Description
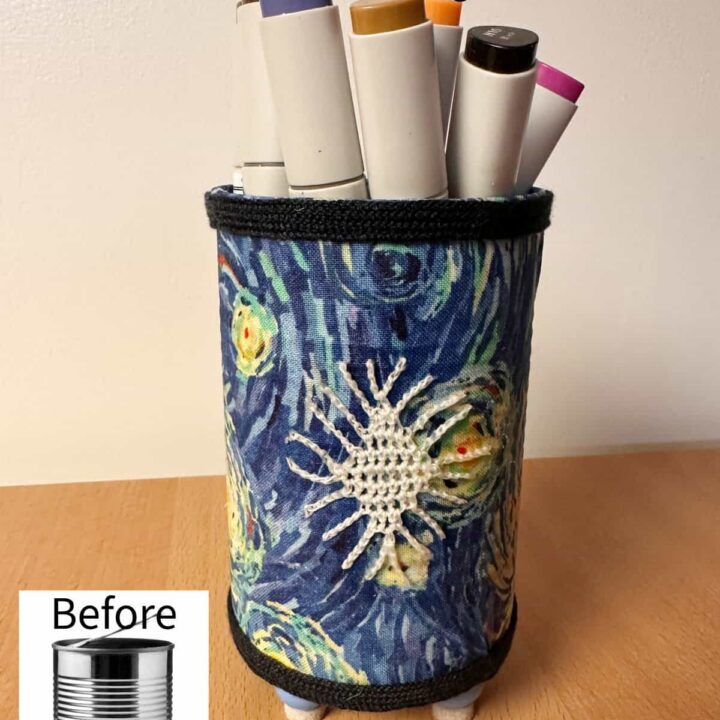
Upcycle clean tin cans into charming desk organizers or decorative vases with this simple, budget-friendly way to clear clutter and add personal flair to your space. Here is how to turn an everyday soup can into a lovely craft container in nine simple steps!
Materials
Empty, clean soup can
Patterned cotton fabric - I used Van Gogh Starry Night fabric I bought some time ago.
Fabric Mod Podge
Satin acrylic paint (light blue)
Foam paintbrush & wooden skewers - pick a size that fits in the hole of the wooden bead
Wooden beads for feet - 1/2 inch in diameter
Fabric shears & scissors (affiliate)
Crochet vintage doily piece
Dark blue or black shoelace ribbon for trim
Hot glue gun (affiliate) and glue stick (affiliate)
Felt surface pads (optional)
Instructions
Before turning your ordinary tin can into a decorative container, start with a thoroughly cleaned, empty soup can. Remove the original paper label (affiliate) and wash out any residue to get a clean slate ready for paint, fabric, and embellishments. If needed, sand down any raised edges from when you opened the can.
Then, slide wooden beads onto a wooden skewer to keep them steady. Use a foam brush to paint each bead with light blue satin acrylic paint. Set aside to dry.
Now, apply two full coats of acrylic paint to the inside of the clean soup can to give it a smooth, finished interior. Let it dry between coats.
Next, measure your fabric around the soup can. Cut the fabric so it extends about 1 inch beyond the top and bottom of the can.
Brush a layer of Fabric Mod Podge (affiliate) over the can's exterior. Smooth the fabric neatly around the container, folding (affiliate) the excess 1-inch fabric over into the top opening and onto the bottom base.
Pick a pattern you like on the vintage crochet. Using sharp scissors (affiliate), carefully trim a small decorative accent motif out of your crochet doily.
Apply a coat of Mod Podge (affiliate) onto the front face of your fabric-wrapped can. Press the crochet piece firmly into place, then coat it with more Mod Podge (affiliate) to seal it down. Separate the string pieces so they are evenly spaced.
Allow the Mod Podge (affiliate) to dry completely. Glue dark ribbon trim around the upper rim and bottom rim of the soup can to create clean, defined edges.
Add the wooden feet to the bottom of the can using a hot glue gun (affiliate). You only need a drop of it to hold these beads in place. Optional: place small felt pads on the bottom of each bead to protect your tabletop surfaces.
- Prep Time: 10 minutes
- Category: DIY, Tin can
- Method: Step-by-Step