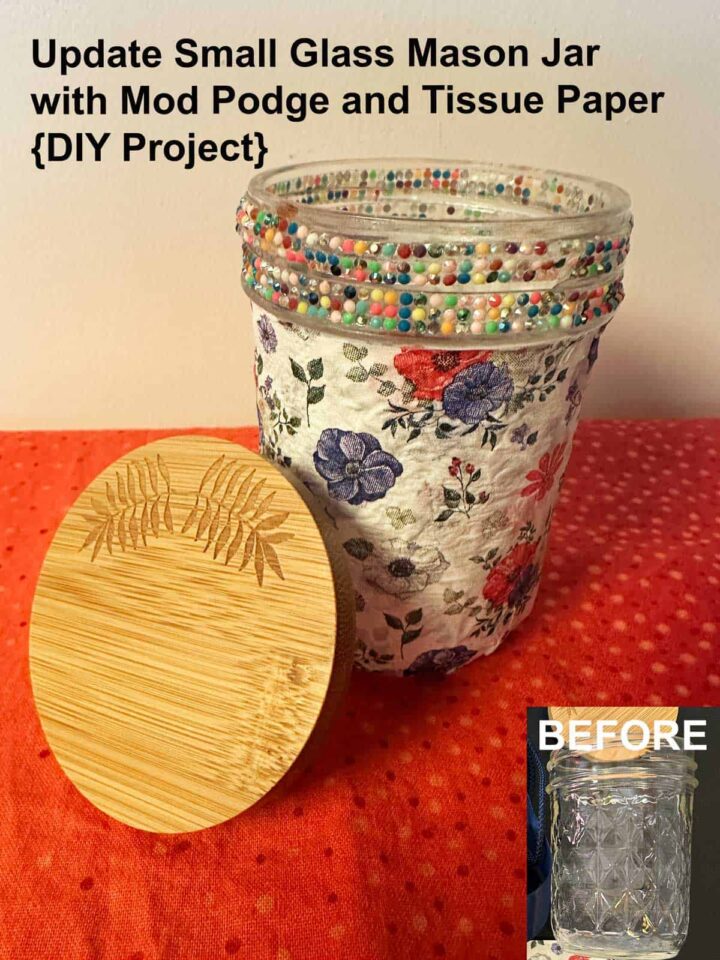
When I was little, I loved DIY craft projects that used decorative tissue paper (affiliate) or decorative napkins (affiliate). Whether it was scraps of decorative tissue paper (affiliate) or making little elevated tissue-paper flowers, all these projects were fun and enjoyable to assemble. I wanted to revisit this type of craft project and update the glass jars with the decorative tissue paper (affiliate)/decorative napkin (affiliate) I have seen on Pinterest over the last several months. Check out how I updated this small glass jar.
Jump to:
- What is the difference between Decorative tissue paper and decorative napkins for crafting?
- What inspired me to do this project?
- What supplies did I use to make this project?
- How much did it cost to make this project?
- How long did it take to make this DIY Project?
- How did I make this Updated Small Glass Jar with Mod Podge and Tissue Paper?
- What to do with this small mason jar?
- The Big Reveal
- Tips on making this project
What is the difference between Decorative tissue paper and decorative napkins for crafting?
Let's first determine the similarities and differences between the two delicate papers. While there are some differences, you can use both of them for any decoupage craft project.
Similarities:
- They can both be easily decoupage onto pretty much anything.
- And, both are very thin and can easily tear.
- They usually have a floral design.
Differences:
- Decorative tissue paper (affiliate) is larger and can be easily cut down. It can work for larger pieces.
- The decorative napkins (affiliate) usually have a unique edge. When folded, the pattern is in the same direction on both sides. So, when you open it, you may need to turn the paper napkin around if you want to continue the pattern. That is what I had to do with these, since I used paper napkins instead of tissue paper.
What inspired me to do this project?
This Updated Small Glass Jar with Mod Podge (affiliate) and Tissue Paper (affiliate) project was inspired by my exploration on Pinterest, where I found several posts showing people updating their antique and old items with designer tissue paper (affiliate).
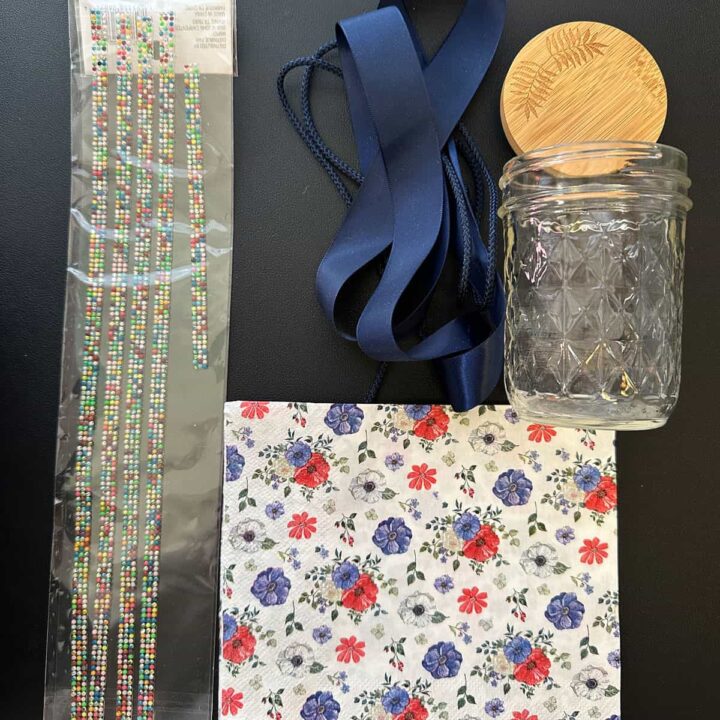
What supplies did I use to make this project?
This project was pretty easy to make, and only a few supplies were needed.
- Decorative Tissue Paper - napkins (craft type - it only has one layer)
- Mod Podge (affiliate) - matte finish
- Disposible sponge brush
- Bling Stickers - Recollections - autocollants strass (6 piece set) from Michael's or bling ribbon strip or make your own strip from Amazon (affiliate)
- Oui Yogurt Jar Lid - wood top
- blue ribbon - optional - I ended up not using it.
Please note these are affiliate links through Amazon (affiliate), and at no additional cost to you, I will earn an affiliate commission if you decide to make a purchase.
How much did it cost to make this project?
The cost of this DIY project was minimal. I had everything in my craft area, including the mason jar (affiliate). So let's say, $2.00 to make it.
How long did it take to make this DIY Project?
It took me about 3 hours, including dry time.
How did I make this Updated Small Glass Jar with Mod Podge and Tissue Paper?
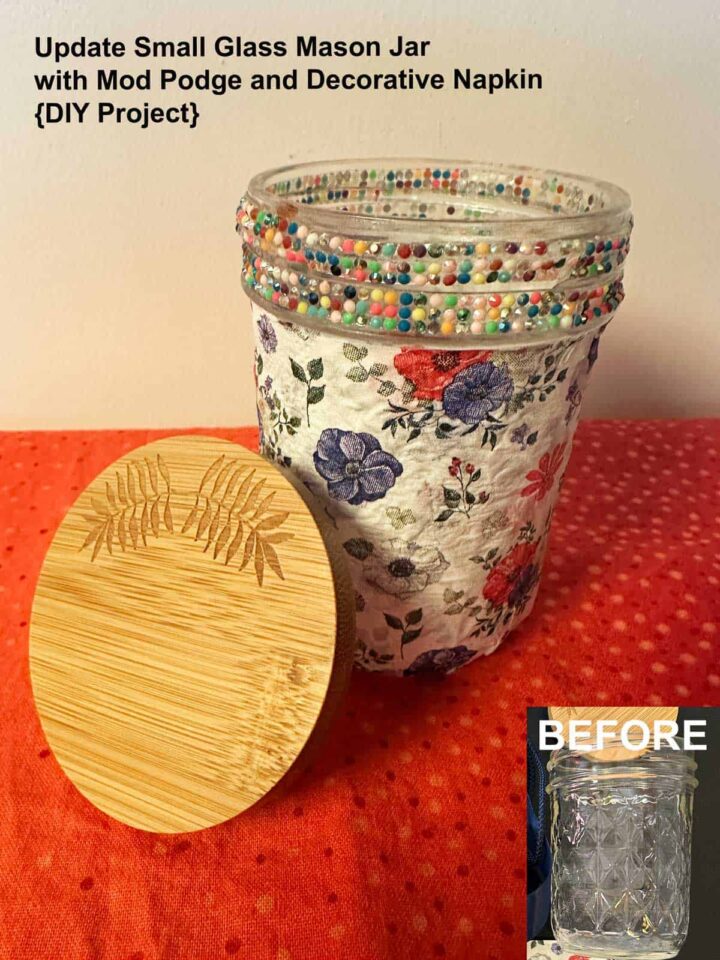
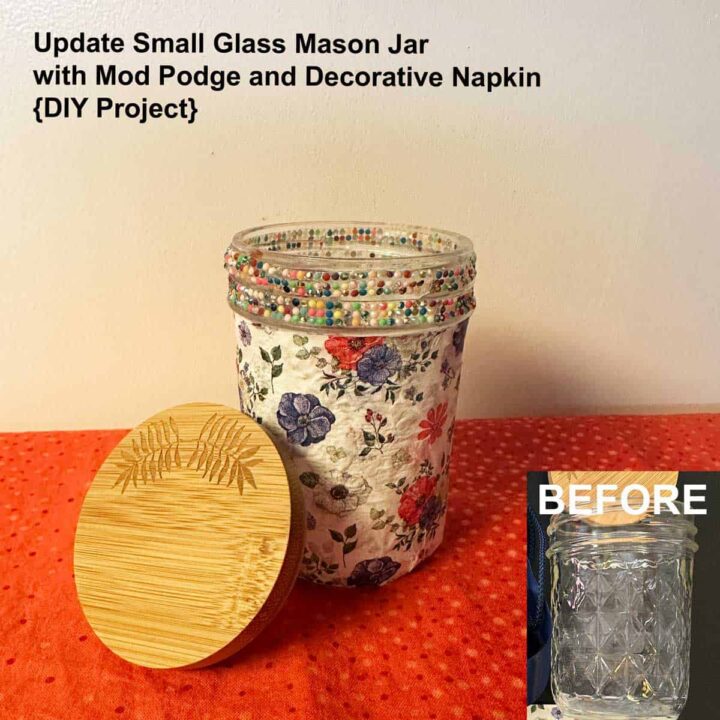
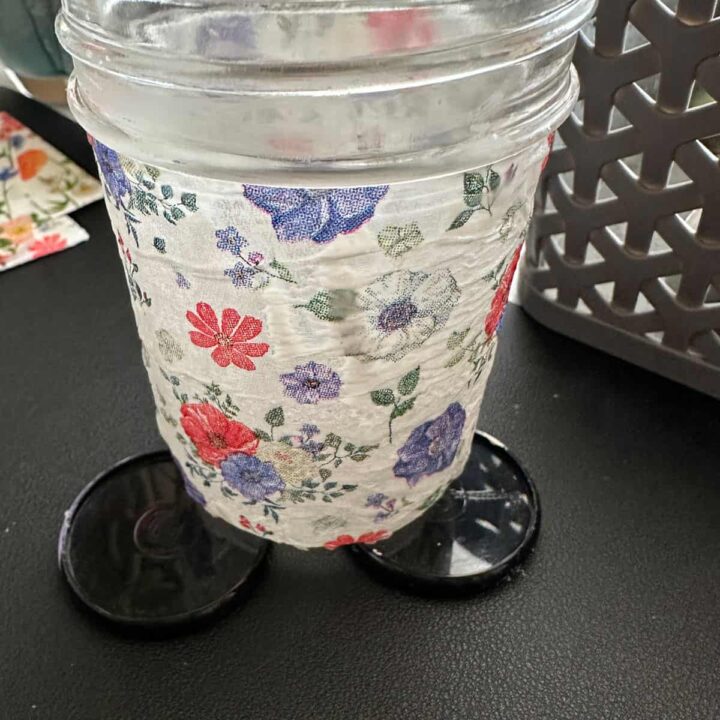
First, measure from the end of the small mason jar (affiliate) to just before the lid rim. For me, it is measuring 3 inches long. Open the decorative napkin (affiliate) and cut it to 3 inches, or as long as needed to wrap around the mason jar (affiliate).

Add a little of the Mod Podge (affiliate) to a disposable bowl. Lay down a paper towel or paper to protect your surface.
As you add a light amount of Mod Podge (affiliate) to the outside surface of the glass, have the decorative napkin (affiliate) ready to add. And apply the Mod Podge (affiliate), then the napkin, going all the way around the small mason jar (affiliate).
Be sure to do the bottom by brushing the Mod Podge (affiliate) on the bottom of the mason jar (affiliate) to flatten the napkin. Elevate the jar on a base so it doesn't stick to your table surface.
Let dry for at least 1 hour. If it looks like you added too much Mod Podge, it will look transparent. You can just reapply another layer of the napkin on top of the dried napkin (I had to do that because I added too much the first time). Live and learn.
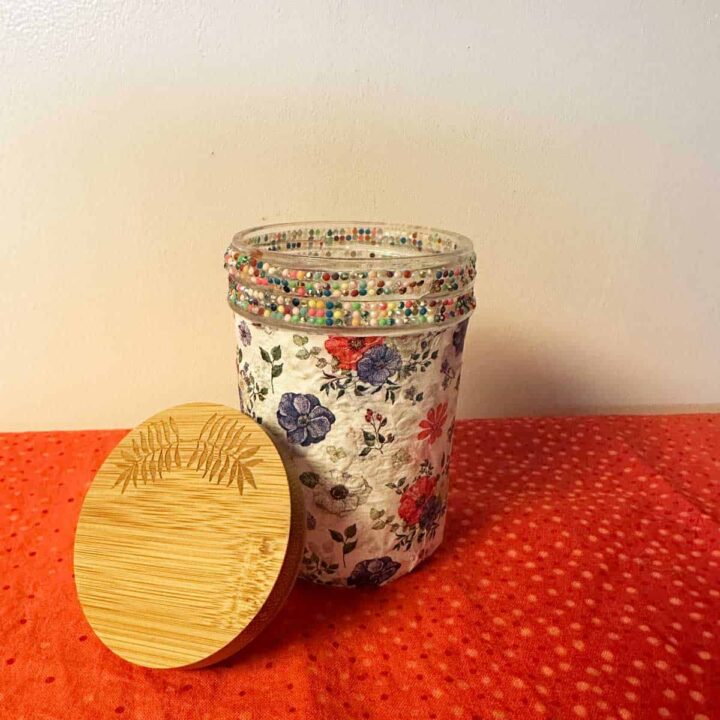
Then, add the bling around the part where the mason jar (affiliate) lid would be. Since I am not using the mason jar lid, I needed to hide the grooves. I ran the bling stickers around the top part a few times to hide the ridges.
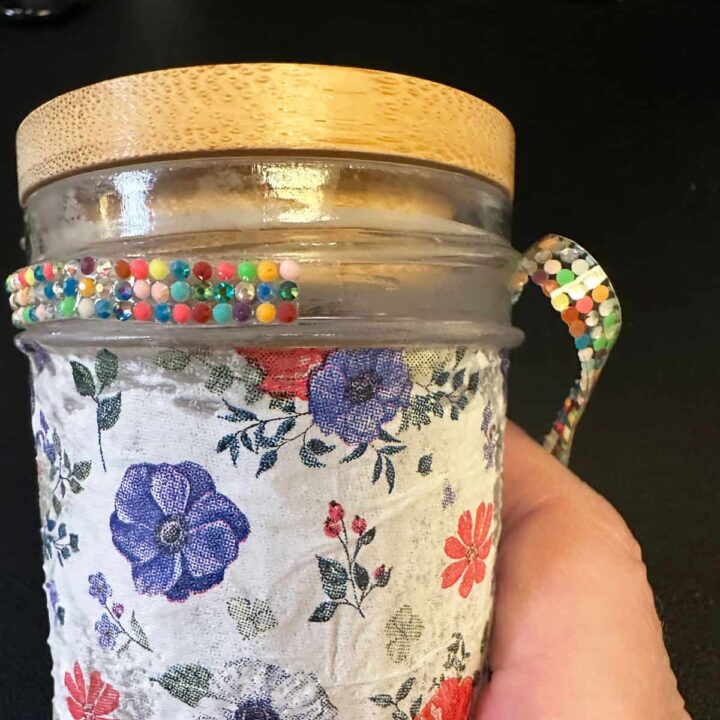
Now, I affixed the Oui lid I had from another project, and that's it.
What to do with this small mason jar?
You can easily use these small mason jars (affiliate) for portable candy (affiliate), since they are food-safe (affiliate). Just be sure not to add any glue to the inside of the jar.
It can also be used to store paper clips, bobby pins, and small erasers, making it a cute addition to a kid's home desk.
The Big Reveal
This update small glass mason jar with Mod Podge and Decorative Tissue Paper (affiliate) looks lovely.
Tips on making this project
Whether you use decorative tissue paper (affiliate) or decorative paper napkins (affiliate), be sure to use very little of the Mod Podge. It will seep through the paper, discoloring it unevenly.
But don't worry, if you do, just add another layer over the saturated dried layer, and it will work well.
I hope this inspires you to try crafting with decorative tissue paper (affiliate)/paper napkins (affiliate). This was my first try. Stay tuned for my other two tries coming soon. I swear I'll get better at it. =) Happy crafting.
DIY Craft Project Ideas
Stop by and check out some of my other DIY craft ideas to help you keep your home more organized.