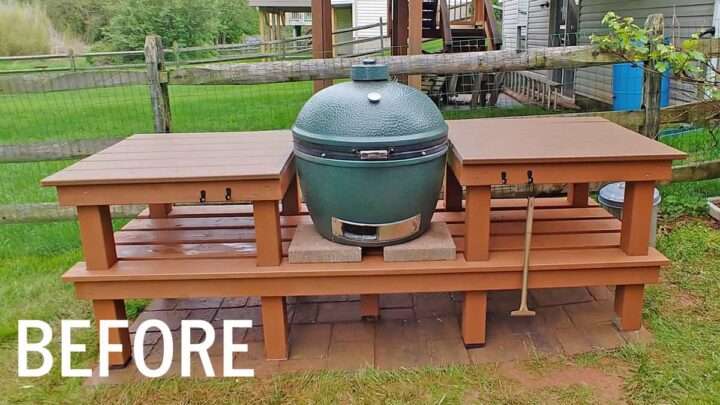
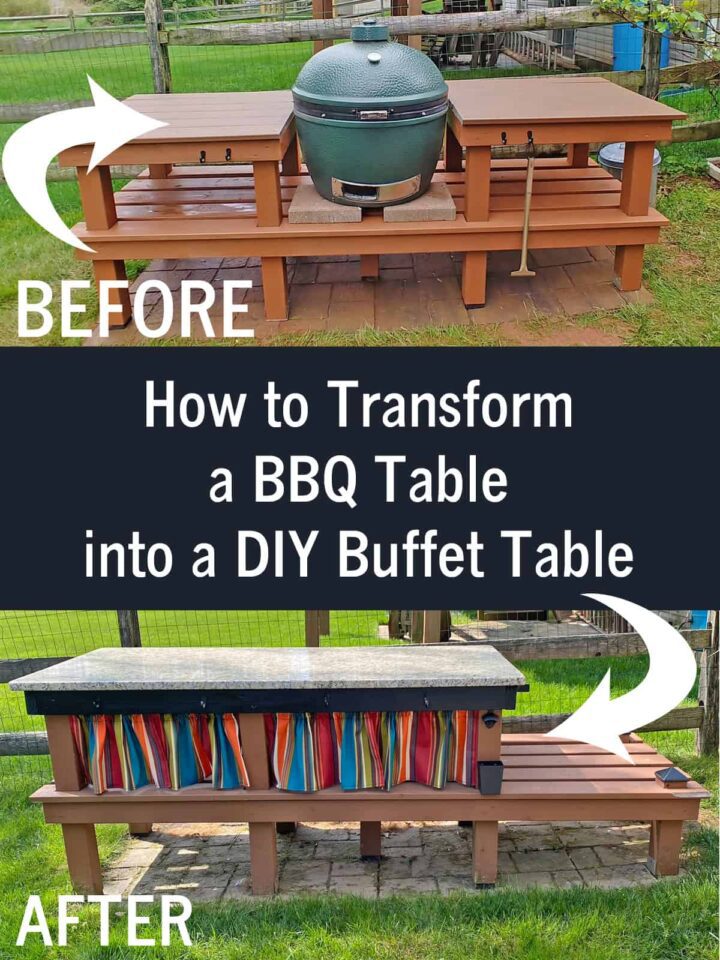
BBQ tables are great to have, especially if you want storage. We made a BBQ table years ago for our extra large Big Green Egg. If you have ever seen this grill, it is huge! It is about 29 inches by 29.5 inches. It was great, but over the years, we stopped using it. So, we sold it. Then, we were left with a BBQ table and didn't know what to do with it. This post will show you how we transformed the BBQ Table into an outside buffet table.
Jump to:
- What inspired me to do this DIY Buffet Table?
- What supplies did I use to make this DIY Buffet Table?
- Before DIY Buffet
- How much did it cost to make this DIY Buffet Table?
- How long did it take to Make This Buffet Table?
- How did I make this DIY Buffet Table?
- How to Make Custom Curtains on the DIY Buffet Table?
- Steps to Make the Custom Outdoor Curtains
- The Big Reveal
- Tips on making this DIY Buffet Table
- Popular DIY repurposed furniture posts:
What inspired me to do this DIY Buffet Table?
I enjoyed the outside permanent tables people would have. Instead of bringing folding tables outside on the grass and getting all muddy, I loved the idea of having a buffet table that could easily be used to hold food and beverages(coolers), so all the party items are in one spot.
I found that since the table could hold the heavy weight of this grill, I could repurpose it to make my very own custom DIY Buffet Table. So, I started planning. Here is what I came up with.
What supplies did I use to make this DIY Buffet Table?
FYI - I purchased and had the Granite people install the countertop because we didn't have the manpower to do it.
***The links below from Amazon (affiliate) are affiliate links, and I will receive a small referral commission if you click through and buy something on Amazon (affiliate) (Happy shopping!)***
Supplies used:
- 3 - 2 x 4 pressure-treated wood
- Granite Slab - low-price granite $1,140.00
- Wood Hand Saw
- 2 - Post Caps
- Construction adhesive
- Sandpaper - super fine
- Black paint - satin finish
- Disposable sponge paintbrushes
- Tack cloth
- TASTOS Premium Stainless Steel bar 9 inches wide
- 4 - Black hooks
- Jumiok - Satin Black Cast Iron Bottle Opener Wall Mounted with Bottle Cap Catcher
Optional supplies - to make the curtains:
- 2 yards of Solarium Covert Outdoor Fabric. I bought clearance fabric at Joann's Fabric. It is U/V fade-resistant, durable, water-resistant, stain resistant, and easy to clean with soap and water.
- sewing machine
- black heavy-duty thread
- fabric scissors (affiliate)
- Zigzag scissors (affiliate)
- Tape measure (affiliate)
- Pins
- 2 - Pressure rods
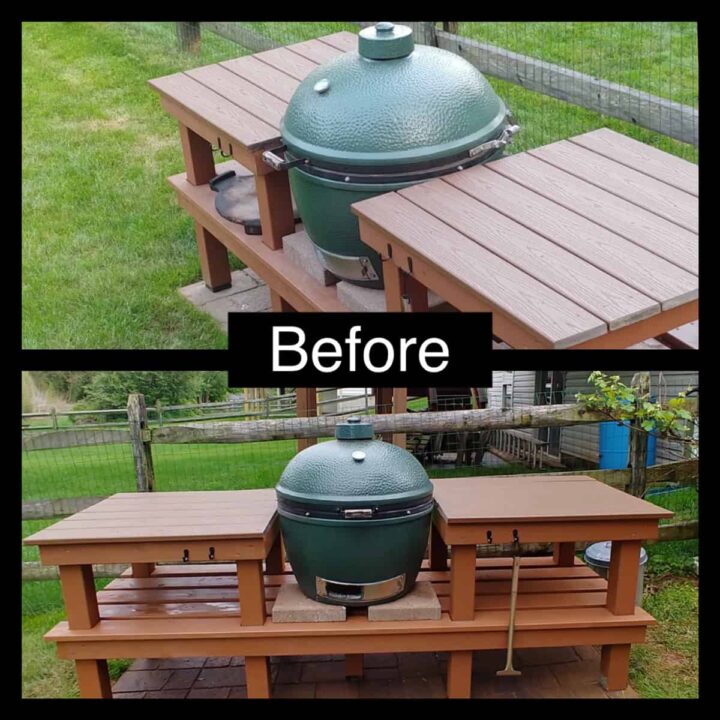
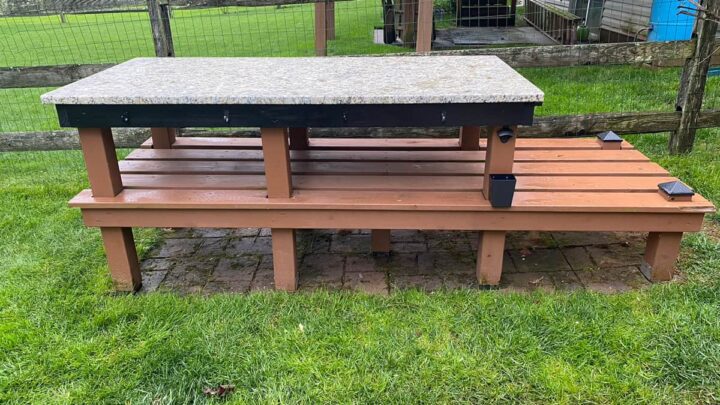
Before DIY Buffet
This photo is what it looked like before we modified the table. As you can see, we even made a stone patio to hold the table and grill.
How much did it cost to make this DIY Buffet Table?
This project cost me about $1200.00 - the cost for the granite was $1140.00. The rest of the cost was the things I needed to reframe the top and the outdoor fabric.
How long did it take to Make This Buffet Table?
To do the actual modifications and make the curtain took about 5 hours. But, it took about 10 days to 2 weeks to get the granite installed.
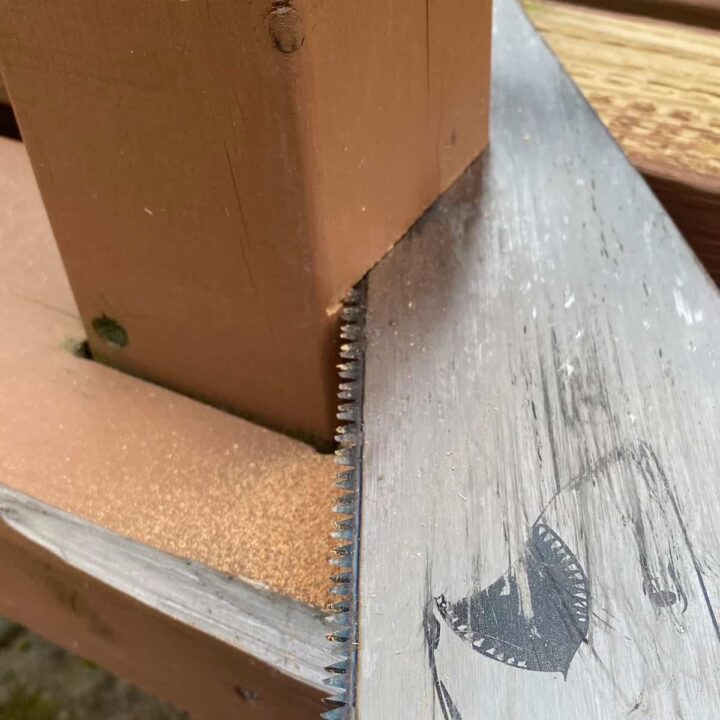
How did I make this DIY Buffet Table?
First, remove the top 2x4s by unscrewing the sides and cross beams. We kept the crossbeams and got rid of the 2x4 sides since they were not the right length we needed.
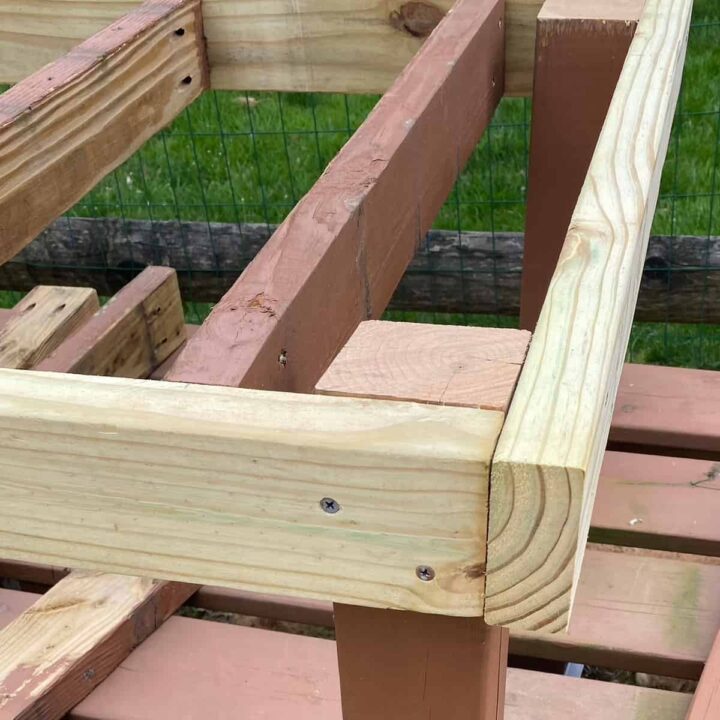
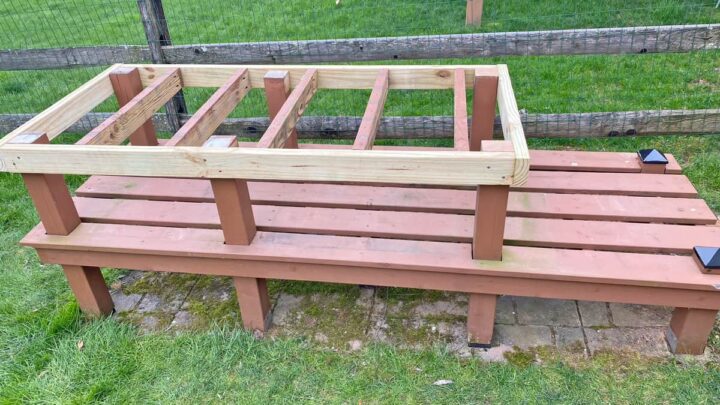
Reframe the top.
Then, we reframed the outside and added the previously used cross beams to the inside about 12 inches apart to help support the new granite top. To make the tabletop, we used the six legs on the left side. Since we had a downhill slope, and when it would rain, water would go downhill, we figured that any water that went down would drop onto the grass instead of the bottom row of pressure-treated wood, which may result in the decaying of the wood over time.
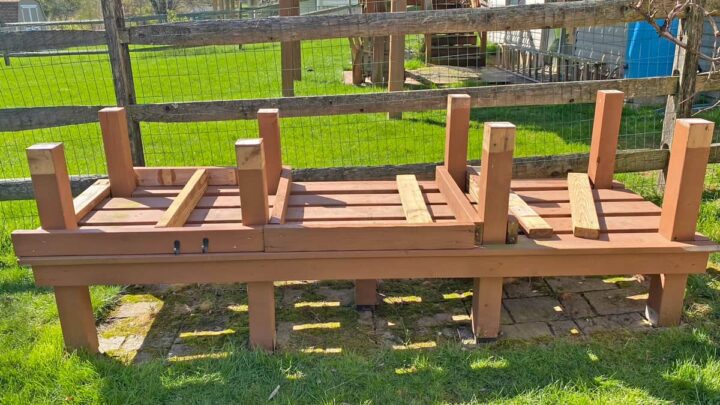
Cut the Extra Legs.
Now, we cut the extra legs down about 2 inches. With construction adhesive, we added the post caps and let them dry.
Here is what it looked like after the reframing was finished.
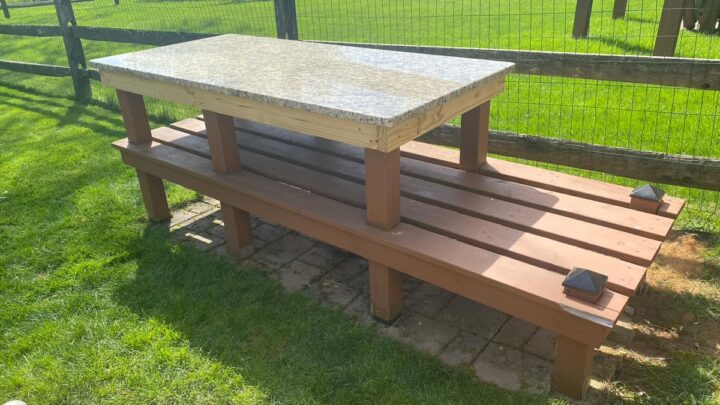
Install the granite.
Next, it was time to get the granite installed, it took about 10 days after we picked out the granite, the measuring person came, and then they installed it. We used Colonial Marble & Granite in King of Prussia, PA.
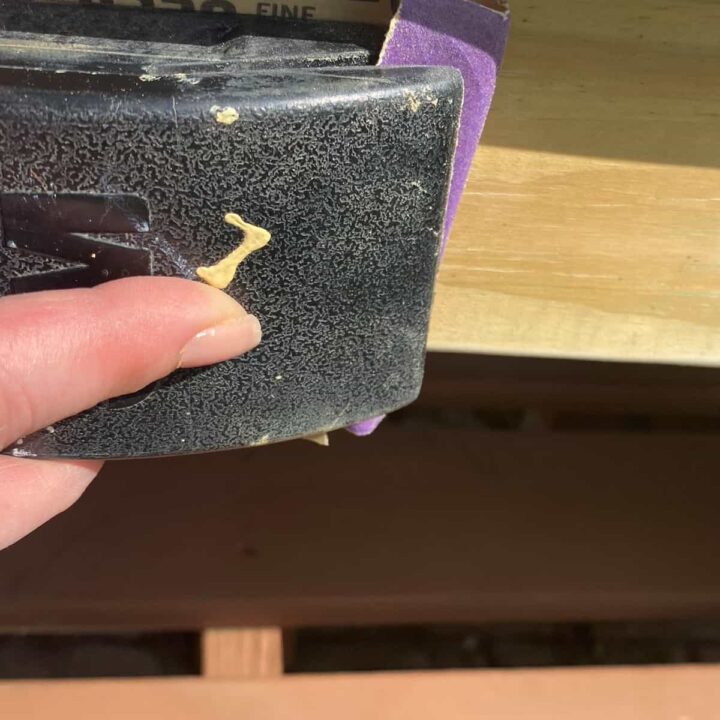
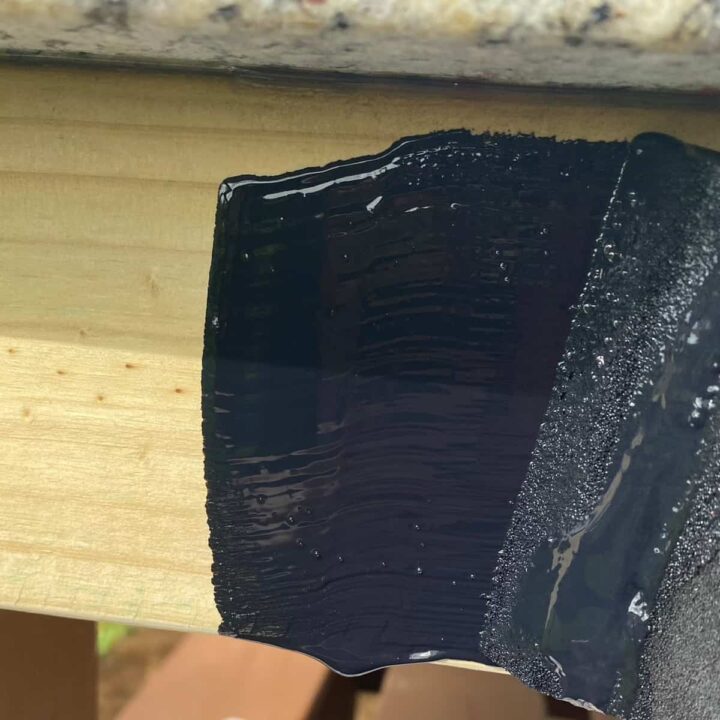
Paint the Pressure-treated wood.
Now, it was time for me to sand and paint the sides. I used superfine sandpaper to roughen up the pressure-treated wood. Then, used a tack cloth (affiliate) to pick up all the dust.
Next, I added black paint with paintbrushes (affiliate). Two coats were necessary.
To ensure I didn't drip, I used rags to cover the second tier while I was painting it.
Then, my husband and I added 4 hooks evenly spaced and added a bottle-opening kit with a small towel bar. The towel bar is on the side.
The left side will be where we store the coolers for the party so they do not need to damage the grass.
How to Make Custom Curtains on the DIY Buffet Table?
This section is optional. The benefits of doing this extra step are: 1. It allowed me to hide extra supplies under the table. 2. And it added a little color to an otherwise bland buffet table.
Below are the steps to make these curtains. As I listed above, you will need outdoor fabric, a sewing machine, black heavy-duty thread, scissors (affiliate), zigzag scissors (affiliate), a tape measure (affiliate), and pins.
Steps to Make the Custom Outdoor Curtains
I like to use Solarium Covert Outdoor Fabric. It is durable and stiff, and I can easily fold it and make a crease without using an iron. Plus, it is extra wide, measuring 54 inches. I was able to make all the curtains with only 2 yards of outdoor fabric.
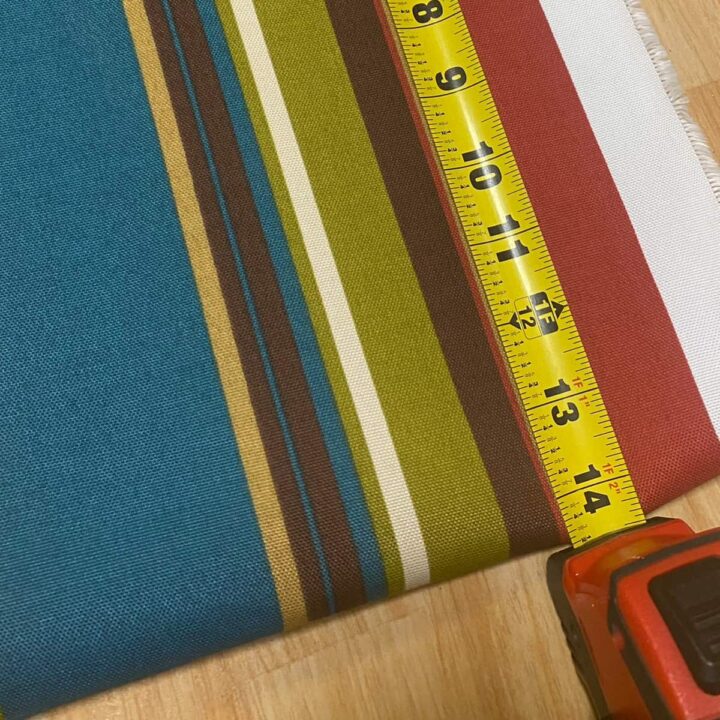
Measure the area to determine the panel's height and width.
First, I folded the fabric so that it measured 14.5 inches high. To figure out how much fabric I needed for each curtain panel, I added up the following:
- 11 ½ inches that measure the opening from the bottom of the pressure-treated wood to the bottom shelf.
- 2 ½ inches for the rod.
- ½ inch for the bottom fold.

The lengths of each of the openings were 23 ½ inches and 30 ⅜ inches, respectively. Since I was making two panels for each opening, they both fit in this area with excess for gathering.
Cut the fabric to 14.5 inches and cut the fabric in half.
Then, cut the fabric height to 14.5 inches.
Then, fold the fabric in half. It should measure 27 inches. Cut the fabric to create two panels.
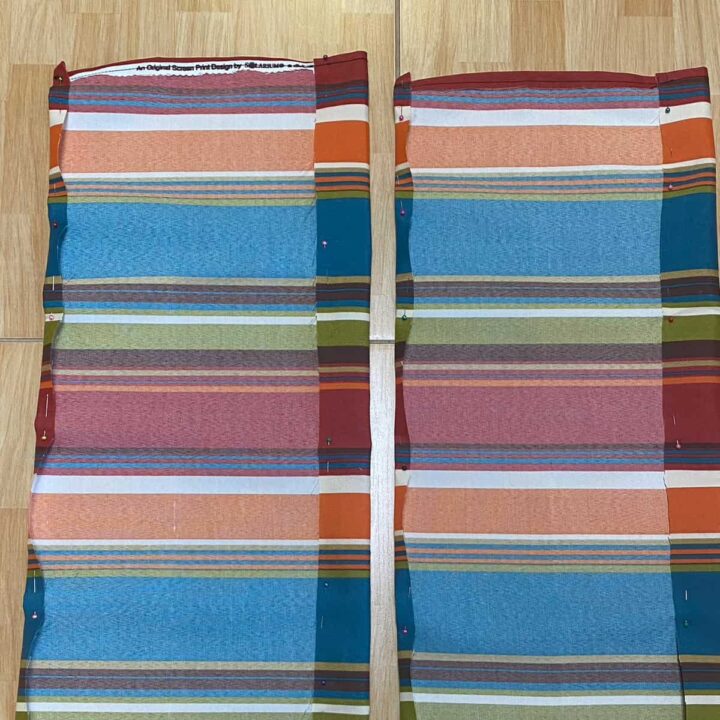
Fold in the sides of each panel about ½ inch and pin down. Crease as you go to see where you need to sew. Sew the sides and remove any excess string.
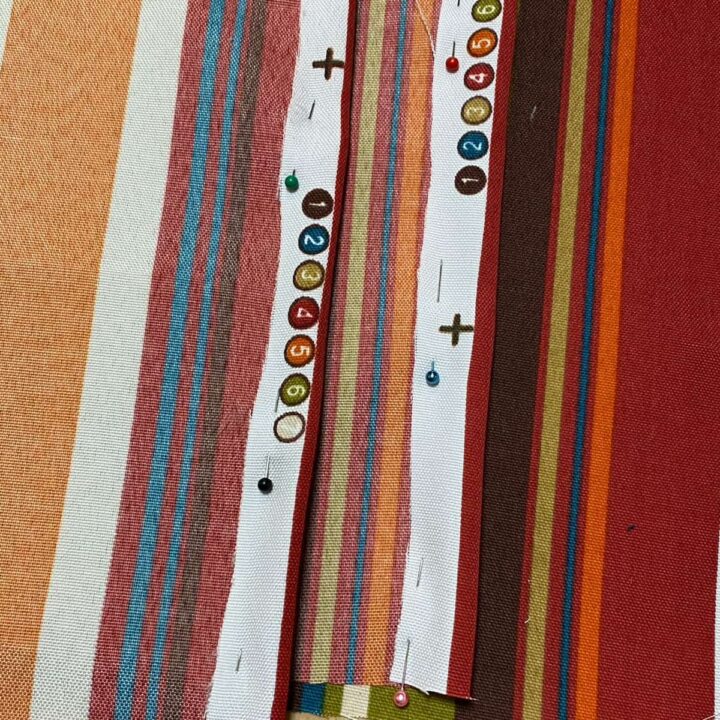
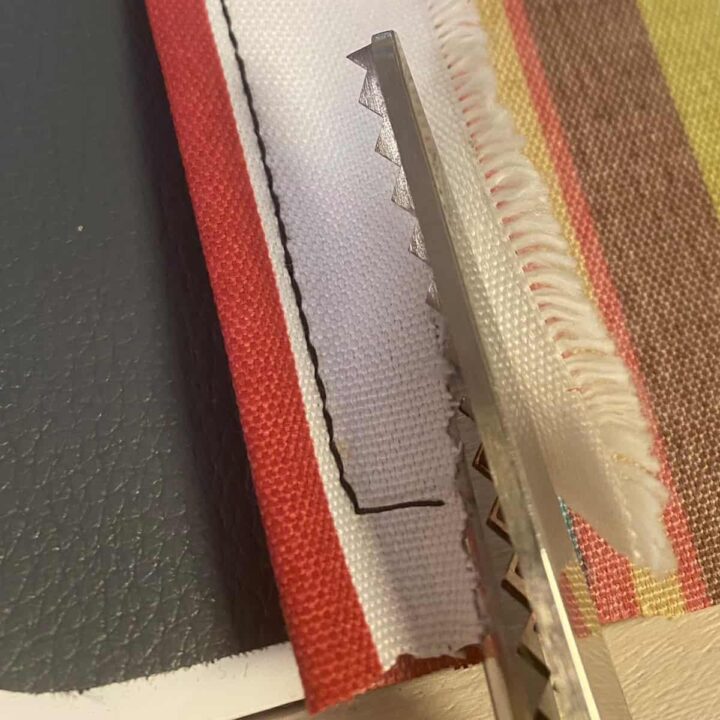
Cut any excess fabric on the back side with zigzag scissors (affiliate).
Fold the top and bottom.
Then, fold the top about 2 ½ inches for the pressure rod and pin where you want to sew (about ½ inch from the bottom). And, then fold the bottom ½ inch and pin. Take the tape measure (affiliate) and make sure that the length equals 11 ½ inches long. See the image below. Then sew the fabric while removing the pins. Remove any excess thread.
Now, repeat these steps for the other panels.
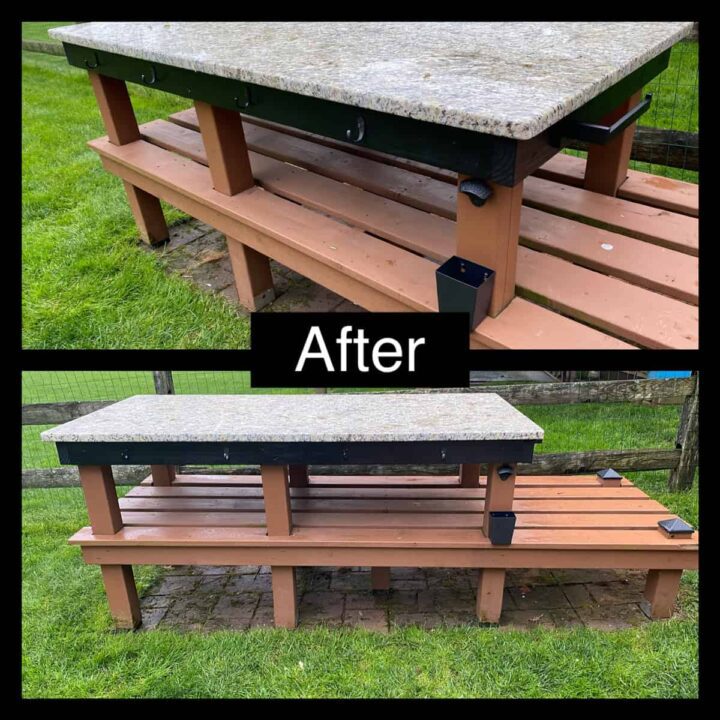
The Big Reveal
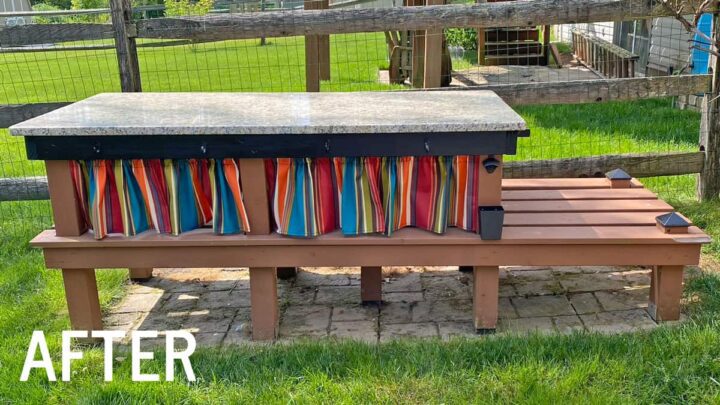
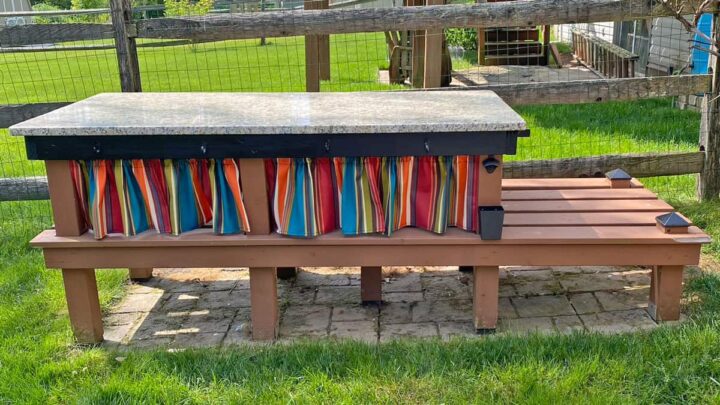
This DIY Buffet Table looks lovely. This image is with the curtains. I love the pop of color!
I used a pressure rod that fit inside each section and mounted the finished curtains. Here is the photo of the buffet table. I'm so excited to use it soon.
Also, we found a 4-foot deep tent that we will be installing above it when we have our next BBQ.
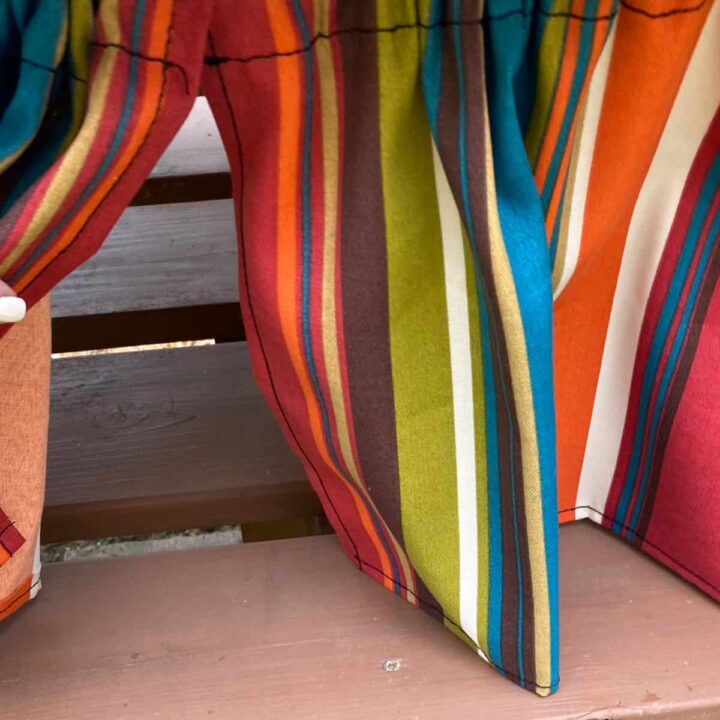
Here is an up-close image of the table curtains I made. They turned out pretty great. I do recommend taking them in for the winter months if you are in a snowy or very cold area like we are.
Tips on making this DIY Buffet Table
Some tips I would suggest if you want to make this buffet table are:
- Use pressure-treated wood when reframing. It will hold up better and can handle the rainy season.
- To make it more secure for the granite, we attached the cross beams at 12 inches on center to help distribute the weight of the granite slab.
- Reuse as much wood as possible. We didn't want to buy too much new wood, so we reused the already stained pressure-treated wood on the cross beams.
- Keep measuring to make sure you have pinned the fabric correctly. Lock the tape measure (affiliate) at the right length and move it down the fabric as you pin it to ensure you use the right measurement.
Here is my before and after transformation video. Feel free to share.
Well, that's it! What do you think? I am so happy with the results. I hope this post gets you inspired to update and repurpose your gently loved furniture (affiliate) pieces. Please comment below with any questions you may have. I would love to hear from you!
Popular DIY repurposed furniture posts:
I love updating furniture (affiliate), here is my collection of furniture (affiliate) I updated over the last several years. Enjoy, and please visit and share.

Leave a Reply