My office is a part of my small family room. I have a treadmill desk that has a clamped arm for my laptop. With all the cables and other obstructions, I found it distracting when I was off work and in the family room area. To keep my work life out of my mind, I wanted to create a divider. I searched online for dividers, but found several that wouldn't work with a drop ceiling and were too narrow to block my desk. Here's how I created my DIY fabric room divider.
Jump to:
- Supplies needed to make this DIY fabric divider curtain:
- How to make this hanging DIY fabric divider curtain:
- Wash and dry the fabric and then iron it.
- Cut the fabric to the desired length.
- Cut the fabric to the desired width.
- Measure the fabric's length and width,
- Follow the instructions on the firming fabric.
- Fold the fabric ½ inch, fold again ½ inch, and pin.
- Sew the four sides, removing the pins as you go.
- Other notes about this project:
Supplies needed to make this DIY fabric divider curtain:
Your Favorite fabric (furniture (affiliate) type) 42 inches wide, 6 feet long, or 1.8 yards
Iron on firming fabric to firm up the back of the fabric
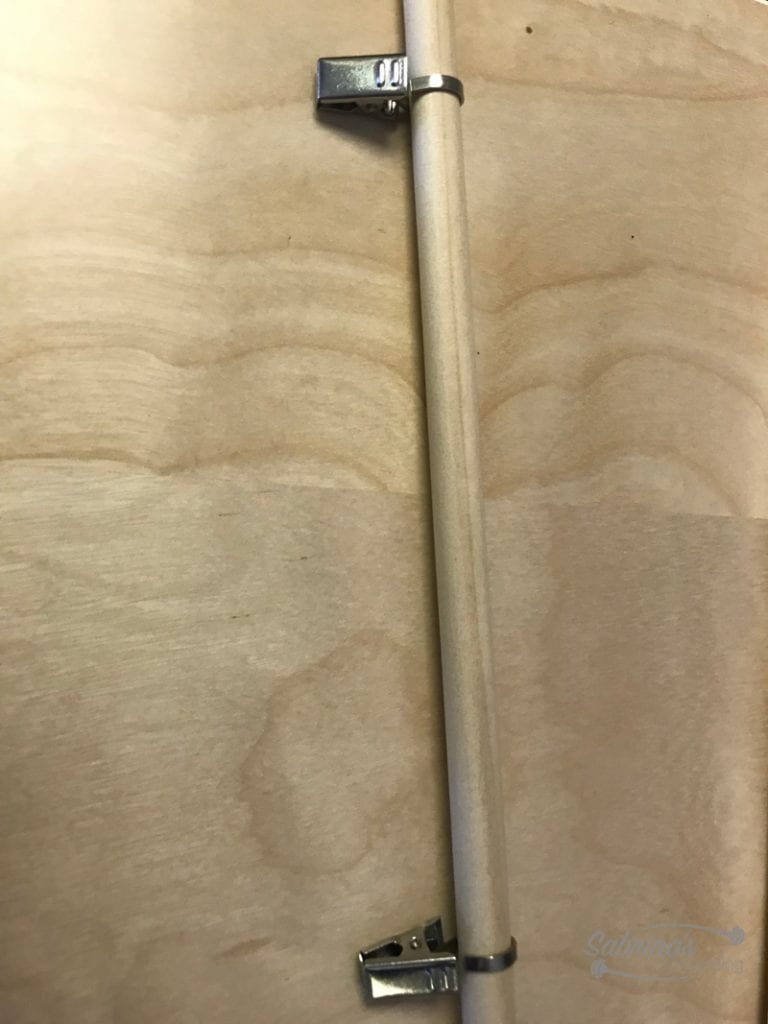
One dowel 32 inches long, the same size as the loop on the clip
5 IKEA clips with circles at the end
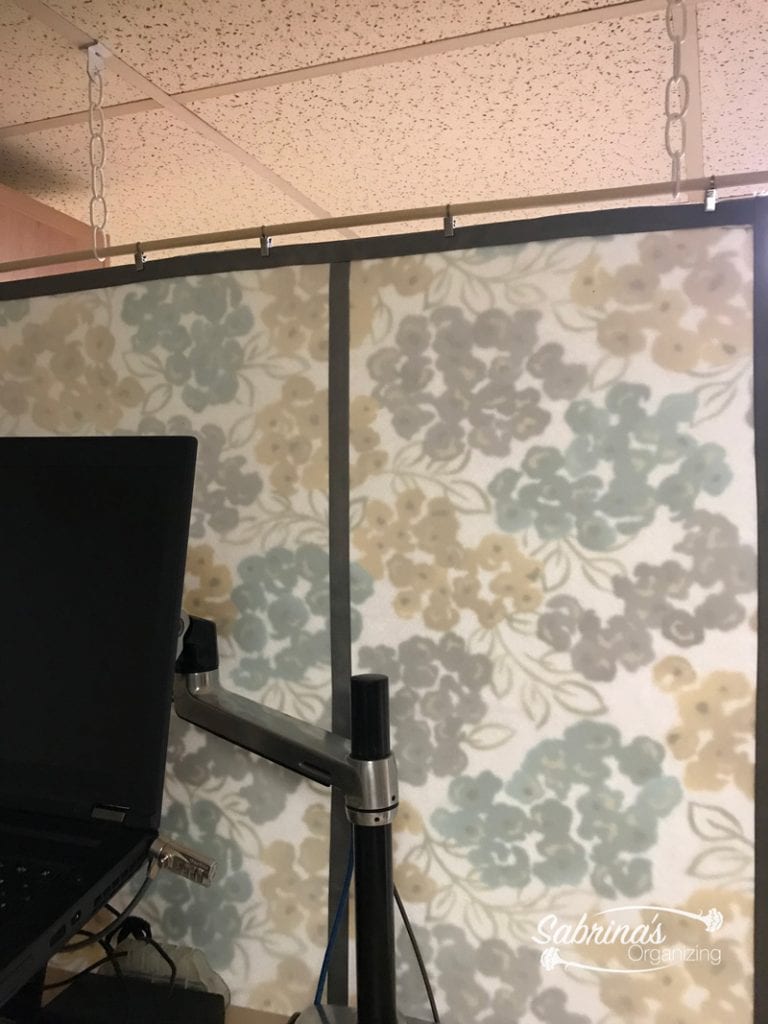
2 - 6 link metal chains in white
Ribbon on the back of the edges and clear hot glue
Supplies needed:
Extra-strength sewing machine needles
Heavy Duty (affiliate) white thread
Sewing machine or handheld sewing machine.
How to make this hanging DIY fabric divider curtain:
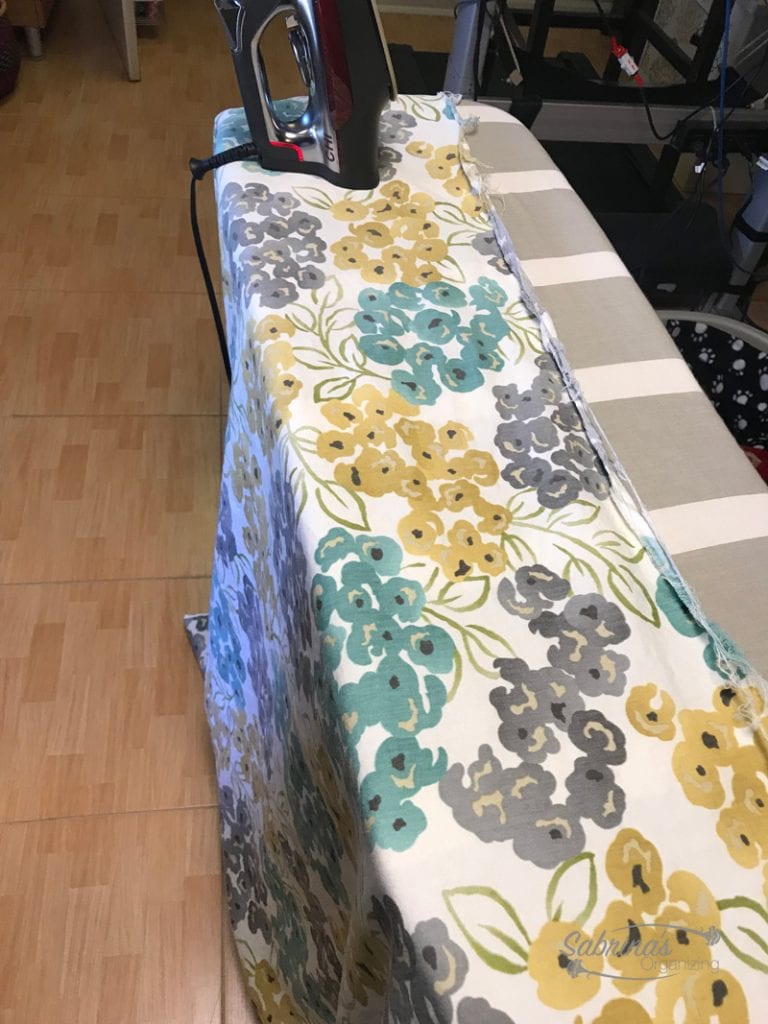
Wash and dry the fabric and then iron it.
Determine the desired length and width, then add an inch on each side. This will allow you to fold all sides twice (½ inch twice) on all sides.
Cut the fabric to the desired length.
Line the T part of the T-square and lay across the fabric using the rolling cutter cut along the T-square across the fabric. Be sure the blade is new on the cutter. This should create a straight edge.
Cut the fabric to the desired width.
Using the T-square and the rolling cutter, do the same thing as above by starting with the straight-end top. If your fabric is going to be as long as mine, you can measure the width mark with a marker two or three points down the entire length of the fabric, so you have a place the straight edge to create a straight line and then cut the fabric with the rolling cutter.
Measure the fabric's length and width,
Then subtract one-half inch on all four sides. Then, cut the iron on the firming fabric to fit the back of the fabric.
Follow the instructions on the firming fabric.
Use pins to hold in place before ironing. Line up the firming fabric next to each other if you are making it extra wide. Iron, then remove the pins.
Fold the fabric ½ inch, fold again ½ inch, and pin.
The 2nd fold should lay over the top of the firming fabric. Do this all the way around the fabric.
Sew the four sides, removing the pins as you go.
If you make the divider wide, you may need help when sewing. Cut off the remaining thread.
Clip the Ikea clips to the top of the completed fabric. Run the dowel through the loop.
Run the dowel through the white chain to hang. I used drop ceiling hooks to attach the chains. You can use something else if you don't have a drop ceiling.
I also added ribbon to the back of the fabrics around the edges and between the firming pieces on the back side for a cleaner look.
Other notes about this project:
I found since I made the room divider wider, it was difficult to sew on the sewing machine without someone else holding up the side and guiding the fabric with me. If you have a quilting table, you may be able to make a straighter line than I did.
Well, there you have it! I hope this DIY Fabric Room Divider project inspires you to separate your work life from your personal life. This is the final product. What do you think? Feel free to share.