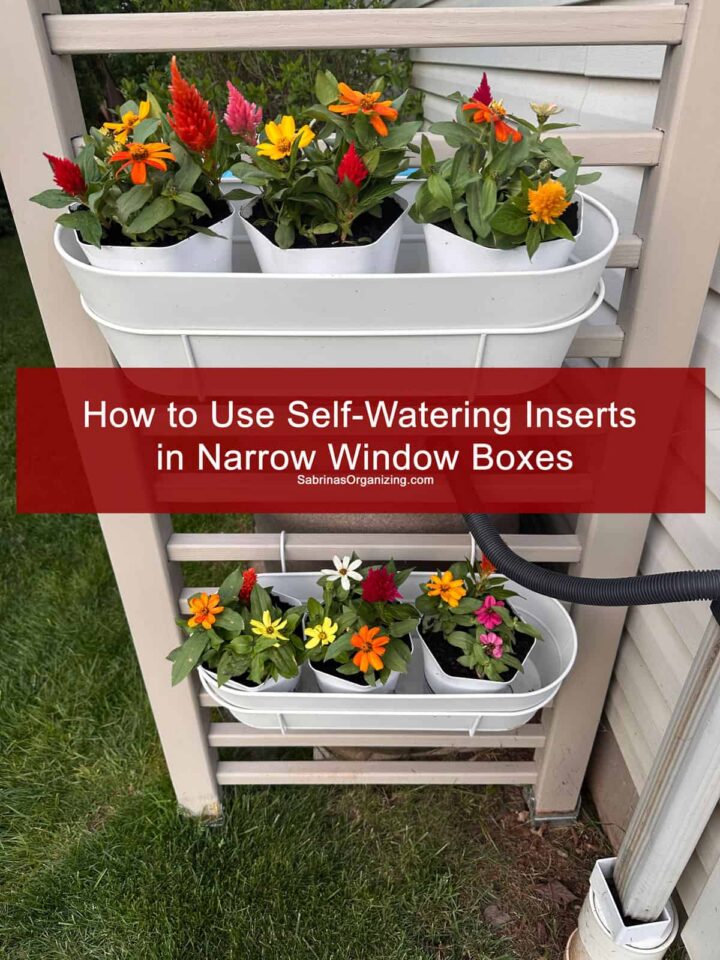
Self-watering pots have come a long way since I started looking at them years ago. Narrow window boxes are beautiful, but their slim profile often means the soil dries out quickly. They are especially helpful for outdoor plants, so you do not need to water them every day. But finding the right size and not spending a fortune was my biggest concern when looking for these pots. So, today I am going to share what I found and how I put these self-watering pots in my window boxes. Using individual self-watering pots allows you to manage moisture more effectively while giving you the freedom to rearrange your plants whenever you like.
This project is perfect for anyone looking to add a splash of color to narrow window boxes (affiliate) without constantly worrying about plants drying out. By using modular self-watering inserts, you create a flexible, low-maintenance display that can be easily refreshed throughout the seasons.
Jump to:
Key Takeaways
- This DIY self-watering window box uses modular pots to maintain moisture, preventing plants from drying out.
- The project costs about $70 and takes about 1 hour to set up and arrange the pots.
- Use healthy annuals like Zinnias and Celosia for vibrant color and height in your self-watering pots.
- Monitor the water reservoir regularly, and fertilize monthly for healthy growth.
- This flexible system allows for easy rearrangement and low maintenance throughout the seasons.
Things to know before trying this project
Below are things you should know about this project.
What inspired me to do this Self-Watering Inserts in Narrow Window Boxes?
I have been searching for self-watering pots for my narrow window boxes (affiliate) for a while now. I didn't want to change out my window boxes (affiliate) because I loved them. So, to find the right self-watering posts, I had to get a little creative. Here's how I did it.
What supplies did I use to make this self-watering pots DIY project?
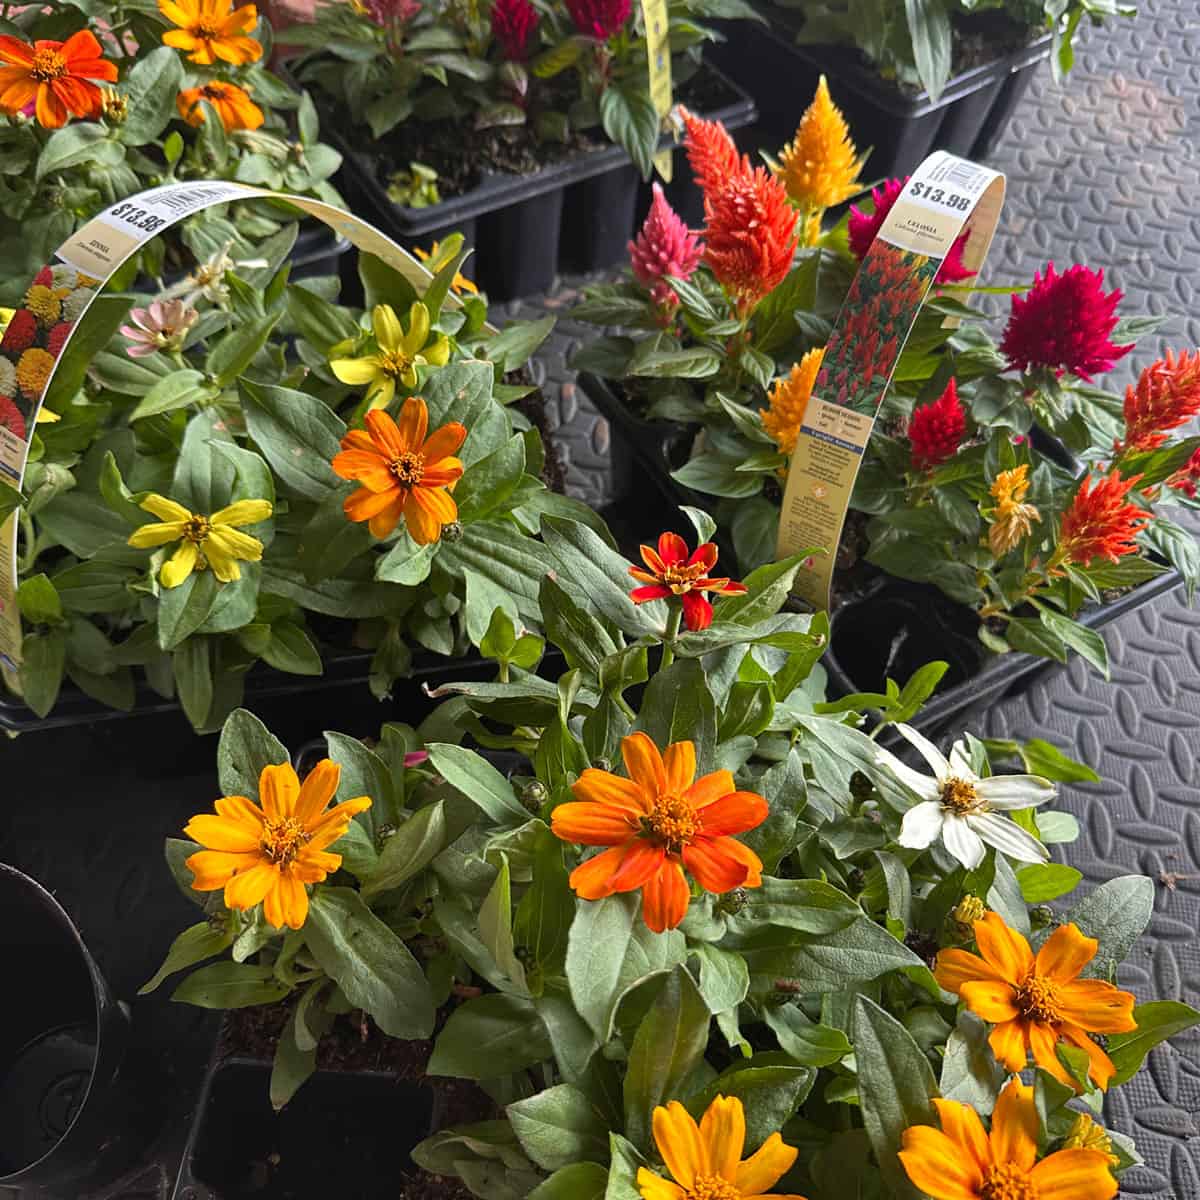
Flowers: Zinnias and Celosia (or your favorite sun-loving annuals) - I picked them up at Lowe's
10 Self-Watering Pots: White hexagonal pots with clear bottom reservoirs. (Amazon (affiliate))
Potting Mix: A high-quality mix designed for containers, outdoor (Amazon (affiliate))
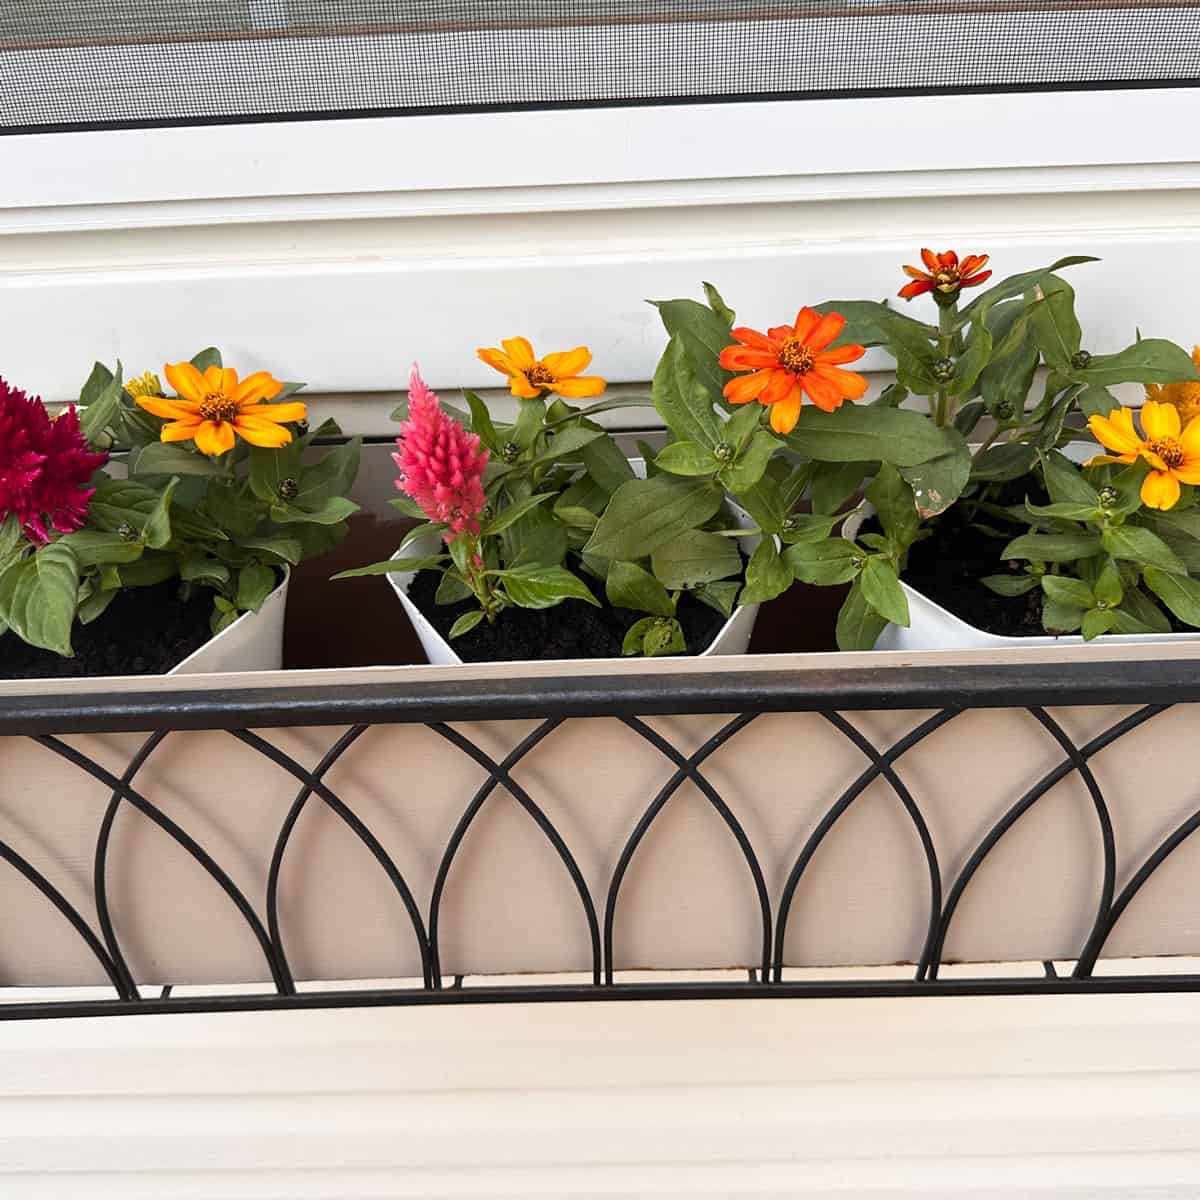
3 Narrow Window Boxes (Amazon (affiliate)): Metal or wooden narrow-profile boxes (affiliate).
A hand shovel (Amazon (affiliate)) or a plastic cup to scoop up dirt and place it in the pots.
Optional: Gardening Gloves (Amazon (affiliate))
Please note these are affiliate links through Amazon (affiliate), and at no additional cost to you, I will earn an affiliate commission if you decide to make a purchase.
How much did it cost to make this self-watering window box?
It cost me about $30.00 for the pots and an additional $40.00 for the annual flowers. A total of $70.00 for 10 self-watering pots with annuals.
How long did it take to make these DIY self-watering pots in a window box?
This project took me about 1 hour to set up and implement.
Tips on making this Self-watering window box DIY
The beauty of this self-watering system is that it isn't limited to window boxes (affiliate). These modular pots can be used throughout your home to create a cohesive look. You can use them in a variety of places inside and out.
Set up all the pots first. Then go and line up the nearby plants and soil, like an assembly line. I did it in my garage (affiliate), where I could sweep out any dirt that may have fallen outside the pots.
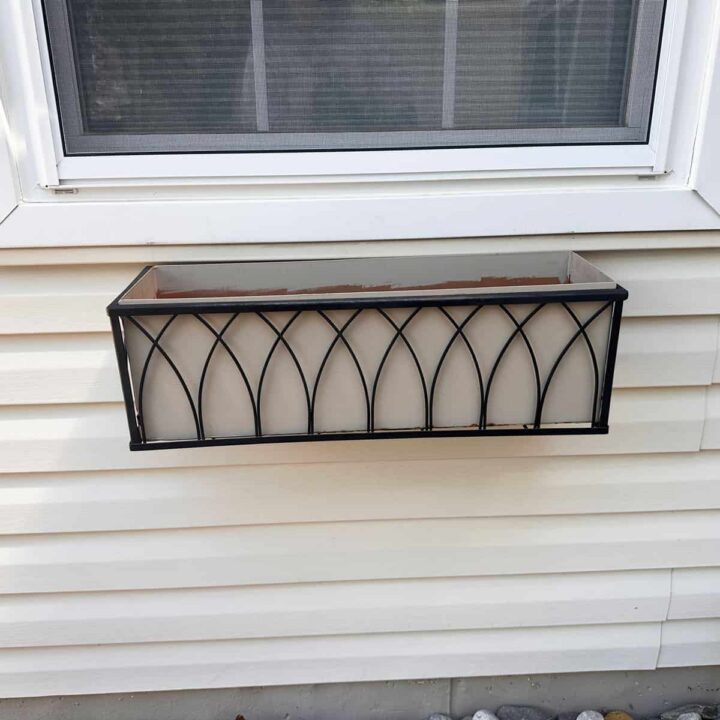
BEFORE IMAGES:
Below are the before images of what the narrow window boxes (affiliate) looked like.
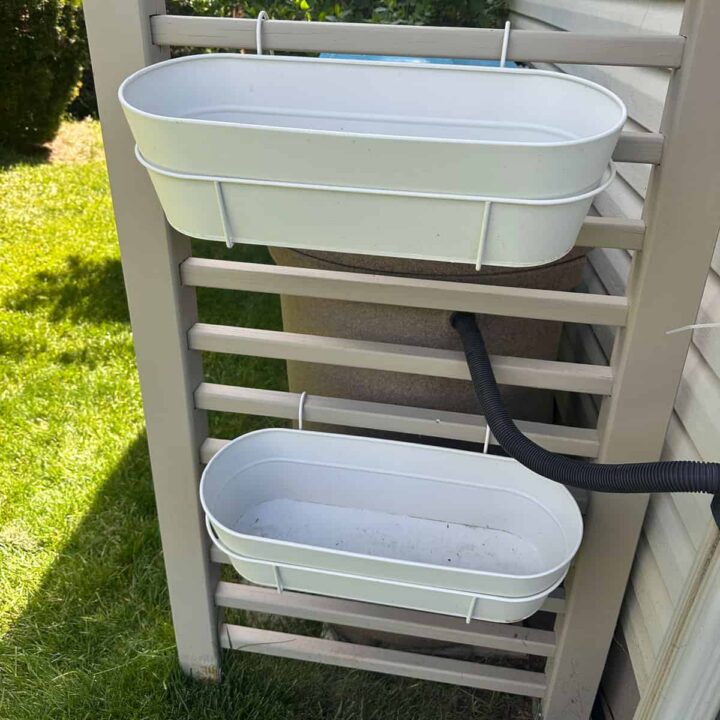
BEFORE Window Box: This is what the before window box looked like. I painted the copper insert a tan that matches our porch floor.
Before window boxes: This is the window box that we hooked to a painted wood railing system, which we turned on its side and painted to disguise the trash cans (affiliate) and rain barrel. These hooked window boxes are from Ikea.
Steps
Below are the step-by-step instructions to make this cute Self-watering window box DIY. Feel free to check them out.
Time needed: 1 hour
How did I make this Self-watering window box DIY?
- Prep Your Plants
First, start with healthy nursery plants. Zinnias and Celosia are excellent choices because they offer height and vibrant color. But any annual will do. I was able to separate my plants and add individual flowers to each pot.

- Buy the right pots and then assemble the self-watering pots
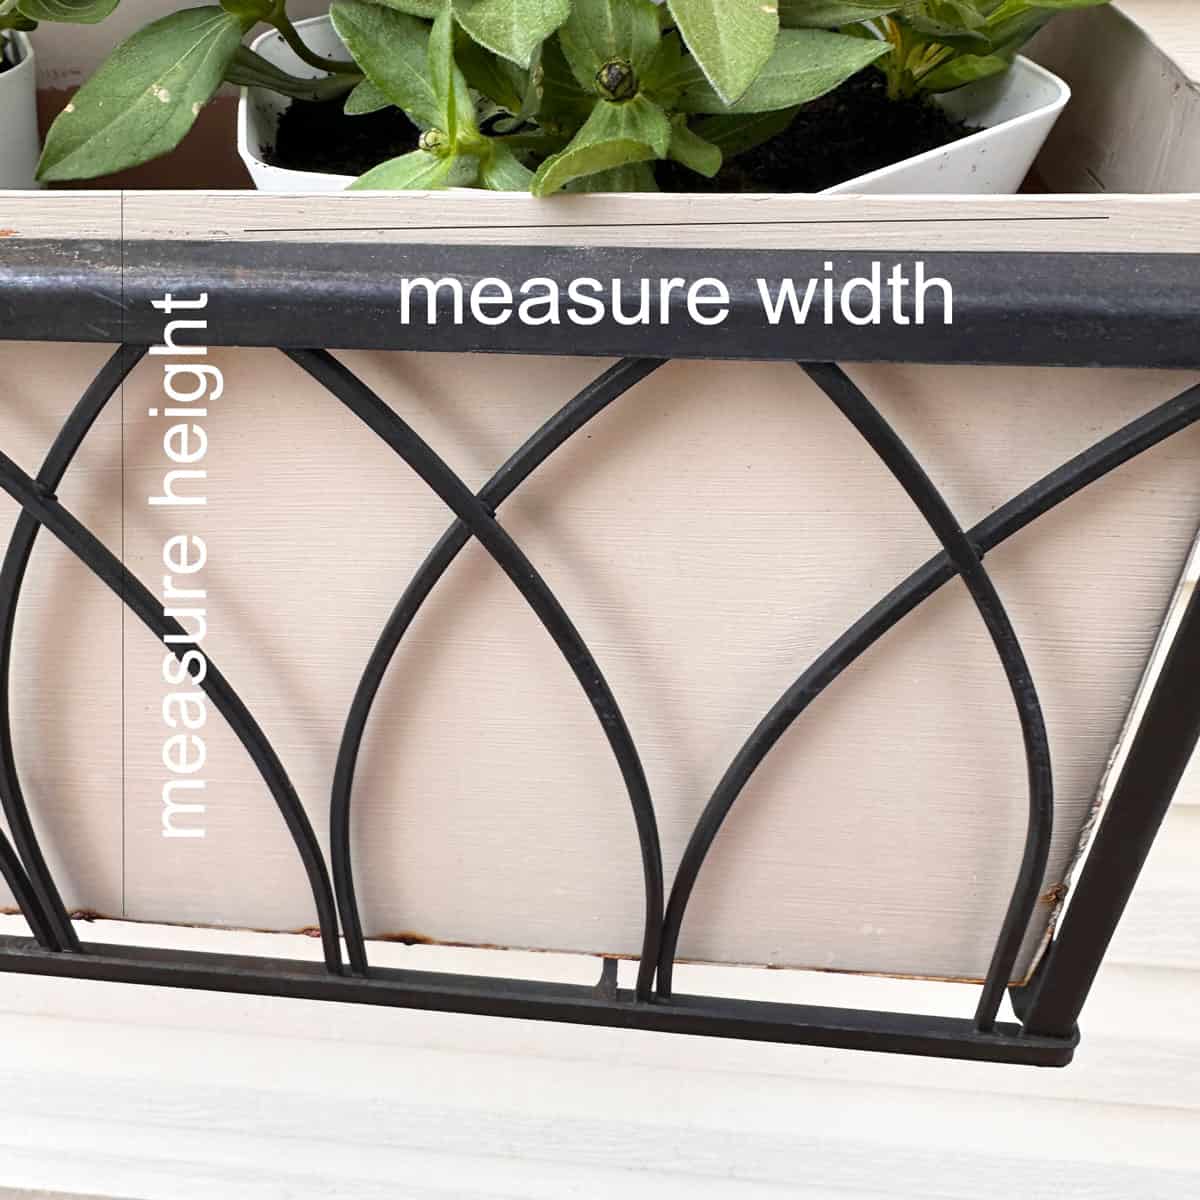
First, I measured the window box from front to back, then from the bottom of the inside to the top edge. I wanted the self-watering pots to sit flush with my window boxes since one of them was pretty deep. I purchased a medium, 5.9-inch-wide and 7.1-inch-high, in a 10-pack.
Then I started assembling the pots by threading the rope through the holes to hang them inside the water basin. Then I attached the top part (where the dirt and plant would be) to the bottom basin.
Hexagonal pots are ideal for narrow spaces because they can be nested together or lined up neatly. This size helped me determine how large (affiliate) the pot is and how many plants to add to it. - Potting Your Flowers
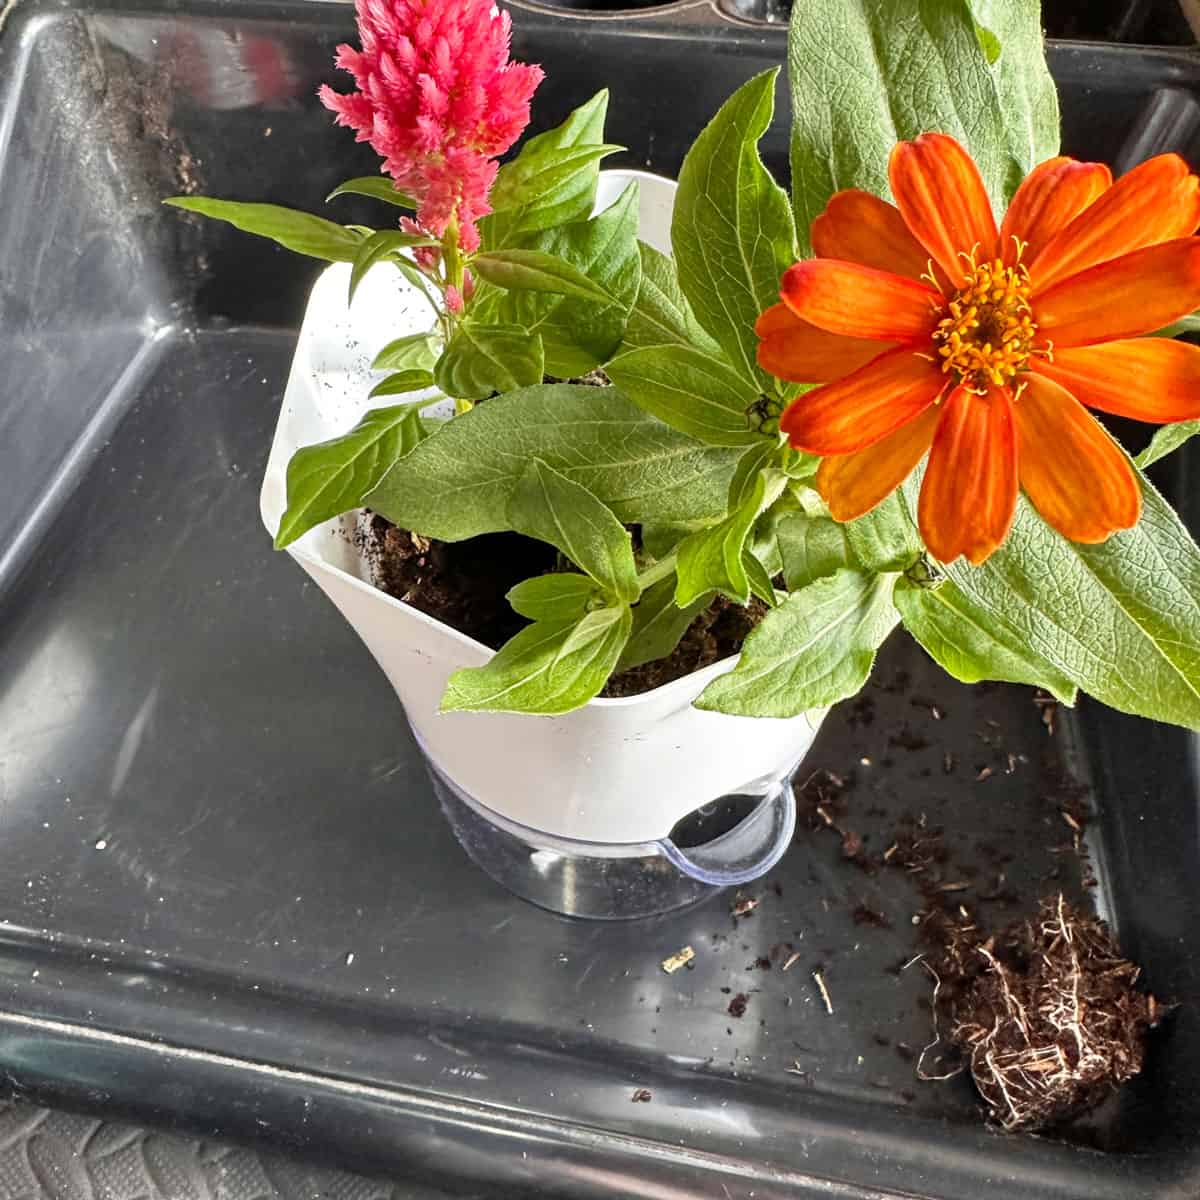
Now, fill the pots with a bit of potting soil, then gently transplant your flowers. For a full look, you can combine a taller "thriller" like Celosia with a "filler" like Zinnias in a single pot, or keep them separate for a more modular approach. I added 3-4 plants in each pot. You can add more to make it even fuller.
Note the soil was already moist, so I chose not to water them again and opted for the water basin and rope to help water the plant. - Fill the Reservoirs with water
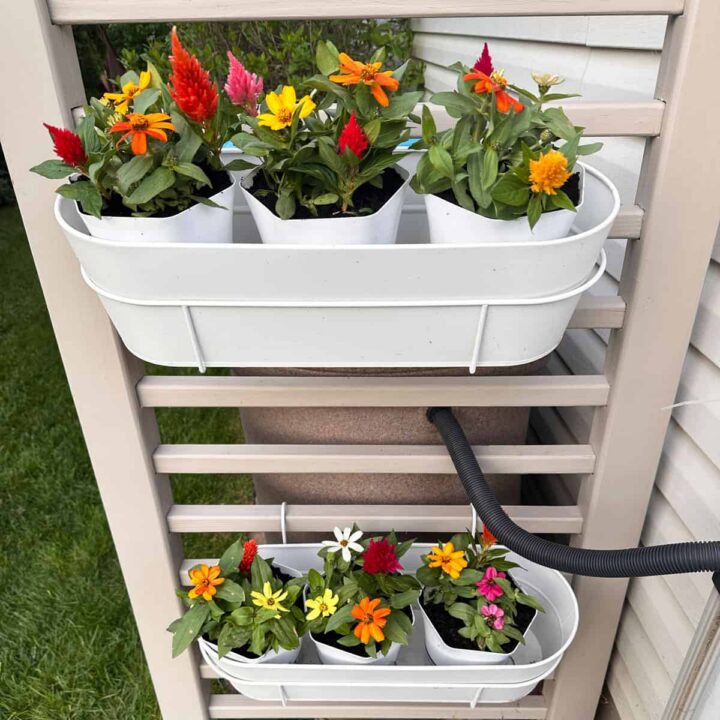
Next, the clear bases of these pots let you see exactly how much water is left. Fill the reservoirs through the side lip so the roots can draw up moisture as needed. We filled it up all the way. I used water from my rain barrel to fill the basins.
Pro Tip: It is OK for there to be some dirt in the water. The rope helps transfer the water to the soil above. - Arrange in the Window Box
Place the individual pots directly into your narrow window box. Because they are modular, you can fit them into tight spaces where a traditional long liner might not fit. This also makes it incredibly easy to pull out one specific plant if it needs extra care.
They do get a little heavy with the water in them, so use two hands so you do not spill the water.

The Big Reveal
This Self-watering window box DIY looks lovely. They are helpful so that the top watering window boxes do not lose all the water to the bottom window box, preventing the top window box from drying out first.
Since I had one pot left that didn't fit in the window box, I decided to add A single hexagonal pot, which makes a great statement piece on a doorstep or small side table.
Quick Outside Flower Pot Care Tips
Below are some tips for caring for outdoor flower pots to help you maintain beautiful annuals.
Monitor the Reservoir: In the peak of summer, check the clear bases every few days.
Deadhead Regularly: Pinch off spent Zinnia blooms to encourage new growth.
Fertilize: Add a water-soluble fertilizer to the reservoir once a month to keep the colors vibrant.
FAQs
Feel free to check out these additional questions for answers. If you have more questions, please leave a comment below, and I will get back to you as soon as possible.
The best one is any one that is easy to remove from the window box. So, measuring the available opening is the first line of defense. I particularly like the clear basin because it makes it easier to see when I need to refill it.
To speed up the assembly process, my husband helped me. I set up the pots and planted them, and he filled the water and added the pots and reservoirs inside the window boxes.
So far, these reservoirs need to be filled once every 5-6 days. But, as it gets warmer, it could be more like 3-4 days.
Closing:
By switching to a modular, self-watering system, you save time on maintenance while keeping your outdoor spaces looking professional and organized. I'm so happy with the outcome. So far, it looks like the water basin lasts 5-6 days. That beats me watering the plants every day.
Sharing is caring! If you enjoyed my post, please share it with your friends via email or social media and use the hashtag #sabrinasorganizingDIY. Thank you!
DIY Posts
And check out these specific posts!


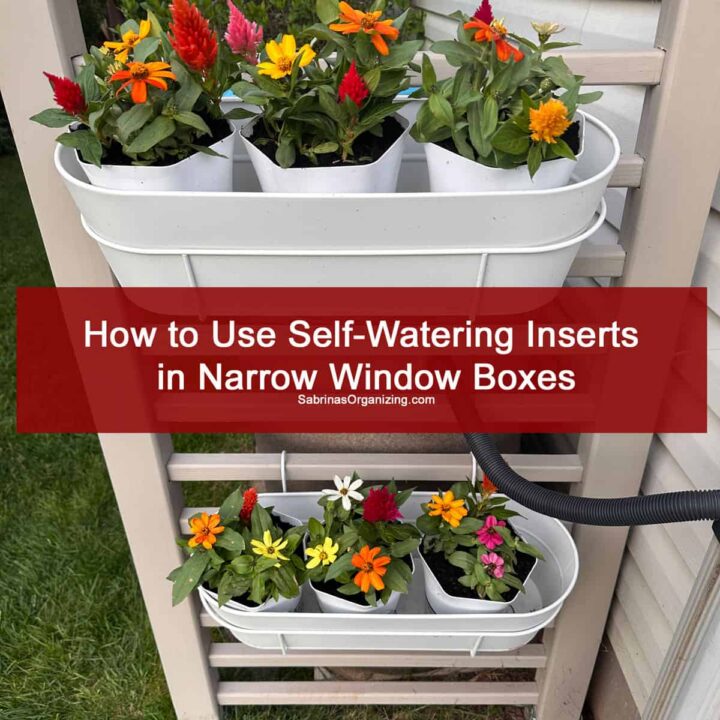
How to Use Self-Watering Inserts in Narrow Window Boxes
- Total Time: 95 minutes
- Yield: 10 pots
Description
This project is perfect for anyone looking to add a splash of color to narrow window boxes without the constant worry of plants drying out. By using modular self-watering inserts, you create a flexible, low-maintenance display that can be easily refreshed throughout the seasons.
Materials
Flowers: Zinnias and Celosia (or your favorite sun-loving annuals)
10 Self-Watering Pots: White hexagonal pots with clear bottom reservoirs.
Potting Mix: A high-quality mix designed for containers.
3 Existing Window Boxes: Metal or wooden narrow-profile boxes.
A hand shovel or cup to scoop up dirt and place it in the pots.
Optional Gardening Gloves
Instructions
1. First, start with healthy nursery plants. Zinnias and Celosia are excellent choices because they offer height and vibrant color. But any annual will do. I was able to separate my plants and add individual flowers to each pot.
2. First, I measured the window box from front to back, then from the bottom of the inside to the top edge. I wanted the self-watering pots to sit flush with my window boxes since one of them was pretty deep. I purchased a medium, 5.9-inch-wide and 7.1-inch-high, in a 10-pack.
Then I started assembling the pots by threading the rope through the holes to hang them inside the water basin. Then I attached the top part (where the dirt and plant would be) to the bottom basin.
Hexagonal pots are ideal for narrow spaces because they can be nested together or lined up neatly. This size helped me determine how large (affiliate) the pot is and how many plants to add to it.
3. Now, fill the pots with a bit of potting soil, then gently transplant your flowers. For a full look, you can combine a taller "thriller" like Celosia with a "filler" like Zinnias in a single pot, or keep them separate for a more modular approach. I added 3-4 plants in each pot. You can add more to make it even fuller.
Note the soil was already moist, so I chose not to water them again and opted for the water basin and rope to help water the plant.
4. Next, the clear bases of these pots let you see exactly how much water is left. Fill the reservoirs through the side lip so the roots can draw up moisture as needed. We filled it up all the way. I used water from my rain barrel to fill the basins.
Pro Tip: It is OK for there to be some dirt in the water. The rope helps transfer the water to the soil above.
5. Place the individual pots directly into your narrow window box. Because they are modular, you can fit them into tight spaces where a traditional long liner might not fit. This also makes it incredibly easy to pull out one specific plant if it needs extra care.
They do get a little heavy with the water in them, so use two hands so you do not spill the water.


- Prep Time: 5 minutes
- Category: DIY, Outdoor Gardening
- Method: Step-by-Step