During a hurricane in our region, we discovered that one of our plants was damaged. This plant was near the lamppost where we had installed the DIY stone address marker. Visit the post here to see how we completed this project. We had to remove the dead plant and replace it with something. My husband and I decided to do a flower container. This post outlines the steps we took to transform the shabby plant rock bed near our lamppost into a beautiful focal point at the beginning of our driveway. Follow along and see the amazing transformation.
Jump to:
Key Takeaways
- The project involved creating a beautiful focal point by replacing the dead plant with a flower container.
- Key (affiliate) supplies included a durable terra cotta pot, soil, plants, and drainage rocks.
- The DIY process took 28.75 hours, including painting the pot and planting the flowers.
- The final container garden adds beauty to the front yard and is designed to withstand winter conditions.
Tools and supplies needed to make this beautiful front yard flower container:
First, let's share the list of supplies and tools (affiliate) we used.
One terra cotta pot is about 27 or 28 inches tall. - We purchased it at Floral & Hardy of Skippack, PA
We used a quart-size can of red exterior paint. We made sure it had a primer and was mold-resistant. We picked the top-of-the-line product to protect the container fromextreme weather.
Paintbrush (affiliate) thick one that can handle the thick paint.
Handy Paint Peal
One bag of drainage rock (linked to Amazon (affiliate) - affiliate link)
One-half bag of Top Soil (linked to Amazon (affiliate) - affiliate link)
1 - 12 inch by 12-inch paver stone
One tall plant for the center - we used Cock's comb
3 - Mini mums in Yellow for around the sides
2 - small pepper (affiliate) plants for in between the mums
One bag of container soil for the plants
Scissors (affiliate) to cut open the bags and cut back the garden weed block
Gardening gloves
Now that I had all my supplies and tools (affiliate) available, I started this DIY container project.
How long did it take to make this flower container?
It took 28.75 hours from start to finish. The paint on the pot dried in about 4 hours, plus a 24-hour set time. About 45 minutes later, the soil and plants were added and watered.
How to make a front yard flower container
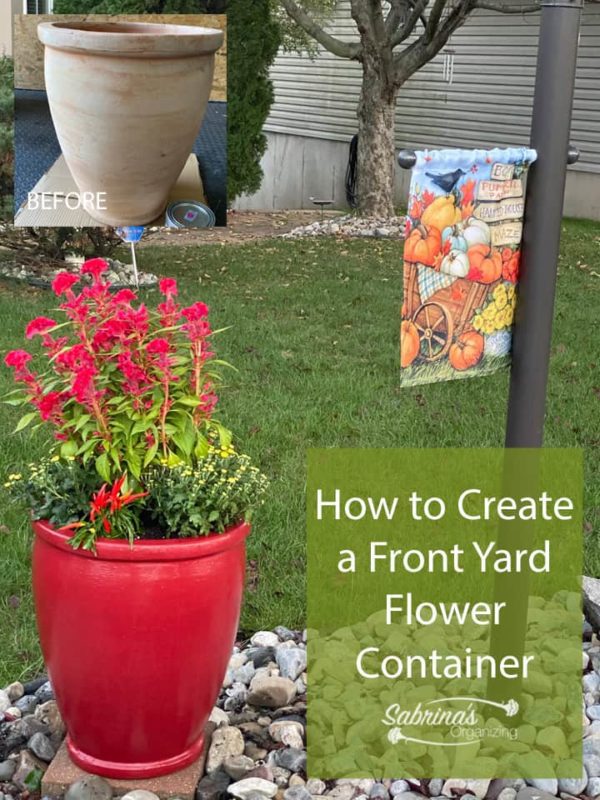
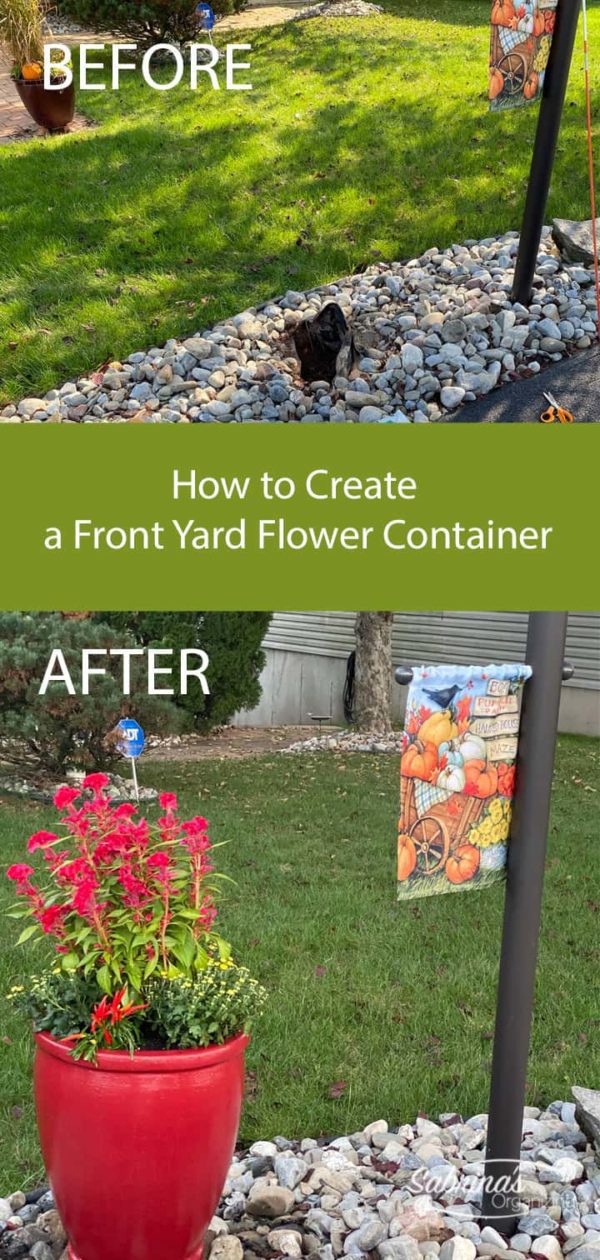
Before the picture of the front yard flower container, We were so sad that the plant had died, so we wanted to replace it before winter hit our area.
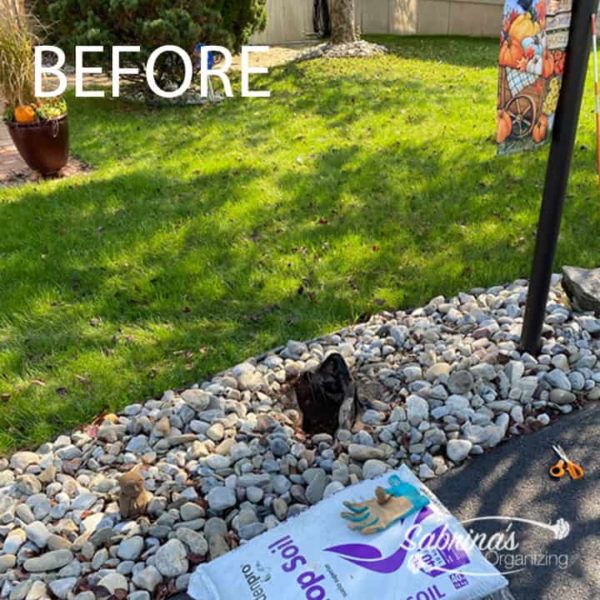
This image shows you exactly what the area looked like after we removed the plant. It left us with a gaping hole we needed to fill.
Get a gorgeous, durable pot made of real terracotta.
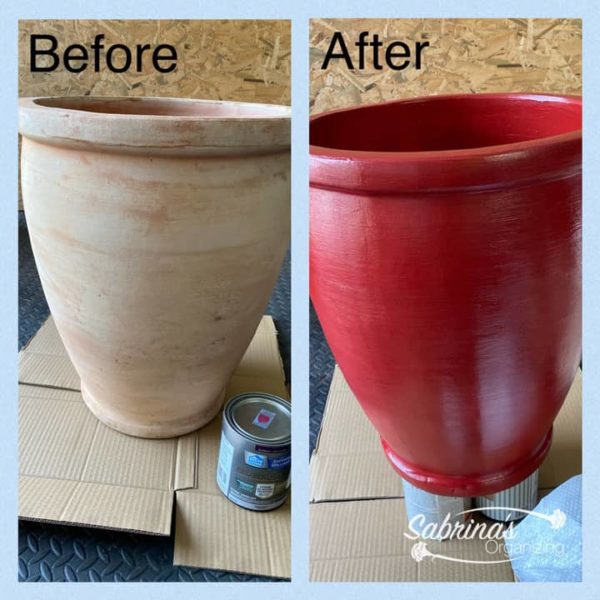
We got this one at the local nursery. It wasn't cheap, about $179.00, but we wanted something durable and able to withstand our cold winters. This one had thick, porous walls, so we could paint it with acrylic paint to match the home. While I liked the color, it didn't match our home's red accents at all. It was way too light.
Paint the terra cotta pot.
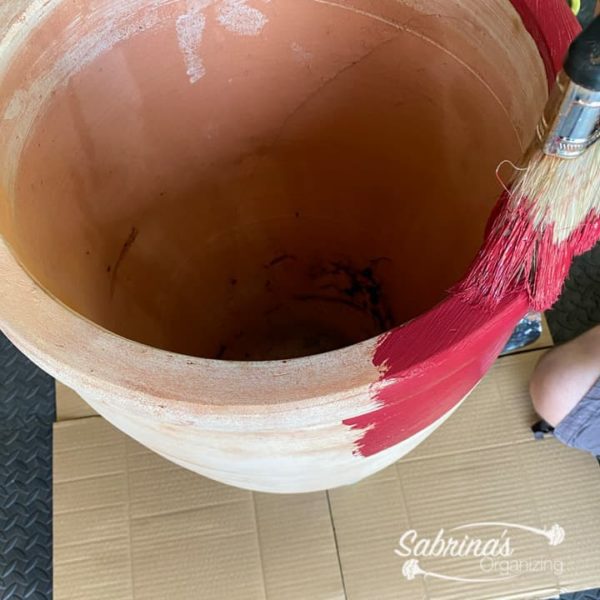
Now, my husband started painting the pot. He placed it on three cans of paint to raise it up, and a layer of cardboard was on the bottom. He added two coats and followed the paint can instructions. The first coat looked a little pink, but when it dried, it turned red.
Fill in the hole left by the plant with topsoil.
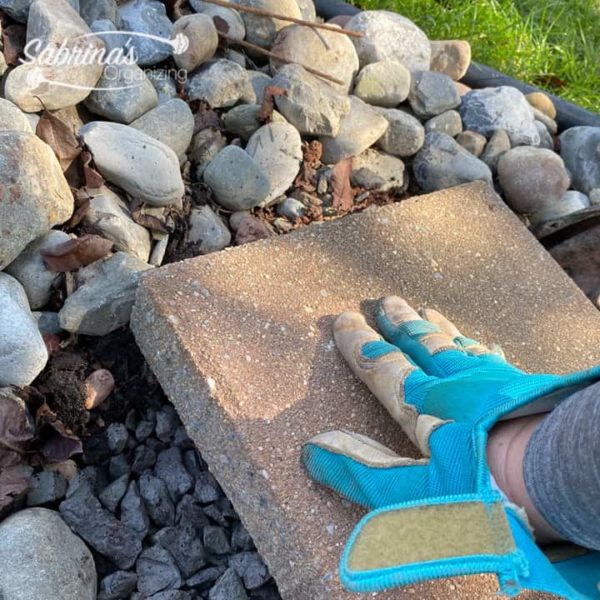
First, I removed the decorative rocks from the garden bed so they wouldn't fall into the hole. Then, I inspected the hole size.
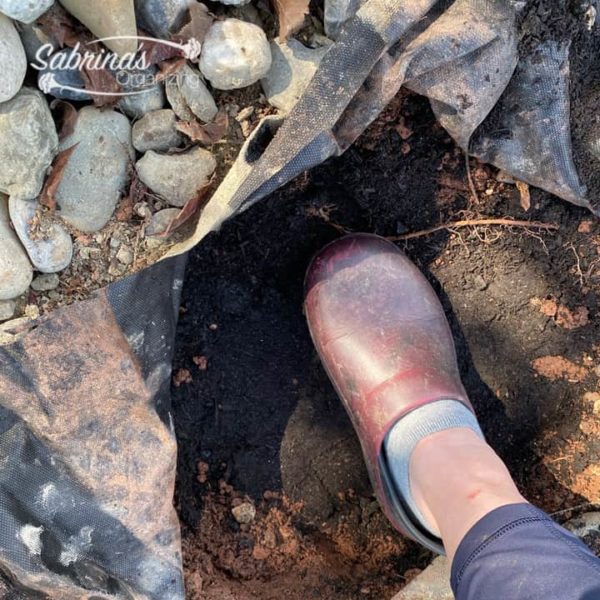
Since I had a hole about 15 inches wide and 10 inches deep, I needed to fill it in. Cutting back the weed blocker to access the additional part of the hole helped me see how much of the area I needed to fill. Then I added the topsoil to the hole and broke up the clumps. Then, I stepped on the dirt to remove any air gaps. You can use a tamper if you want.
I then added more topsoil and pressed it down again, leaving about 3 inches of space from the top edge to the soil. This allowed the drainage rocks to be added next.
Add the drainage rocks to the topsoil in the hole.
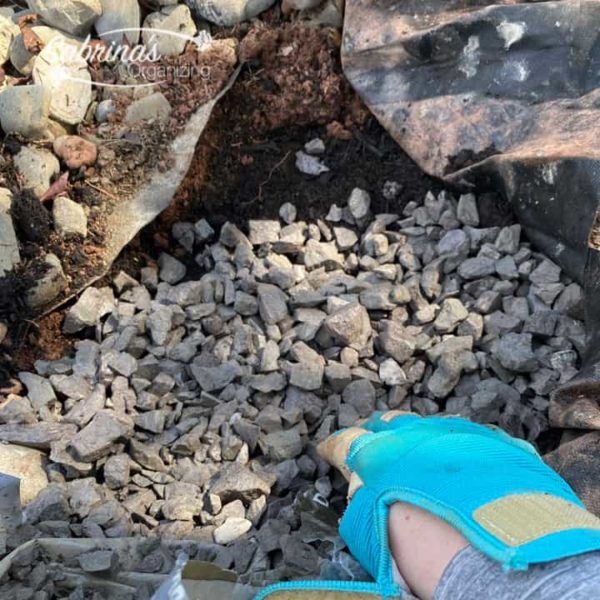
I added some of the rocks and tamped them down with my hand. And continued adding drainage stones to level the paver. I had an unused square 12 inches by 12 inches paver from a previous project, and used it to place on top of the rocks after it was level.
This is where the terra cotta pot will be placed when it is finished. I added the rest of the weed blocker to the top of the drainage rocks and put the paver on top.
Next, I added decorative rocks around the paver in the garden bed.
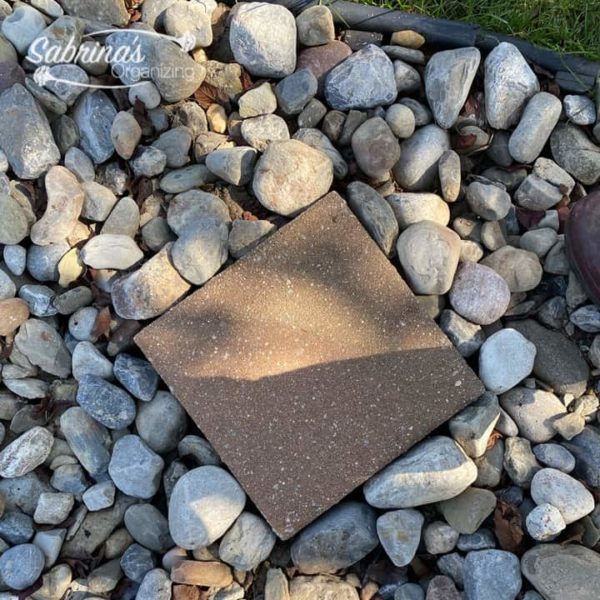
Here is what it looked like after it was level and the rocks were added around the paver.
Add the soil and plants to the painted pot.
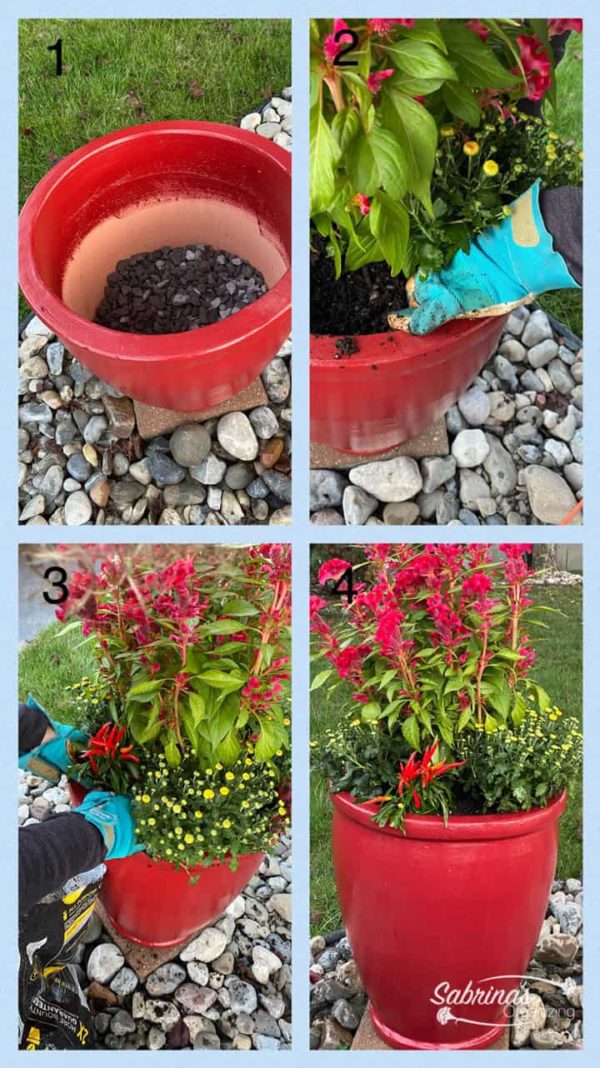
My husband placed the finished pot in its new home.
I first added the rocks to the pot to improve drainage. Then, I added the soil until I got to about 2-3 inches from the top of the pot.
Planted the plants into the container.
I started with the largest plant, which I placed in the center, and worked around the container to add the smaller ones.
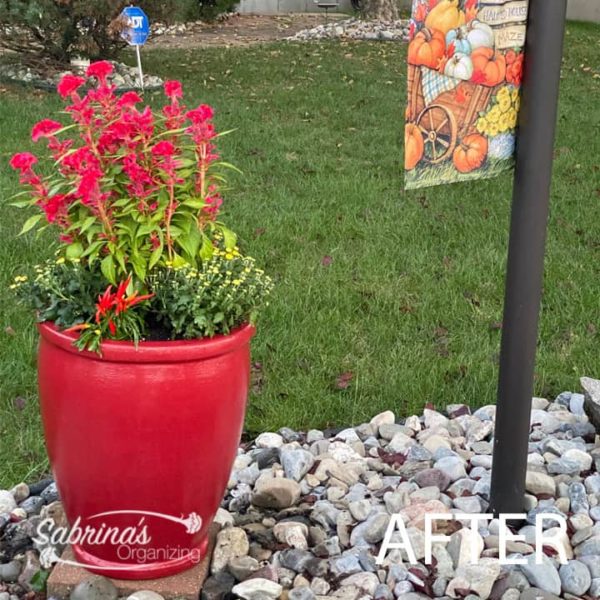
The container garden front yard Reveal
That is it! We are finished! Check out how the flower container looks next to the lamp post. We love it and can't wait to show it to others when they visit this Thanksgiving. What do you think? Please comment below and feel free to share on Pinterest, HomeTalk, and other social media sharing sites.
Remember that when the season ends, we will remove these fall flowers and empty the pot. We are considering covering it to protect the pot from the snow this winter. Hopefully, that will help keep the flower container usable for many years.
Visit our other outdoor DIY posts.
How to make a two-tier Raised Bed Garden
DIY Easy Holiday Wreath with fresh herbs
I found some of these posts to give you more gardening ideas. Feel free to check them out.
125 Container Gardening Ideas by Southern Living
Please note these are affiliate links through Amazon (affiliate), and at no additional cost to you, I will earn an affiliate commission if you click through and decide to make a purchase.