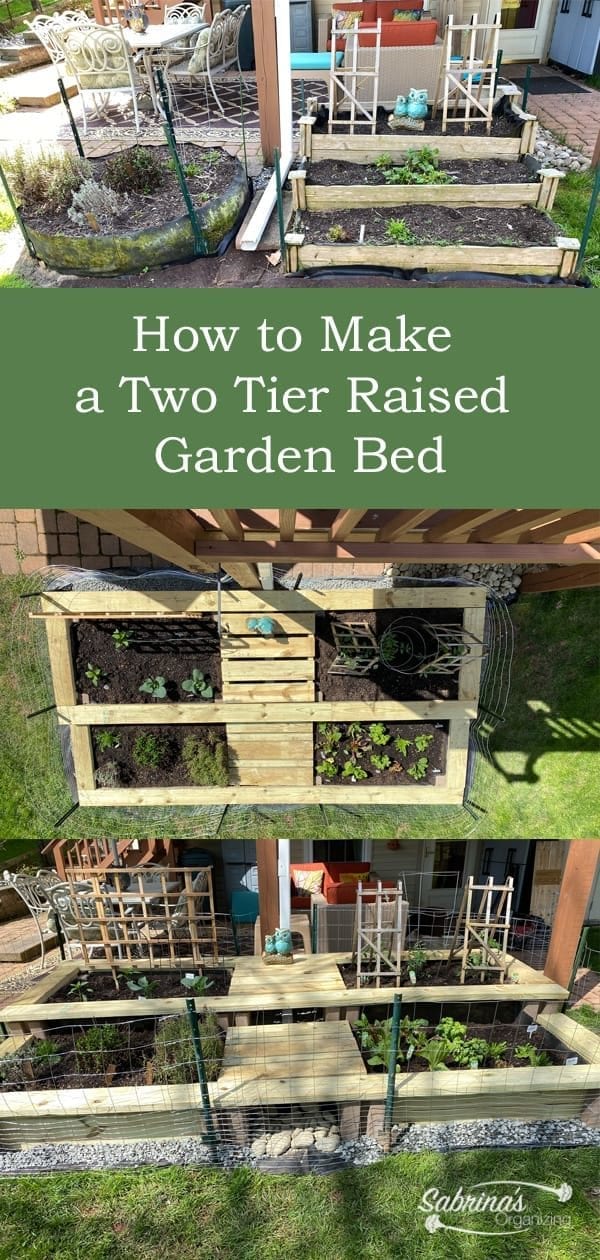
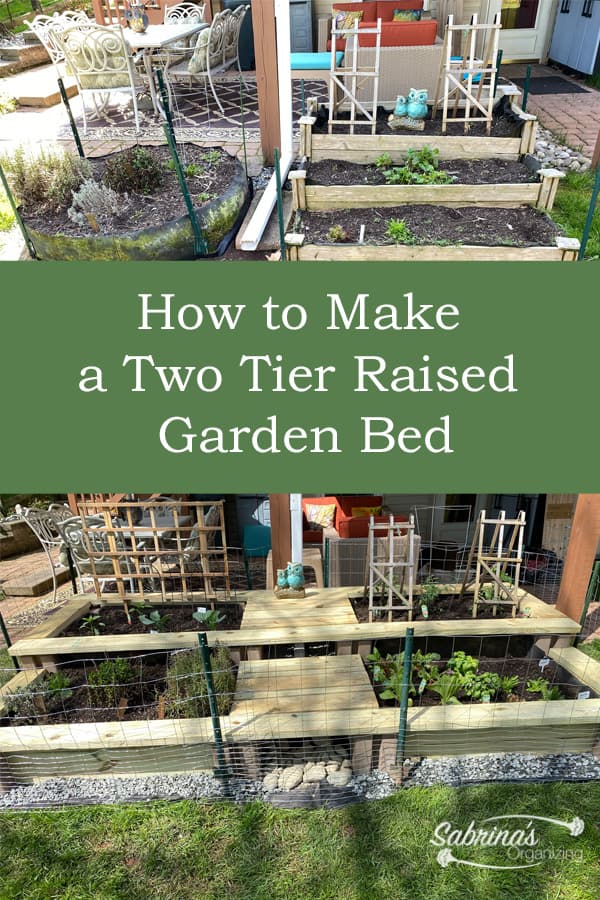
If you've followed me for a while, you know that I love gardening from spring to fall. I live in Pennsylvania, so we have true seasons here, and when it's time to go outside, I'm ready for the fun my garden brings to my family and me. I have three gardens on my property. All three of them are raised beds. One is an herb garden, and the other is a vegetable garden. This year, we had to replace our three-tier raised bed because of wood decay, so we decided to revamp both raised beds and create a double-tier, extra-wide raised bed garden. Here's how we made it.
We are replacing both of our gardens we shared on this blog. Feel free to check those posts below.
FUN CHEAP AND EASY PRACTICAL OUTDOOR GARDENING IDEAS
Jump to:
What was needed to make a two-tier raised Garden bed?
Soil from the prior garden plus four garden soil all-purpose bags two cubic feet.
2 - 6 ft. x 50 ft. Landscape Fabric Weed Barrier Ground Cover Garden Mats for Weeds Block in Raised Garden Bed
One large (affiliate) box of 100 or less 4 inches or more Garden staples to hold the weed barrier down outside the garden.
4 - ½ in. x 1 ft. #4 Rebar
8 - ½ in x 2 ft. #4 Rebar
32 - Oldcastle 7.5 in. x 7.5 in. x 5.5 in. Tan Brown Planter Wall Block
21 - 2 in. x 6 in. x 8 ft. #2 Prime Ground Contact Pressure-Treated Lumber
One large (affiliate) box of Outdoor Wood Screws
6 - drainage rock bags .5 cubic feet
Two rolls of Garden Rabbit Fence 28 inch by 25 foot, silver (affiliate)
10 - Green Garden Post for the Fence 30 inches
What do you need to add to the trellis of the two-tier raised garden?
24 in. by 36 in. teak Trellis (affiliate)
Two 5-foot stakes
Four Outside 1-inch screws
Tools needed for this DIY Two Tier Raised Garden Bed:
15 Amp 10 in. Sliding Compound Miter Saw (affiliate) with LED
Mallet
Drill (affiliate) and Drill (affiliate) bits
Tape measure (affiliate)
Level
Flathead shovel
Spade
Gloves
7 ft by 9 ft tarp
Staple gun and staples
How long did it take to make a two-tier raised Garden Bed?
This was a job for 2-3 people. It took us two days to do it-eight hours on one day and two hours on the other day.
Visit our other gardening posts below:
FUN CHEAP AND EASY PRACTICAL OUTDOOR GARDENING IDEAS
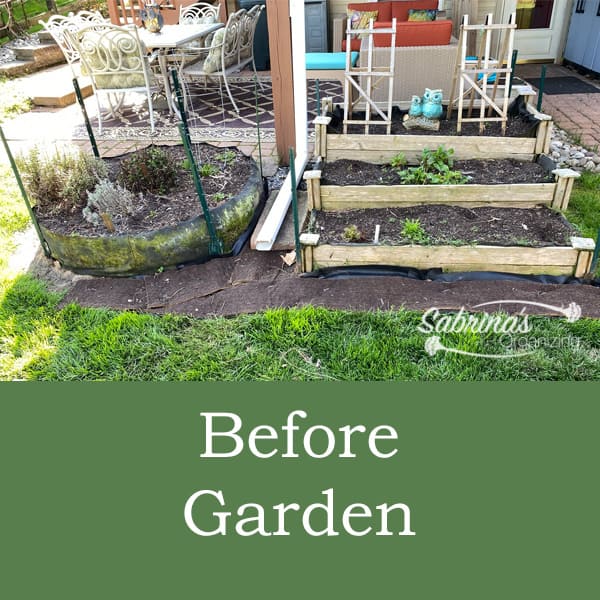
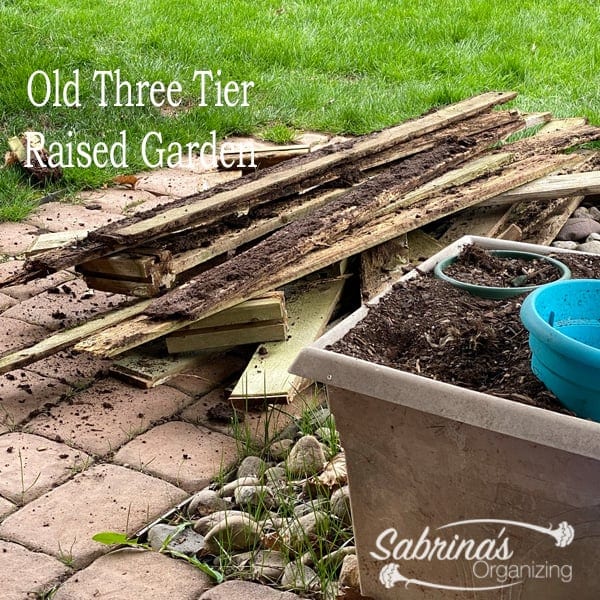
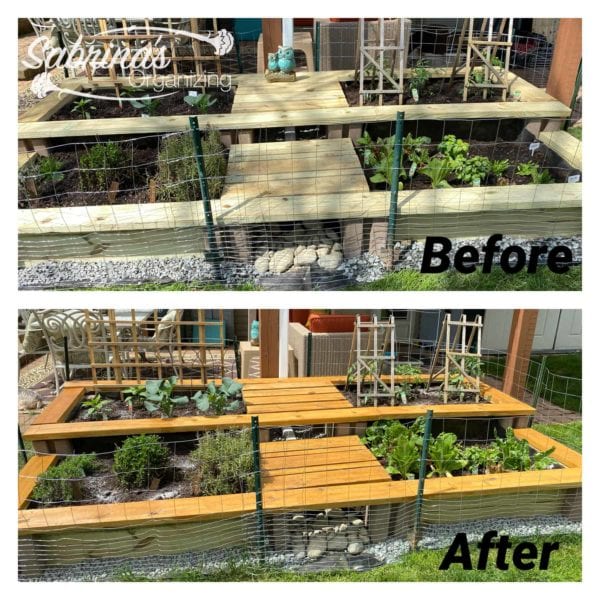
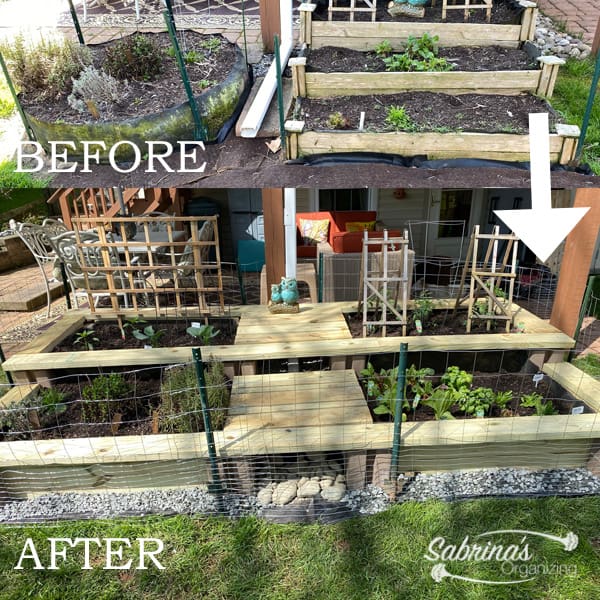
Here is the before picture of this new Two-Tier Raised Garden Bed. See how one garden was decaying and the other one had mold growing around it.
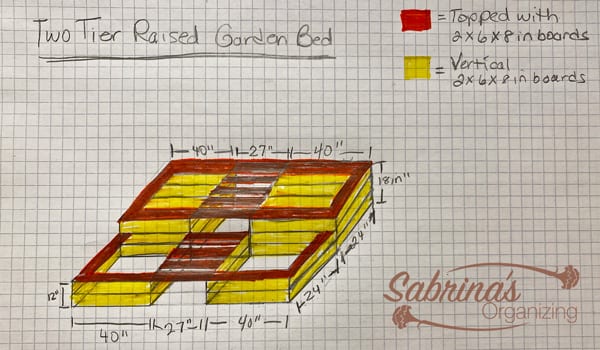
We decided on a plan and ordered the supplies from Home Depot. Below is the drawing I made to help us figure out the quantity needed.
How to Make the Two-Tier Raised Garden Bed?
First, remove the soil and grass that may be in the area you are planning to use.
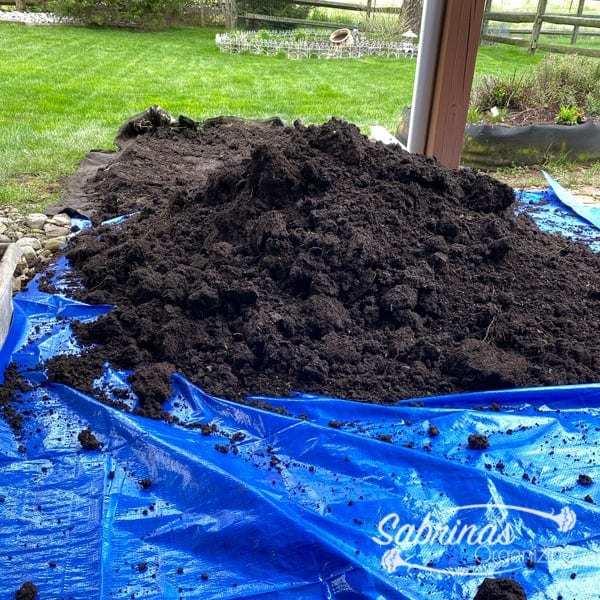
We were using the exact area of the other two raised gardens (from the post above). So, we needed first to dismantle the existing garden and find a place to hold the dirt until we are ready to refill them.
We laid out the tarp on the patio so as not to kill the grass. Then, we started removing the dirt from the old garden onto the tarp, making sure only to cover half of it so I could cover the dirt with the rest of the tarp. It was going to rain that night, so I wanted to protect the garden dirt from washing away.
Piece by piece, I removed the old wooden tier garden. It served us well and was starting to collapse at the bottom from the weight and the cold, snowy weather we have here.
I discarded the pieces of cedar wood from the garden and cleared the area.
We had a few plants that came back from last year, so we transferred them to the round raised bed.
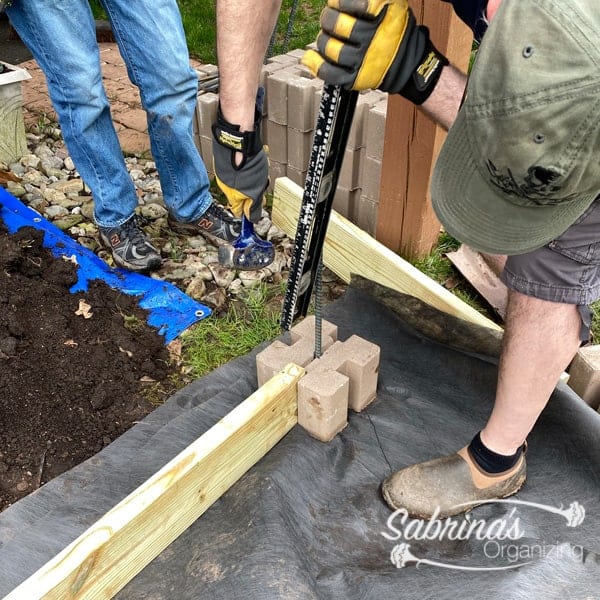
Begin by leveling the area with a shovel for the blocks.
Now that we had cleared the tiered garden, we were ready to level it. To determine the area we were going to use the wall blocks, we had to measure the distance between each corner and determine the placement of these block corners.
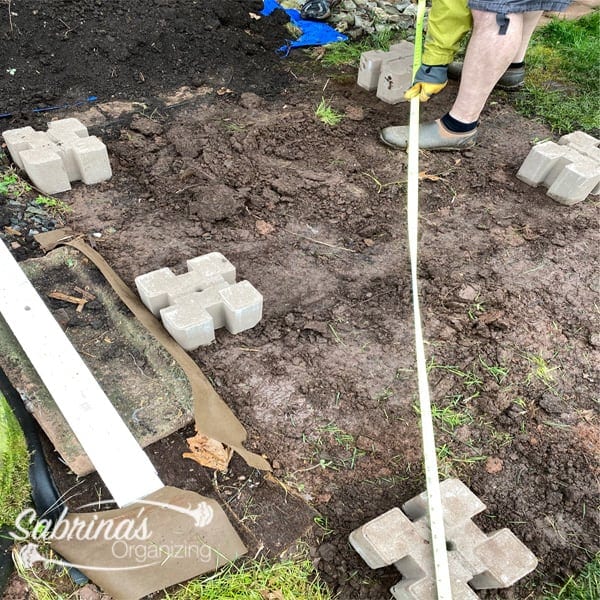
After removing the dirt and getting close to the placement of the blocks we needed, it was time to level the ground. We used a level to make sure each block was level at the top (close to the patio). As we moved forward, it was pitched a little forward. The reason why we did this was that our garden is right near a swale, and we were concerned that if we didn't do this, the water that landed on the garden would go toward the patio and the house.
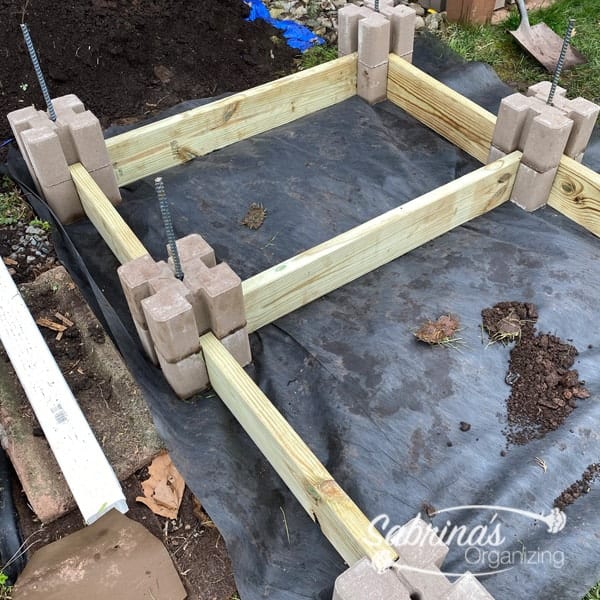
We wanted to make easy-cut measurements, so we went with 40 inches wide on the top and bottom and 24 inches long for each of the two-piece sides. Because it was two tiers, we had to cut the wood into two 24-inch lengths to fit the extra block in the center of the sides of the garden.
Start cutting some of the wood pieces for the sides.
After placing the blocks exactly where we needed to make the 40-inch-wide and 24-inch-long pieces, we started cutting the first level for the first garden. (Remember there are 2- two-tier gardens.)
Place the weed fabric down in the area.
We placed the fabric down and left about 8 to 12 inches of excess weed fabric around it. You will see why we did that later. We then needed to place the blocks again on top of the fabric where we had placed them earlier. Then, we confirmed that it was level.
Start assembling the wood pieces with the blocks.
Then, it was time to start assembling the blocks and wood. We placed the first row down and adjusted/removed soil as needed to keep the wood level with the ground.
Line the inside of the garden tiers.
With a staple gun, I staple a weed barrier inside each of the created gardens in the two-tier garden.
Transferred the garden dirt from the tarp to the new garden.
Then, we added the dirt back into the two-tier garden to fill it up. We did not use it all, but most of it. I then transplanted the garden plants from the other garden into this one so we could start dismantling the round garden bed.

We followed the same process as above to create the other garden bed. And used the excess dirt from the round garden and the excess dirt from the tarp.
Between both is a downspout, so we could not put it together. Instead, we did shelves (affiliate) to connect them. Below is how we attached them.
Add the wood on top of the vertical pieces to protect the sides of the garden.
We covered the wooden sides around all areas of both gardens. We ran the long pieces from the bottom, then went on to do the sides. And worked our way up the tiered garden. We did not do the middle, though. That was left for the end.
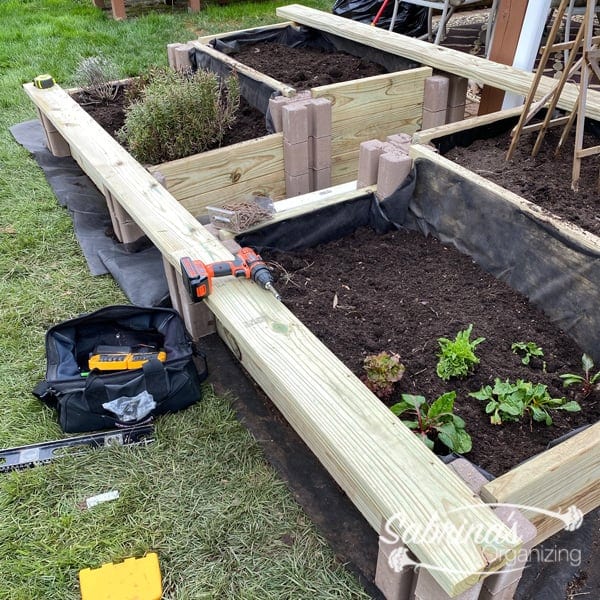
Now, connect the two raised garden beds together.
We measured the distance between the two sides and figured out how many pieces we would need to place over each tier. For us, it was about 27 inches apart. We ensured that there was spacing between the wood boards to allow for expansion. Then, we cut the pieces to screw them in and connect them. We then started screwing in pieces-two screws on each side of each 27-inch board.
Note: we do not know if this is structural so, use caution if you are putting stuff on it.
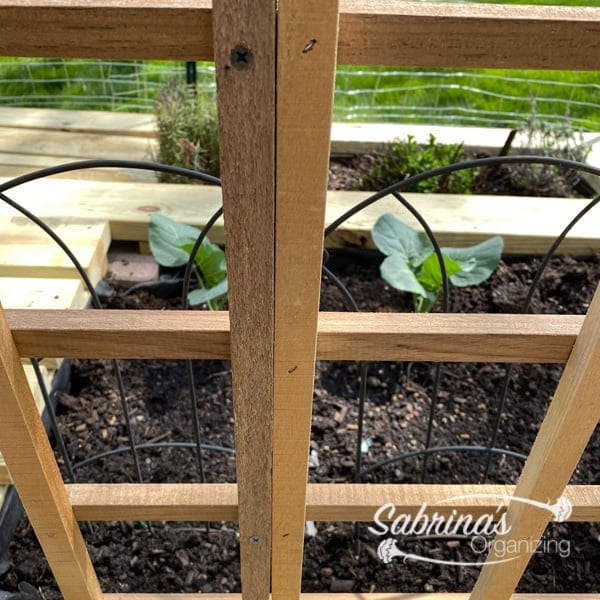
How we attached the Lattice to the garden
24 in. by 36 in. teak Trellis (affiliate)
Two 5-foot stakes
Four Outside 1-inch screws
Add the garden stakes to the top tier of the garden's soil. Then, line up the trellis (affiliate) next to the stakes. Drill (affiliate) a hole on the side of the stake and trellis (affiliate), then screw the screw into the drill (affiliate) hole. Do it for all four sides.
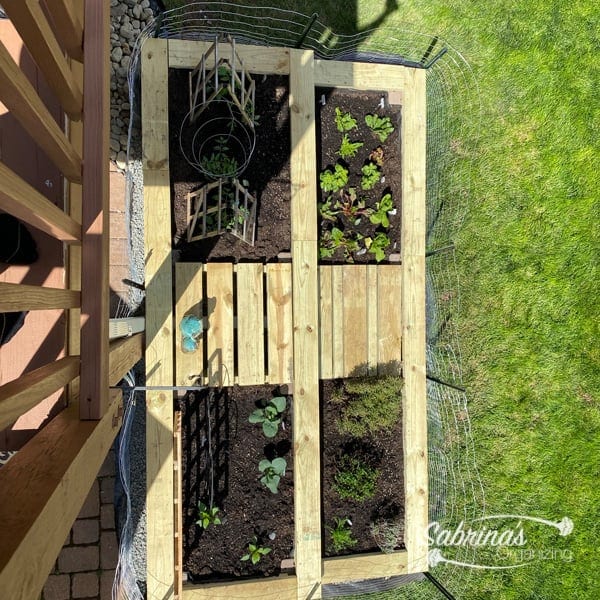
Garden vegetables and herbs in the raised bed garden
Now it was time to add the veggies. We added a variety of veggies and herbs (affiliate) to the garden. Lowe's was very plentiful this year. Yay! Below is the list of plants I bought.
Basil
Broccolini
Beans
Lettuce
Chamomile
Roma Tomatoes
Swiss Chard
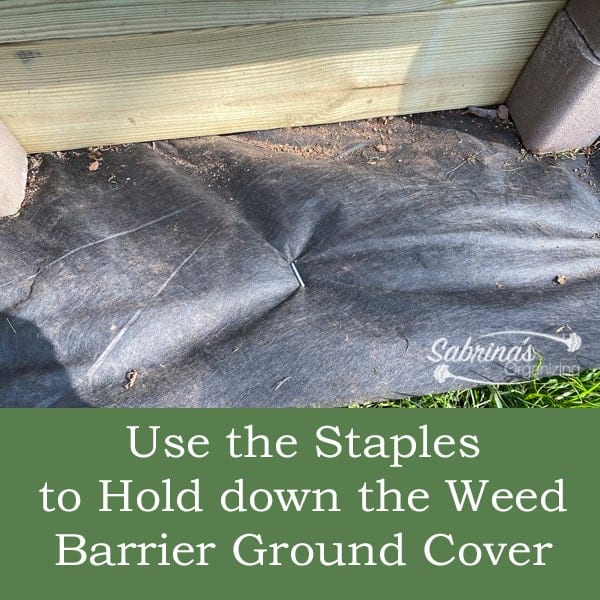
Add rocks and weed cover to the outside edge of the garden.
I then added weed cover around the outside and used staples to hold it in place with a mallet. Then I added the rocks on top.
Here is what it looked like from one side when it was finished.
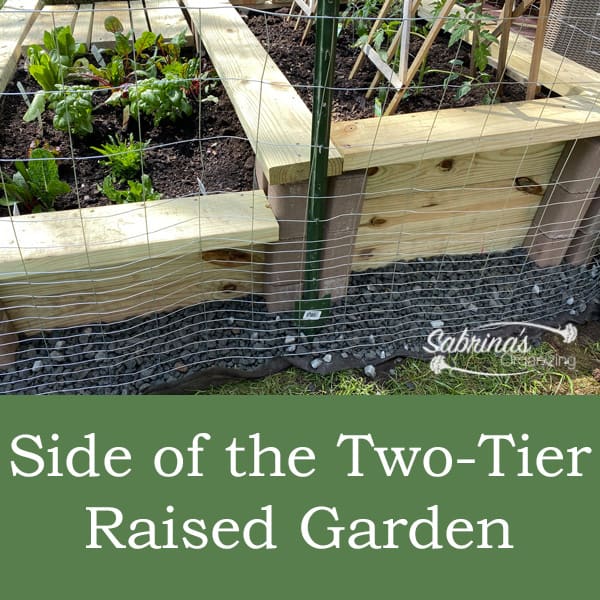
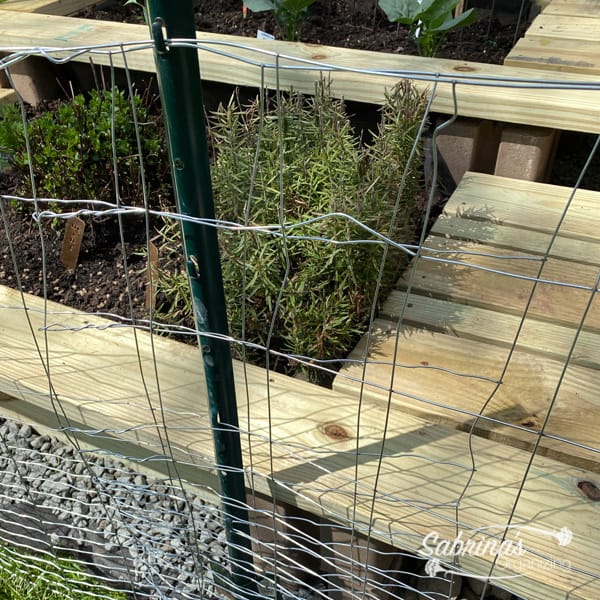
Add the fence.
I added the stakes for the fence, then opened it up and worked my way around the garden. I wanted to have the front middle area open to access the plants, so I overlapped a piece of fencing there to make it easy.
The Big Reveal!!!
Below is the after picture of this two-tier raised garden bed. What do you think? I love it! Since there is a drain down the middle, I used larger rocks so the rain would not push the rocks on the grass.
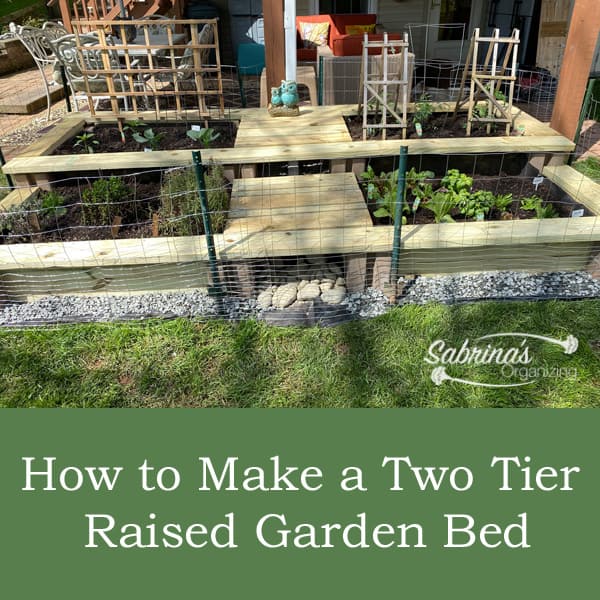
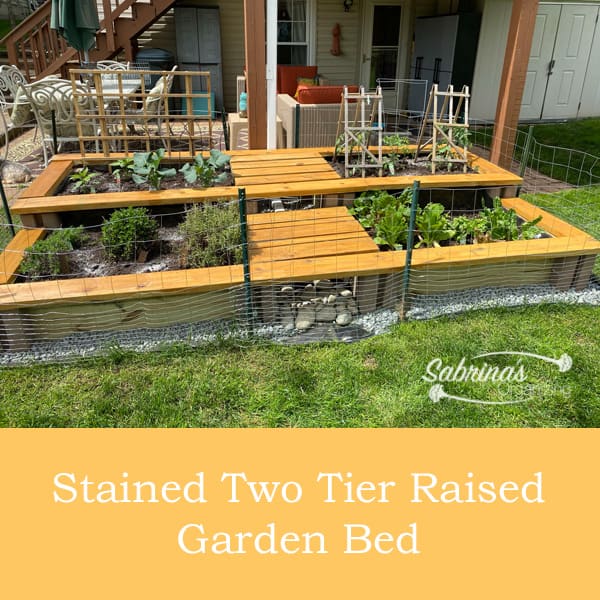
I decided to stain the top pieces of wood to protect them. I used about ¾ of the can of Gardener's Exterior Wood Stain 1 Quart. This stain is garden and pet-safe (affiliate). Below are the before and after stain-raised beds. Doesn't it look amazing? It really softens the garden and wood.
Visit our post that shares great gifts for Gardeners!
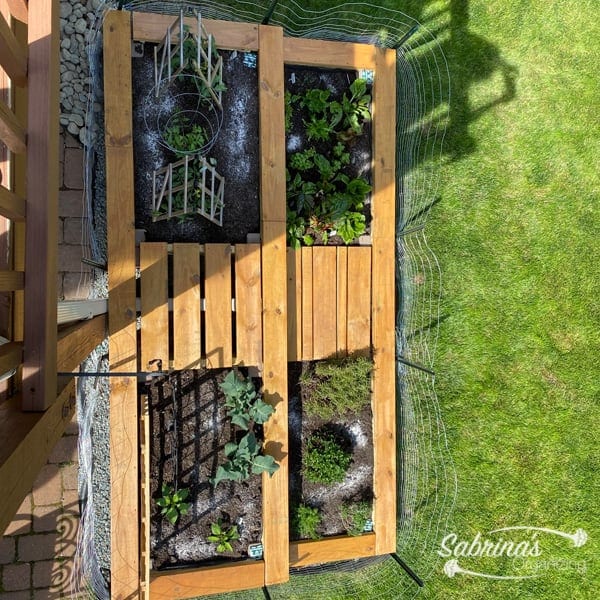
Here are other views of the stained raised bed garden.
At no additional cost to you, if you click through and buy something on Amazon (affiliate), I will receive a small commission. Happy Shopping!