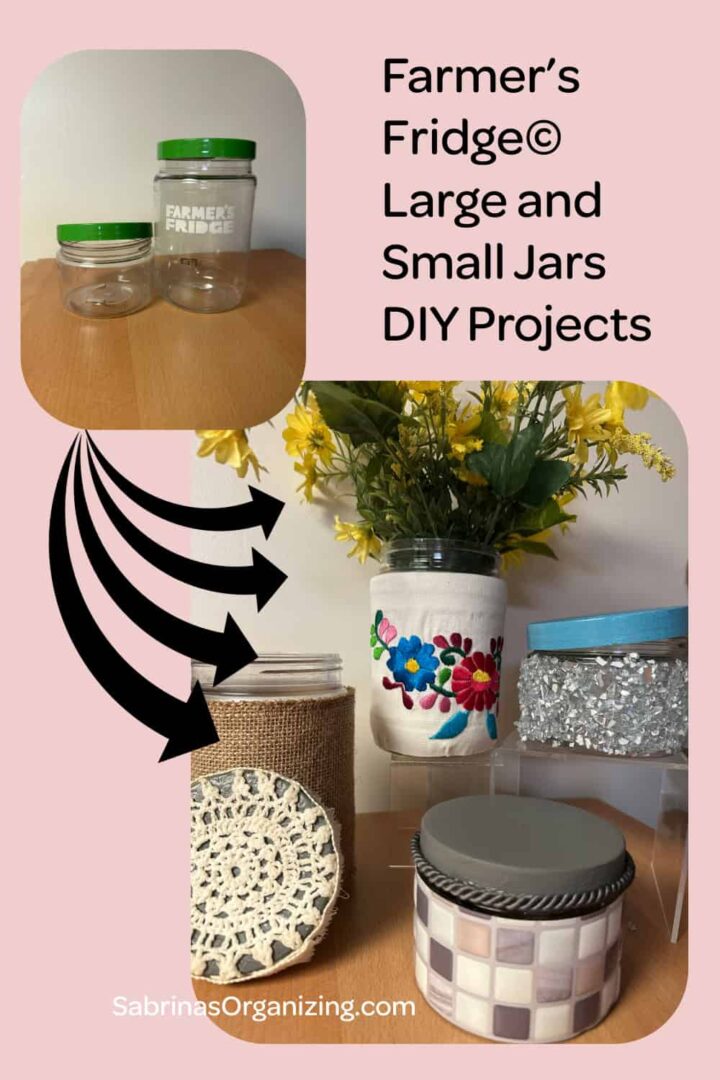
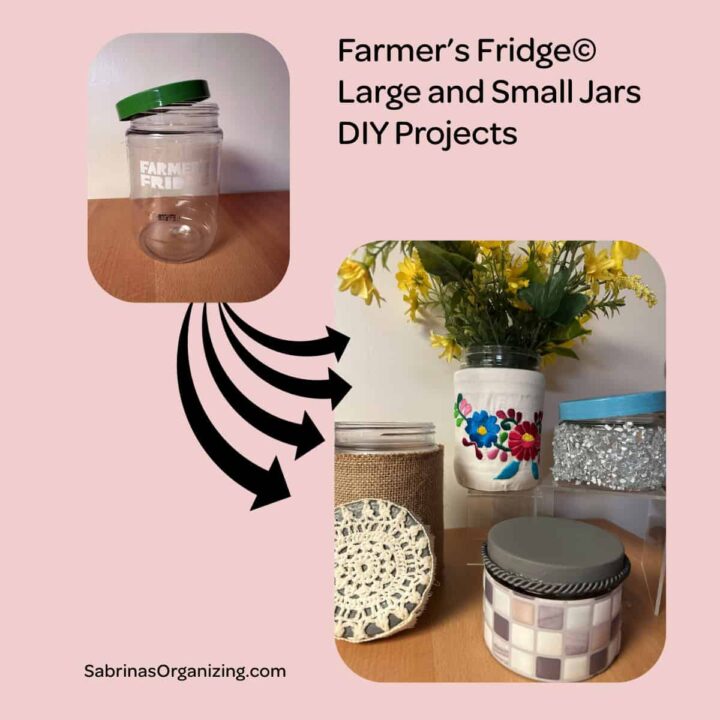
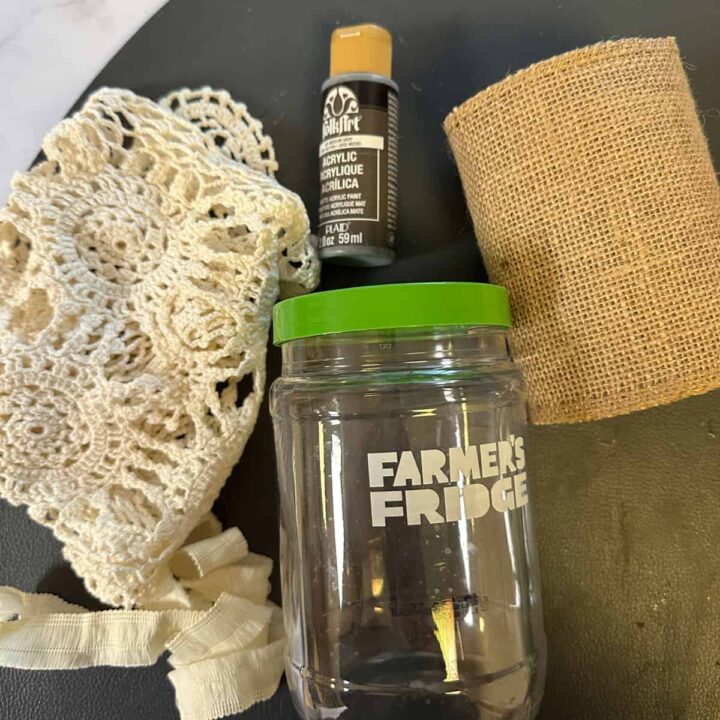
When traveling at the airport to reach our connecting flight, we were in a rush, and there was nothing to eat near our departure gate. So, we chose to try Farmer's Fridge. These meals come with sturdy plastic containers (affiliate). There is a place to recycle the jars right on the vending machine. However, while we ate, I thought I would upcycle these containers for this blog when I returned home to help people see the value in making things out of a one-use jar reusable for organizing purposes. Today, I will share with you four different Farmer's Fridge Jars Repurpose Ideas, suitable for two different jar sizes (large and small), as well as ways to repurpose these items.
What is Farmer's Fridge?
It is a vending Machine service with over 2,000 locations nationwide. It offers tastier, healthier meals. Discover more about its locations and offerings here. ***Note that this is NOT an affiliate link. The company's website showcases its diverse range of meals. ***
Farmer's Fridge Jars Repurpose Ideas
Jump to:
- Farmer's Fridge Jars Repurpose Ideas
- How to repurpose Farmer's Fridge Jars
- Farmer's Fridge Jars Repurpose Idea #1 - Large Embroidery Farmer's Fridge Jar
- Reveal - Large Farmer's Fridge jar project with embroidery
- Farmer's Fridge Jars Repurpose Idea #2 - Large Farmer's Fridge burlap and crochet Jar DIY Project
- Reveal - Large Farmer's Fridge burlap and crochet Jar DIY Project
- Farmer's Fridge Jars Repurpose Idea #3 - Small Crushed Mirror Pieces Jar
- Reveal - Small Crushed Mirror Pieces Jar
- Farmer's Fridge Jars Repurpose Idea #4 - Small Farmer's Fridge Jar with vinyl sheet and rope DIY project
- Reveal - Small Farmer's Fridge Jar with Vinyl Sheet and Rope DIY project
How to repurpose Farmer's Fridge Jars
There are several ways to repurpose these jars. Below are just some I found.
You can use them for food storage: These clean containers are suitable for storing leftovers, dry goods, and canned goods. However, I would not recommend using them for extended periods, as they may not be designed for long-term use.
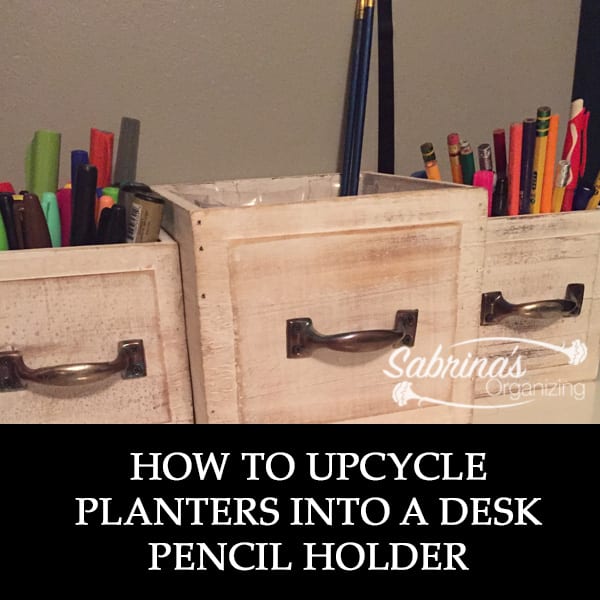
You can use them for organizing and home decor. These clean containers can store art supplies, such as pencils, crayons, and paintbrushes (affiliate). Craft supplies, such as buttons, beads, and other small items, work well in these containers, especially the smaller ones. You can also use them for planting herbs or flowers. Try using them to propagate your other plants.
Bathroom and Garage (affiliate) Essentials Storage: You can also store items like cotton balls, makeup brushes, and other essentials in them, with or without the lid. The small containers are ideal for organizing items in your tool closet, such as tools (affiliate), screws, or other small accessories.
I hope this list of uses provides you with some ideas for repurposing these jars. Below are my four Farmer's Fridge Jars Repurpose Ideas, you can also enjoy making and organizing your home.
Farmer's Fridge Jars Repurpose Idea #1 - Large Embroidery Farmer's Fridge Jar
The first of my Farmer's Fridge Jars Repurpose Ideas uses the large jar. They place salad and bowl recipes in it.
Why did I do this project?
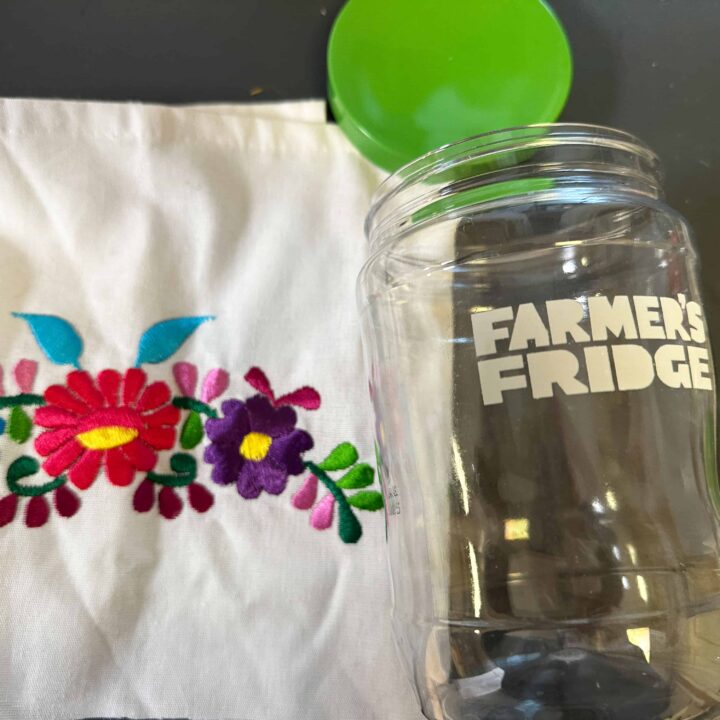
I received a Mexican embroidery shirt from a relative last year, and it was just too small for me to wear. But it was so beautiful that I wanted to use it somewhere. So, I decided to upcycle this jar.
How long did it take me to do this craft project?
It took me about 2 hours to make.
How much did it cost to do this project?
It only cost me the price of the Farmer's Fridge jar, which was about $15.00.
Supplies Used for this project.
There are a few items I used for this project.
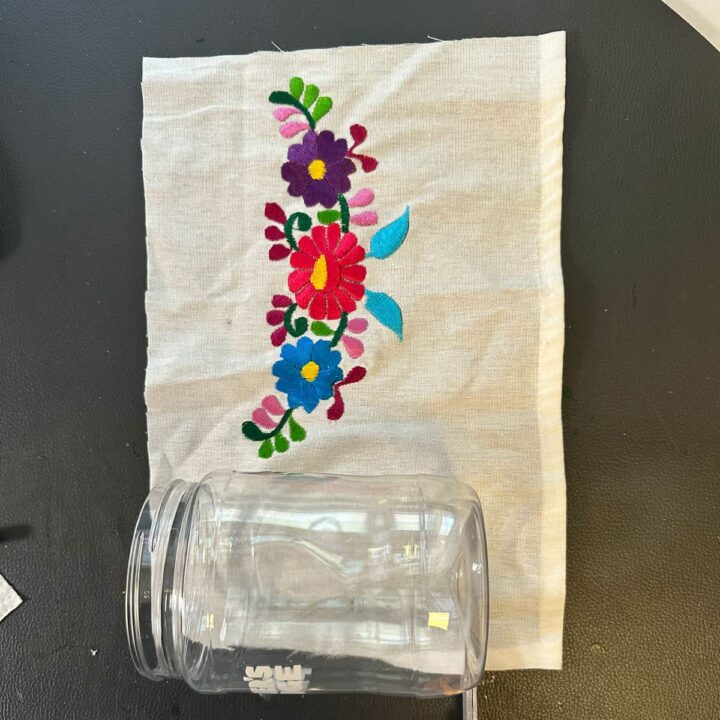
- Embroidery on a piece of fabric - cut evenly on the top and bottom, ensuring the embroidery is in the center.
- Farmer's Fridge large jar
- Mod Podge (affiliate) glue
- Disposible sponge brush
- Scissors
Instructions on how to make this Large Farmer's Fridge jar project.
First, cut the fabric with the embroidery so the design is centered in the middle of the jar. Add a little more fabric so you can fold the edges to create a clean edge on the top and bottom of the jar.
Tip: Ensure the Farmer's Fridge label (affiliate) is on the back, not the front, as I did. The fabric was a bit thin, and the label (affiliate) was visible through it.
Next, fold the edges of the fabric using a straight edge. The top and bottom should be the same distance from either end of the fabric. Remember that the design must be centered on the top and bottom.
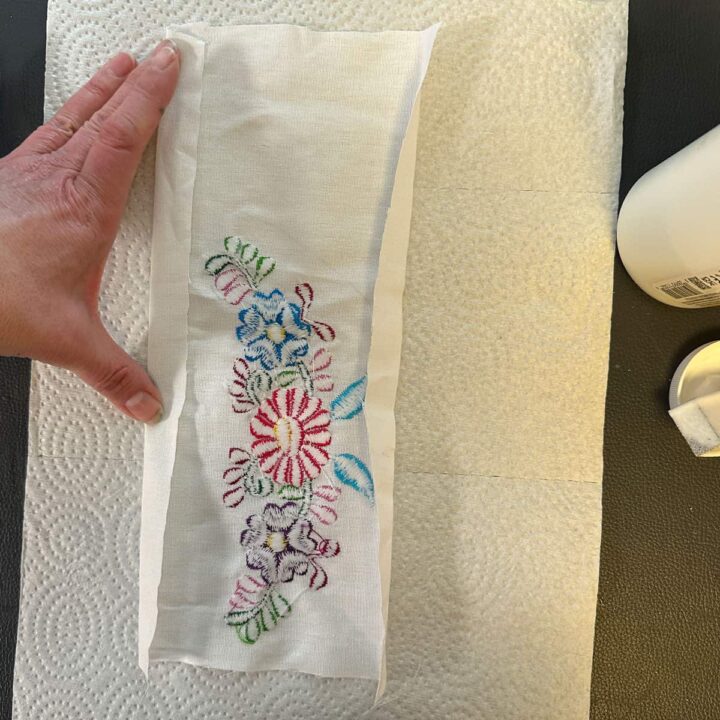
Now, confirm that it fits by placing the jar on the folded fabric.
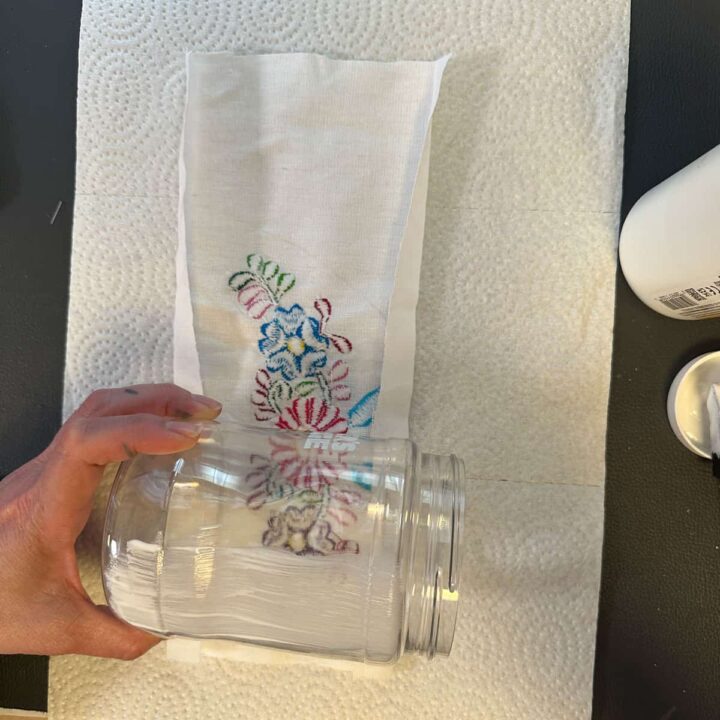
Then, add Mod Podge (affiliate) glue to the inside of the fold and fold the fabric using the crease line. Do this at the top and bottom of the fabric. Let it dry for at least 1 hour.

Then, add Mod Podge (affiliate) to the jar and press the fabric against the back of it. Ensure that the end pieces align with the jar's label (affiliate) to conceal it.
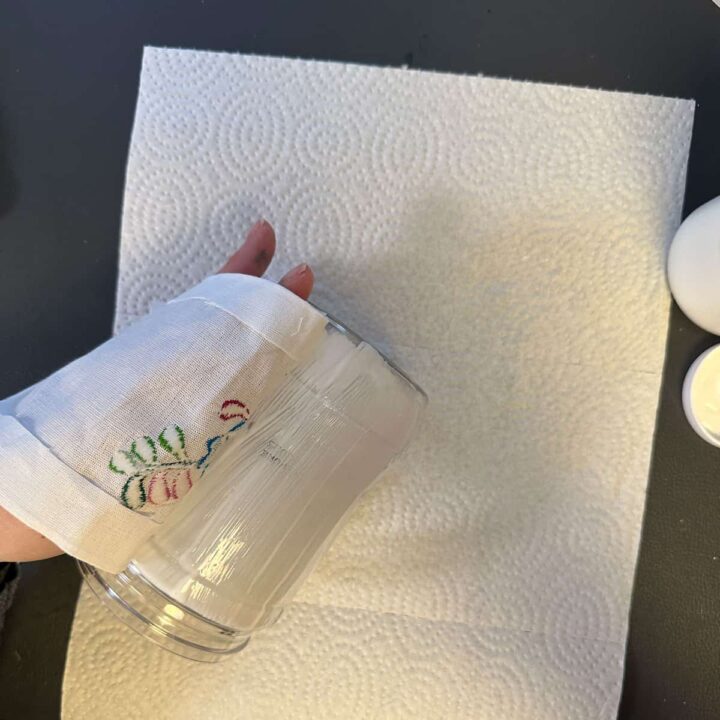
Since the jar's bottom is beveled, you will need to cut little slits, add more Mod Podge (affiliate) glue around and under the slits, and press firmly.
Then, add more Mod Podge (affiliate) to the top and bottom of the jar so the edges are pressed and secure. Let it sit for at least 2 to 3 hours.

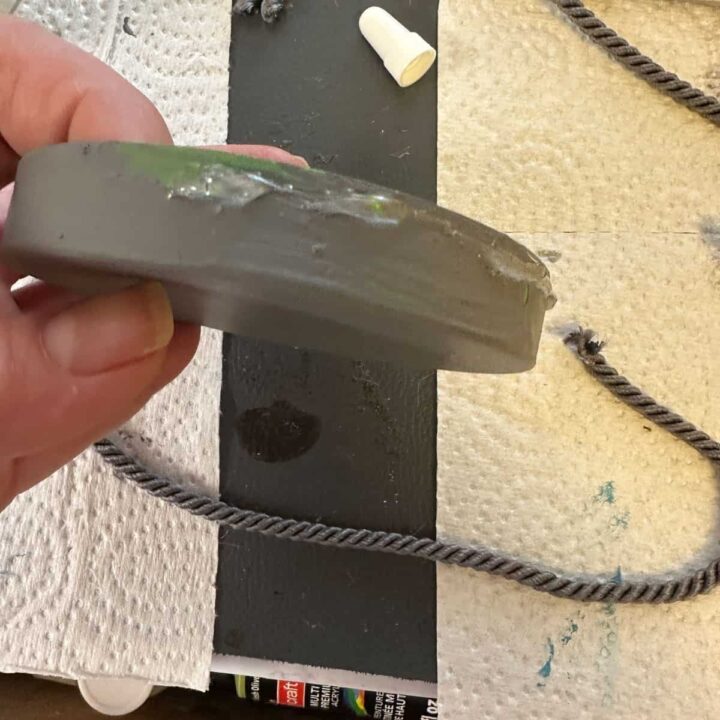
Optional: You can decorate the top or leave it green. My mistake was using a small ribbon piece, and when I added the Mod Podge (affiliate) glue, the green showed through it.
If I did it again, I would probably paint it a different color that matches the embroidery.
Reveal - Large Farmer's Fridge jar project with embroidery
And here is what the jar looks like now. What do you think? I wish I had taken my advice, turned the label (affiliate) around, and added the fabric. But I still like it and will use it.

Farmer's Fridge Jars Repurpose Idea #2 - Large Farmer's Fridge burlap and crochet Jar DIY Project
The second project utilizes a large roll of burlap and a piece of crochet that I pulled from my pillow sham, which I purchased years ago and used in another project: feel free to check it out here: (DIY Old Mason Jars to Hurricane Lamps).
Why did I do this project?
I wanted to use my large burlap roll and thought this would be perfect since the jar is about the same size as the roll I had.
How long did it take me to do this craft project?
This project took me about 4 hours to make, including drying time.
How much did it cost to do this project?
This cost was just for the large jar, approximately $15.00.
Supplies Used for this project.
There were only a limited number of supplies for this project.
- Farmer's Fridge large jar
- Cream ribbon about ½ in height (Amazon affiliate)
- Large burlap roll(Amazon (affiliate) affiliate) - enough to wrap around the jar twice.
- 1 piece of crochet lace that has a round pattern on it.
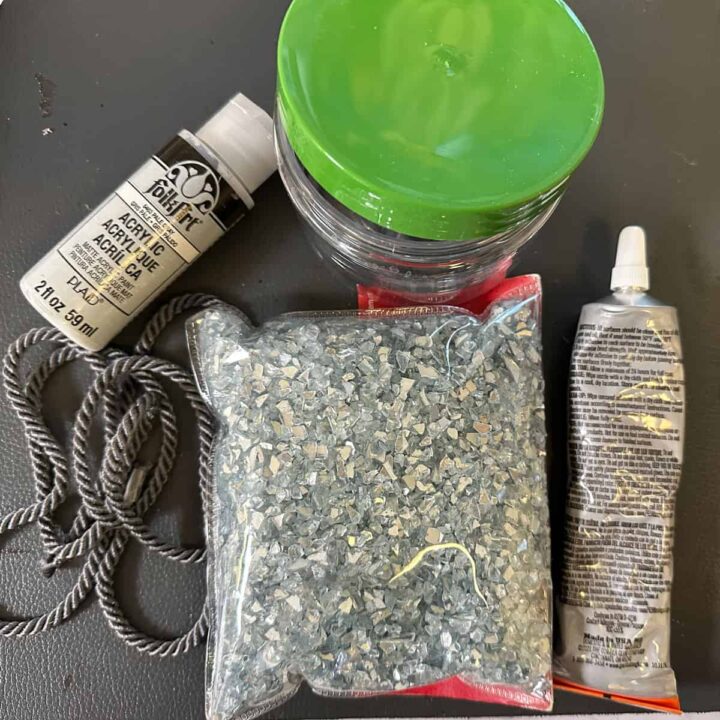
- Medium Gray Acrylic paint, I use one from FolkArt by Plaid - Medium Gray (Amazon (affiliate) Affiliate)
- Mod Podge glue
- Disposable sponge brush for crafts (Amazon (affiliate) affiliate)
- Scissors
Instructions on how to make this large Farmer's Fridge jar project.
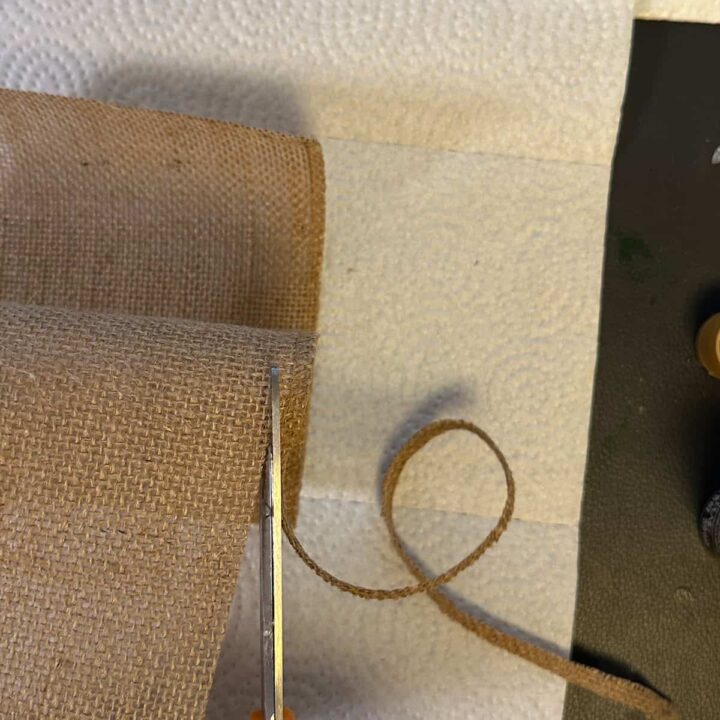
First, cut the burlap roll to the length of the jar, and then cut off the folded edges from the burlap so that it exposes the edges and frays.
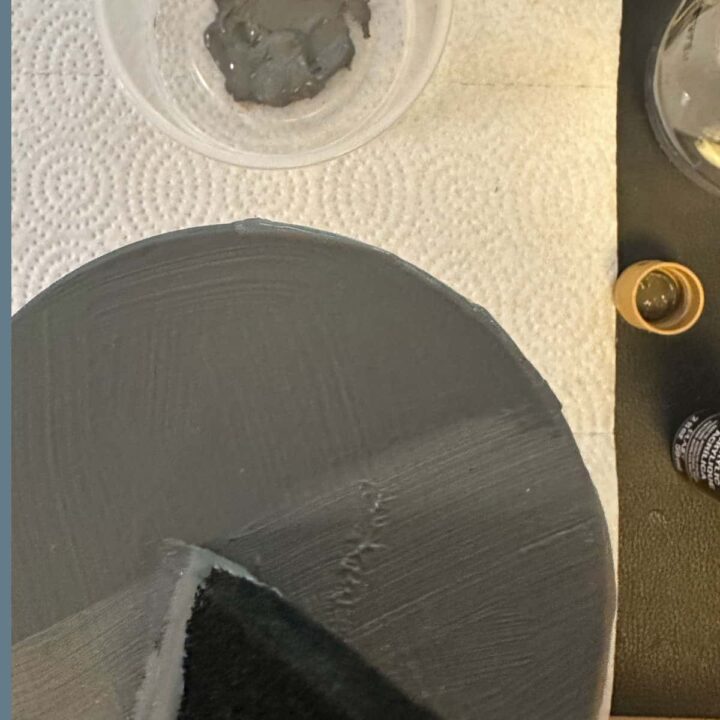
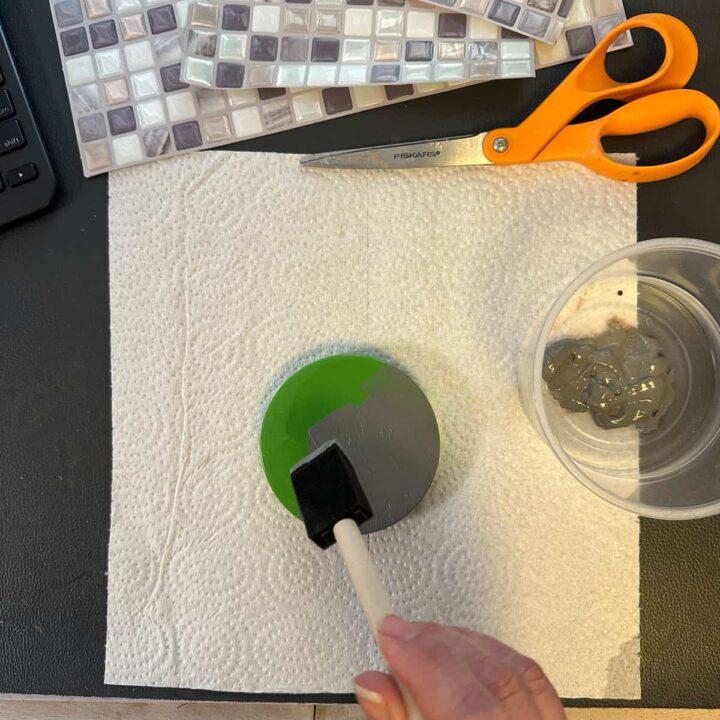
Then, paint the lid with two coats of medium gray paint using a sponge brush, and let it dry for about 1 hour between each coat.
Add plenty of Mod Podge to the jar, and start pressing the burlap's top, center, and bottom to the jar, rolling as you go. When you get past the plastic and begin to overlap with the burlap, you must add Mod Podge glue to the burlap itself. This will ensure that it adheres to both the jar and the burlap.
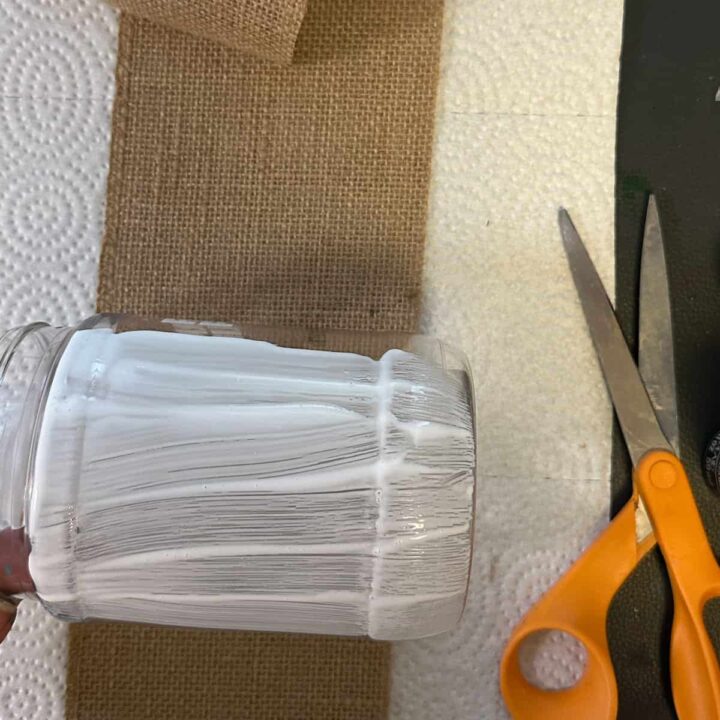
Then, finish the sides by gluing the straight edge over the burlap.

Add another layer of Mod Podge glue to the top and bottom of the jar and press down with your fingers. This will help keep it sealed and prevent it from fraying.
Lastly, using the dry lid and the crochet fabric, line up the pattern to use and cut with scissors so that the fabric hangs over the sides to the edges.
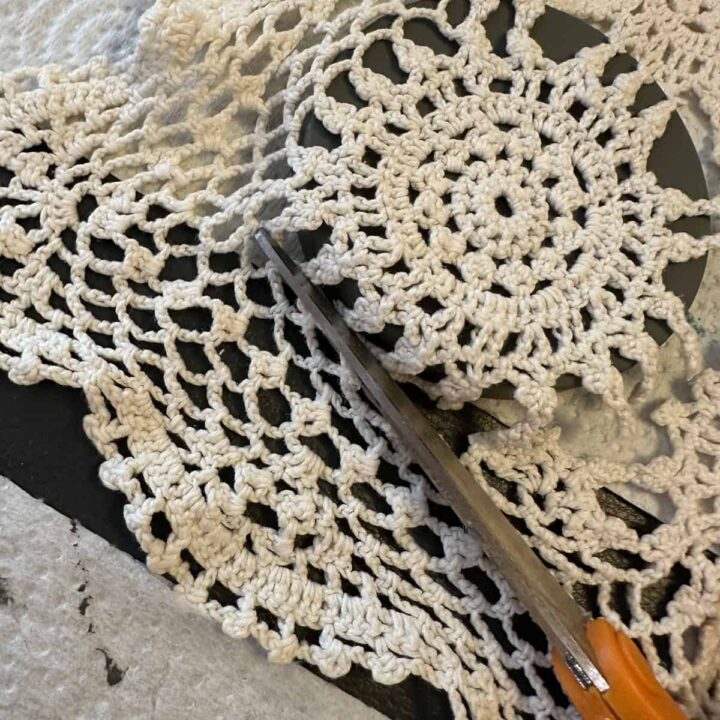
Add Mod Podge to the top and side of the painted lid. Place the crochet piece on top. Add extra glue to the sides and top of the fabric to ensure it adheres well.
Add a fabric ribbon around the jar's edges with Mod Podge. Then let it dry completely.
Reveal - Large Farmer's Fridge burlap and crochet Jar DIY Project
And, this is how it finished up. What do you think? I think it turned out great. I may not use the lid, but I love it anyway.

Farmer's Fridge Jars Repurpose Idea #3 - Small Crushed Mirror Pieces Jar
This project was fun and super easy. The third project uses crushed mirror pieces that I used in another project. I painted the lid for a pretty bling effect.
Why did I do this project?
I love the look of crushed glass pieces on objects. I used it on an upcycled table I made a few years ago, and I still have another packet of it. Here is the project for which I had extra supplies.
How long did it take me to do this craft project?
This project took me about 5 hours, including drying time, to make.
How much did it cost to do this project?
The jar itself costs about $10.00. I had already purchased the other items for different projects.
Supplies Used for this project.
There were only a limited number of supplies for this particular DIY project.
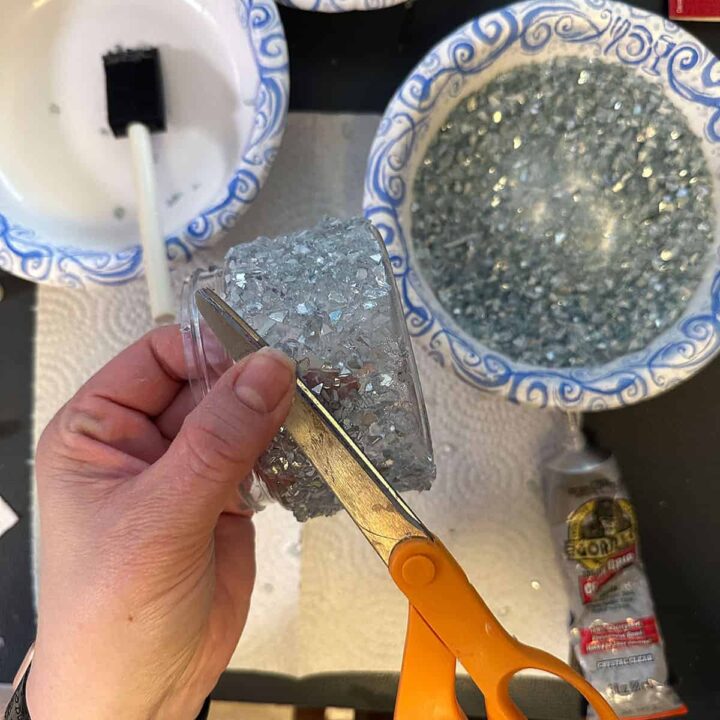
- Decorative Crushed Mirror Filler - with a blue tint - from Michaels.com
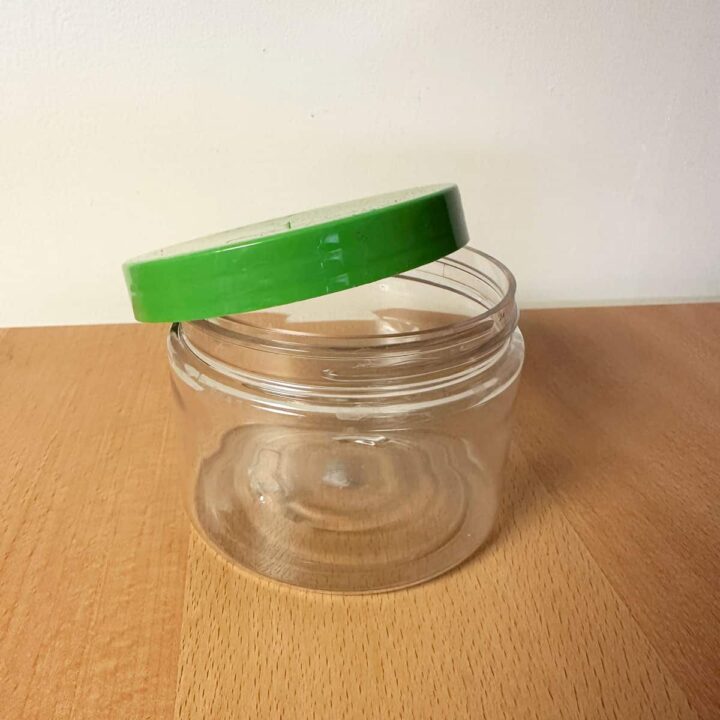
- Farmer's Fridge small jar and lid
- Pale Gray Acrylic paint, I use one from FolkArt by Plaid - Pale Gray (Amazon (affiliate) Affiliate)
- Dark Teal acrylic paint - FolkArt by Plaid (Amazon (affiliate) Affiliate)
- Turquoise glitter acrylic paint - FolkArt by Plaid (Amazon (affiliate) Affiliate)
- Disposable sponge brush for crafts (Amazon affiliate)
- Clear Gorilla Glue
- Scissors
Here is the before picture for both of the small jar projects.
Instructions on how to make the Small Farmer's Fridge jar project.
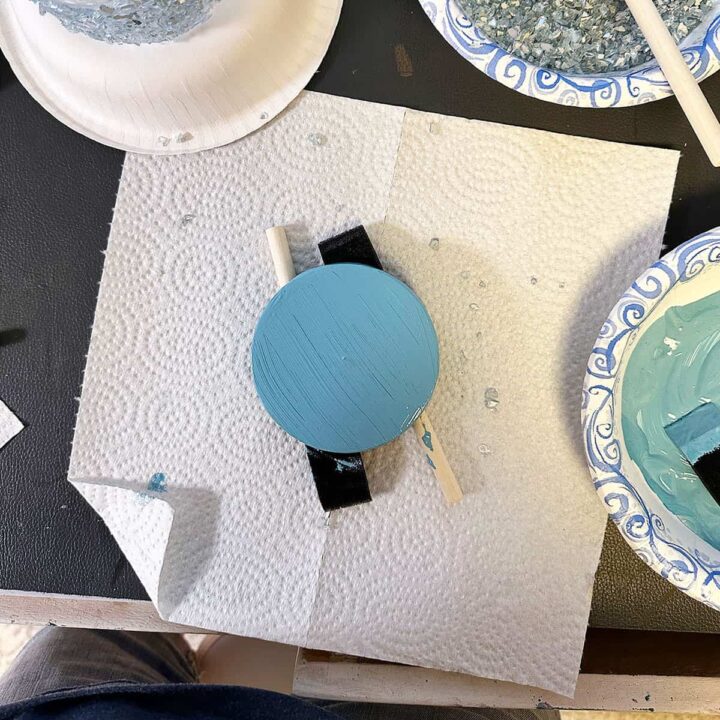
First, use a sponge brush to mix the pale gray and the dark teal in a paper bowl at a 4:1 ratio.
Then, paint the lid and let it dry completely for about 3 hours. After about 1 hour of drying the first coat, add a second coat. Raise it on sticks so the edges will not dry on your surface.
Add a layer of turquoise glitter paint to the top and let dry completely - a few hours. Raise it on sticks again to protect the edges.
Now, add the crushed blue-tinted mirror pieces to a paper bowl. Then, use a sponge brush to apply glue to the sides of the jar and roll the outside of the jar sides in the crushed blue-tinted mirror bowl. Press down using a protected piece of metal. I used the side of my scissors.
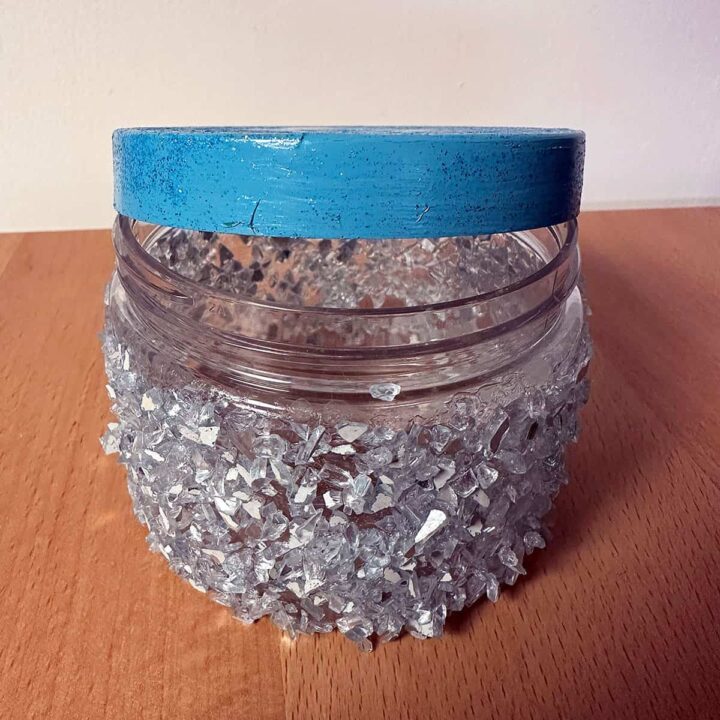
Reveal - Small Crushed Mirror Pieces Jar
And here is what it looks like now. I love it, and the mirror pieces stick nicely to the jar.
And the final DIY project is a very simple one.
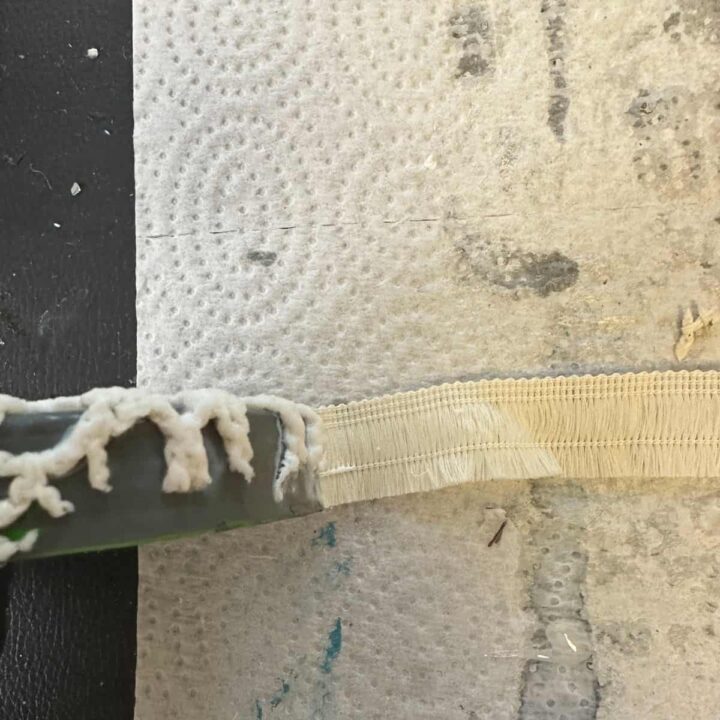
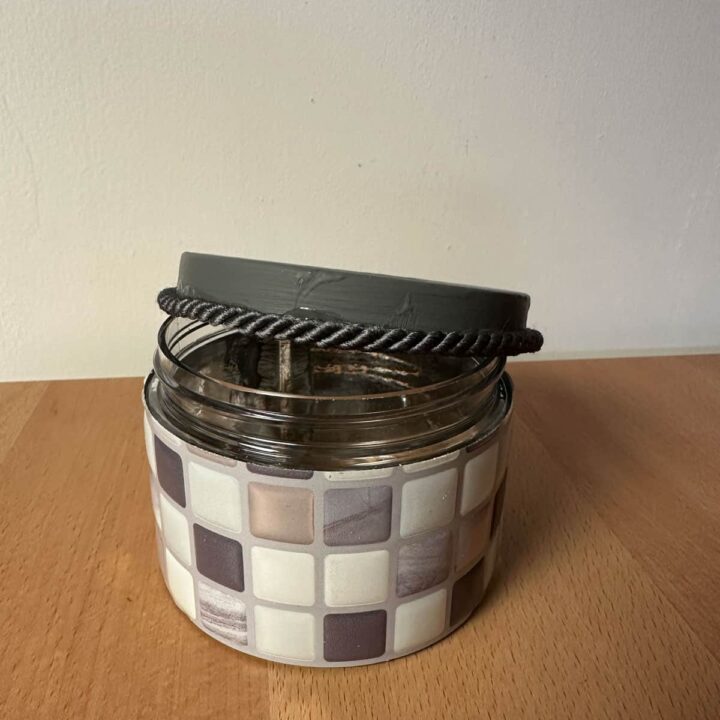
Farmer's Fridge Jars Repurpose Idea #4 - Small Farmer's Fridge Jar with vinyl sheet and rope DIY project
The last project is super easy. I had some leftover vinyl tile sheet and gray rope, so I used them for this small jar. I used supplies I had from another project: How to Upcycle an Old Bench into an Adorable Accent Table
Why did I do this project?
This project was straightforward, using just leftover pieces of my favorite supplies. I wanted to use up some supplies, so this project came out of that purpose.
How long did it take me to do this craft project?
It took me approximately 3 hours to complete this project, including the drying time for the lid.
How much did it cost to do this project?
This DIY project cost about $10.00 for the jar.
Supplies Used for this project.
There are very few supplies for this one.
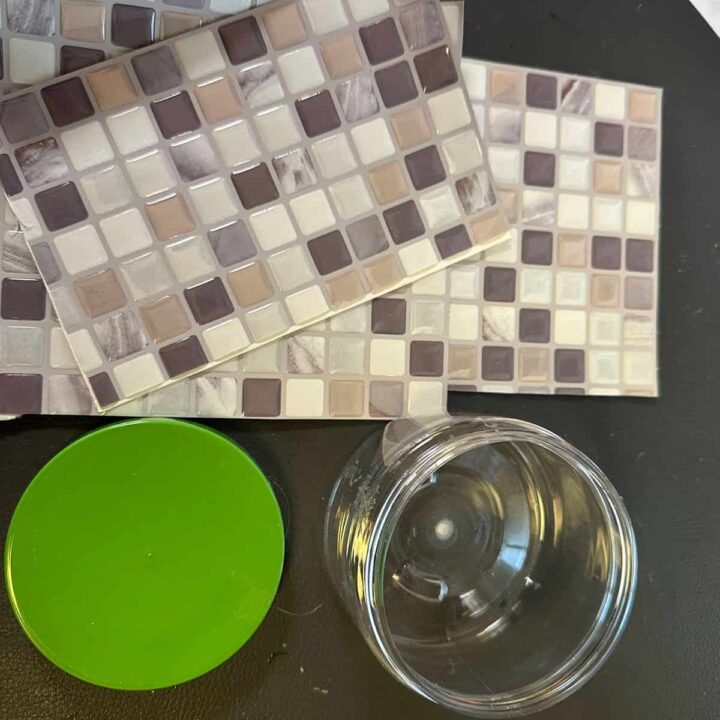
- Small Farmer's Fridge Jar - cleaned and dried
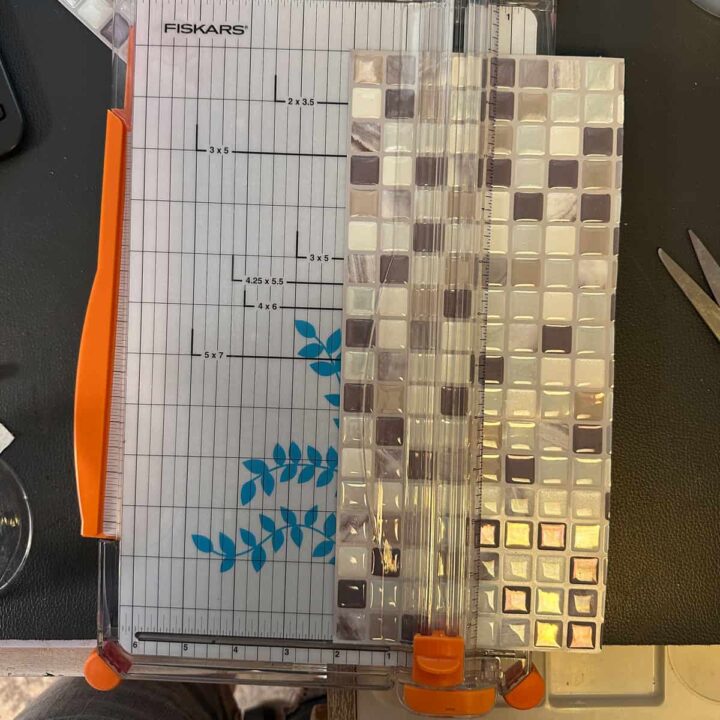
- Smart Tiles - Tile made simple. 1 package from Home Depot. The pattern is not available right now, but other patterns are available for purchase.
- Medium Gray Acrylic paint, I use one from FolkArt by Plaid - Medium Gray
- Gray rope
- Gorilla Glue
- Sponge brush
- Scissors
Instructions on how to make the Small Farmer's Fridge jar project.
First, paint the top and sides with medium gray and a sponge brush. Do two coats and let them dry for one hour between each coat. Then, set aside on sticks to dry completely.
Second, roll the vinyl around to determine how much to cut for the length and height. Mark the area to cut. Then use scissors to cut a straight line for the height and width of the vinyl sticker.
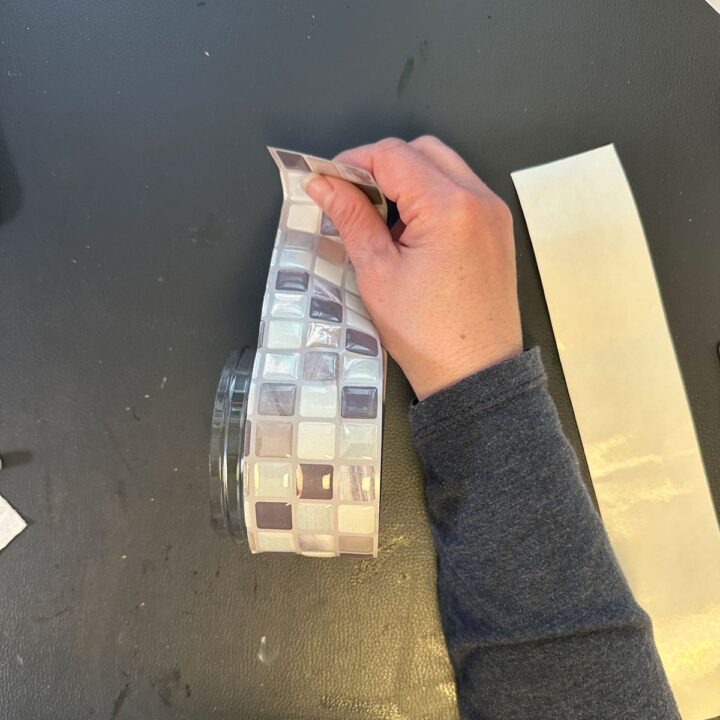
Remove the paper from the back to expose the adhesive. Then, add it to the sides of the jar, lining up the top and bottom.
Add the gray rope with Gorilla Glue around the bottom edge of the lid and let it dry.
Reveal - Small Farmer's Fridge Jar with Vinyl Sheet and Rope DIY project
And here is what the last project looked like. I think it is so cute and can easily be of use in my home.
Well, there you have it. If you can enjoy one of their Farmer's Fridge delicious meals, I hope these Farmer's Fridge Jars Repurpose Ideas inspire you to decide what to do with the large and small jars to upcycle them. Please leave a comment below with any ideas or comments. I would love to hear from you.
Visit our other DIY projects to get inspired!