This project was created during the summer. Our goal was to create a decorative faux stone wall and storage cabinet in our family room by transforming a wall into an organized stone wall. Here are the instructions on how we made this Stone Wall Transformation.
What inspired us to make this wall?
Our home was built in the 1990s and had several plain effects. Over the years, we had to add all the different accents, like crown molding, capping around windows, etc.
But our basement was very basic, with just a drop ceiling and plain drywall. So, we decided to make one wall a focal point. This wall had a small gas fireplace on it and was very plain.
We also had a sump pump in the room and wanted to hide it. To make the room more user-friendly, we added more storage above the sump pump area for the excess space.
Jump to:
Supplies:
The following are the tools (affiliate) and supplies we needed for this project:
- Stonecraft Industries: Ledgestone, Tennessee - we had to special order this product, so it took a little time to come in. $1,000.00 at the time of post.
- 27-in x 8.08-ft Galvanized Steel Stucco Netting - $18.00 at time of post.
- Fireplace wood mantel - exposed wood - we stained it. $250.00 at the time of post. (Amazon (affiliate) affiliate link)
- Hammer
- Roofing Nails
- Tar paper (roof Underlayment) for wall $77.00 (Amazon (affiliate) affiliate link)
- Trowel
- Mortar (Type S) mix and bucket $70.00 (Amazon (affiliate) affiliate link)
Making this transformation, cost us $1,415.00 and took us
Below are the instructions for making this updated stone wall transformation.
How to make this Stone Wall Transformation?
First things first, we needed to check out our poorly placed sump pump. When we converted the basement into a family room, we realized that we needed to cover the sump pump. We framed it out and added a removable lid. And we included a foam cushion to make it a seating area.
When the kids were little, they would sit on it and read. But now, we need more storage for our board games. My kids love board games, so we needed a space for them in this room.
How to make a sump pump cover:
We used 2 x 6 inches pieces of pressure-treated wood and framed them around the sump pump. We painted it and added cross beams to ensure it was sturdy when someone sat on it. Then, we added a removable top with 1 x 4 sheets of paintable wood.
We cut out the areas for the cables and got a water-powered backup sump pump installed. It worked pretty well and is very sturdy. We added pieces of wood to keep the lid secure as well.
Then, I painted the top and sides of the box and let it dry.
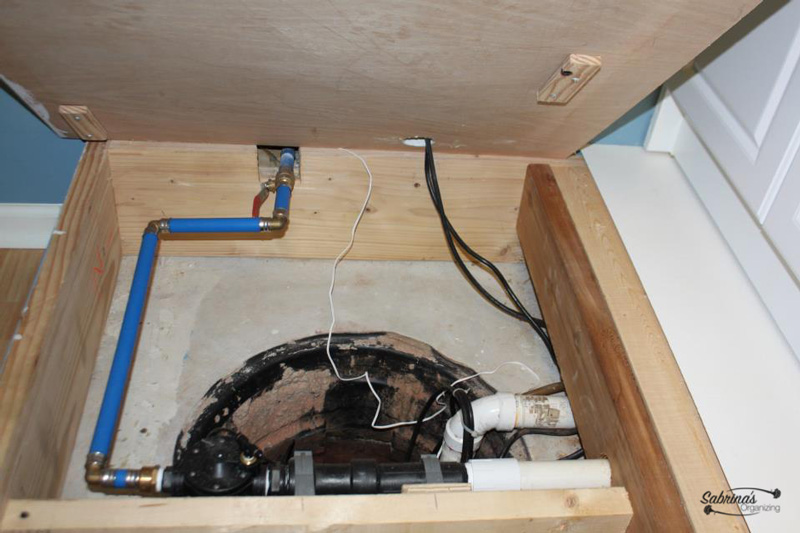
BEFORE Image of the Stone Wall Transformation:
Below is a picture of how we created the storage cabinet to hold games and photo albums. The side-painted wood was attached to the wall and top of the box lid, and the other painted wood was added to the other wall. This gave a good foundation for the shelves (affiliate) we added to the top of the sink cabinet and the middle of the unit.
Caulking is key (affiliate) for this step to make a clean, uniform edge.
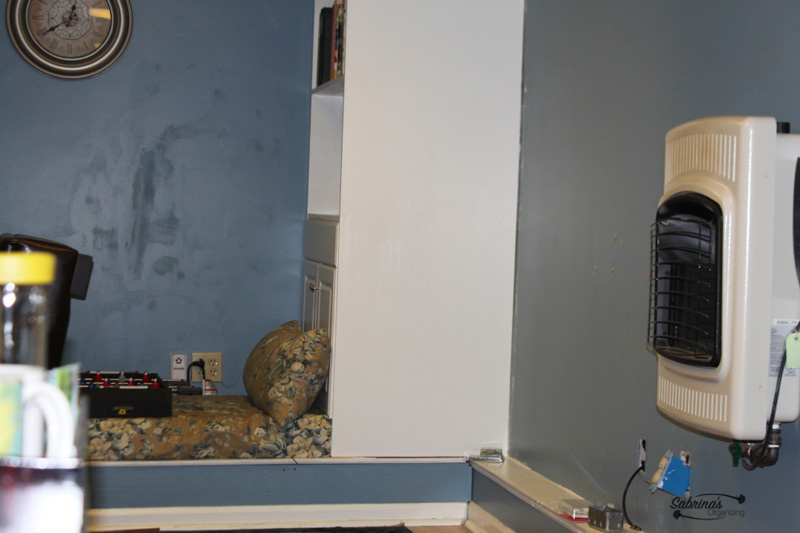
How to Make a Built-in Storage Cabinet
We found a clearance sink cabinet at the nearby home improvement store that had cabinet doors, built a cabinet, and built shelving (affiliate) around it. This cabinet would give me enough space to store my photo albums, and it had a hole in the back so I could access the sump pump piping if needed.
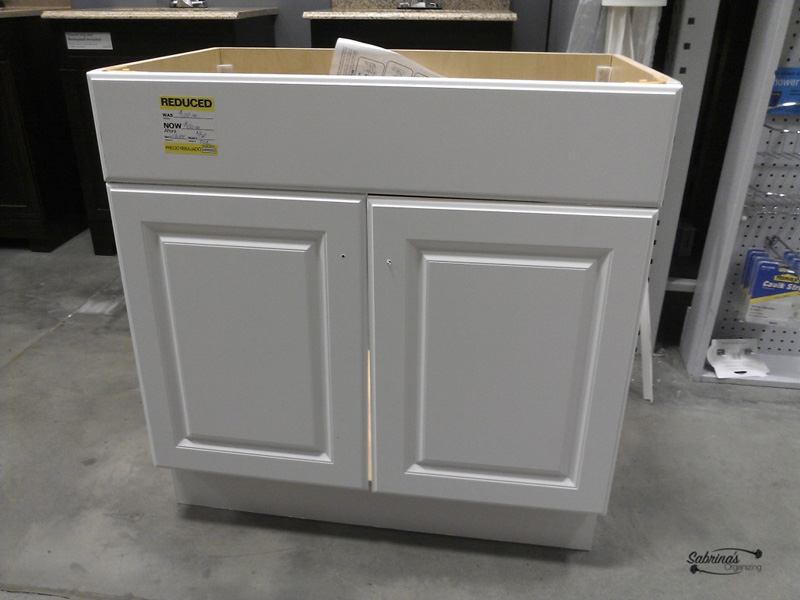
Made Curtains out of one installed curtain
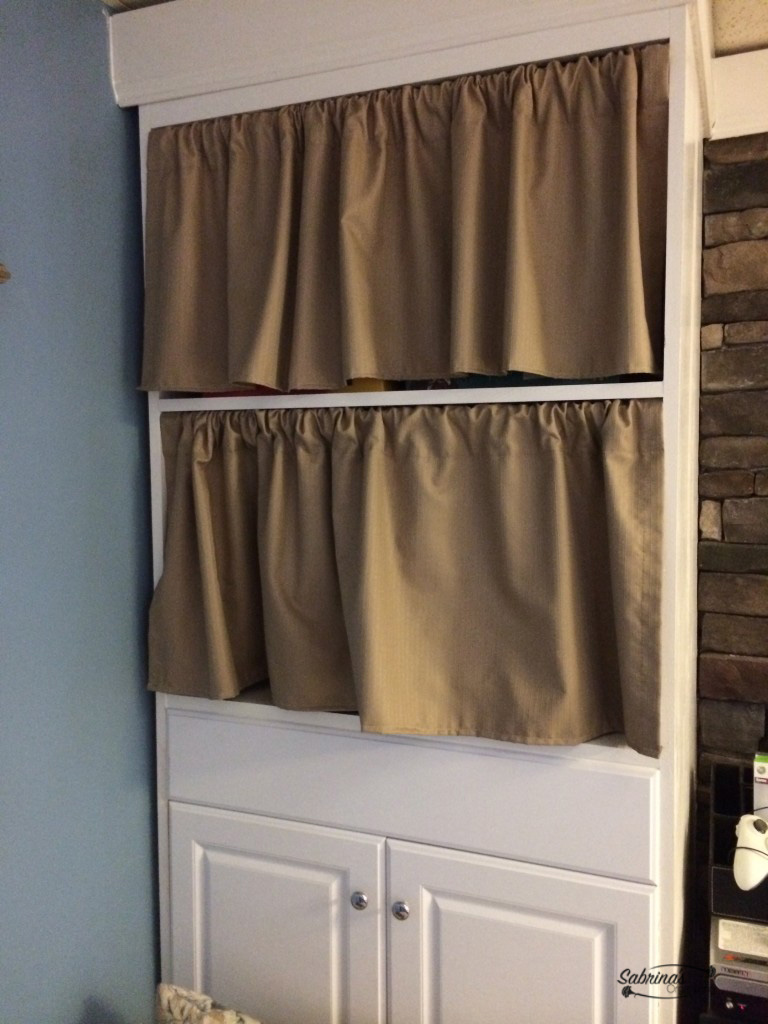
I cut one insulated curtain and made two curtains. To add to the shelves (affiliate), I used a pressure rod on each shelf to cover these shelves (affiliate). What do you think? I am so glad we covered it because you could easily see what was inside of it when you sat on the sofa. Yuck.
Then, we started with the faux wall. We bought StoneCraft 9 Sq. Ft. Tennessee Ledgestone Flats. We got it delivered. They were pretty heavy. I think we bought about six boxes (affiliate). We loved the stone because we did not have to mortar the joints.
How to Create a Faux Stone Wall
Stain the Mantel
We sanded, stained, and polyurethaned the fireplace mantel before starting this process in another room and let it dry completely.
Prepped the wall
Then we cleared out space and prepped the wall. We used roofing nails to wrap the wall with tar paper(felt roof underlayment).
To add the mantel to the wall, we installed the French cleat and screwed it into the studs.
Add chicken wire around the mantel and heater.
We add chicken wire around the mantel and heater to cover the entire area. We did this so the mantel was flush to the wall.
Add mortar to the tar paper(felt roof underlayment).
The next step was to create a texture with the mortar (Type S) to adhere the stone to the wall. I forgot to take a picture of these processes. Let's just say it was messy, really messy. If you plan on doing this, cover everything with heavy-duty plastic. It then took 3 days to cure the entire wall.
Set up the stones to minimize gaps.
In the meantime, we laid out the stone so it would minimize the gaps. This method required a little creativity to reduce the gaps. That was my department. My husband was not interested at all in this part of the process. We measured the wall, used the extra tar paper at the same length as the wall, and created the rows for the wall on the floor.
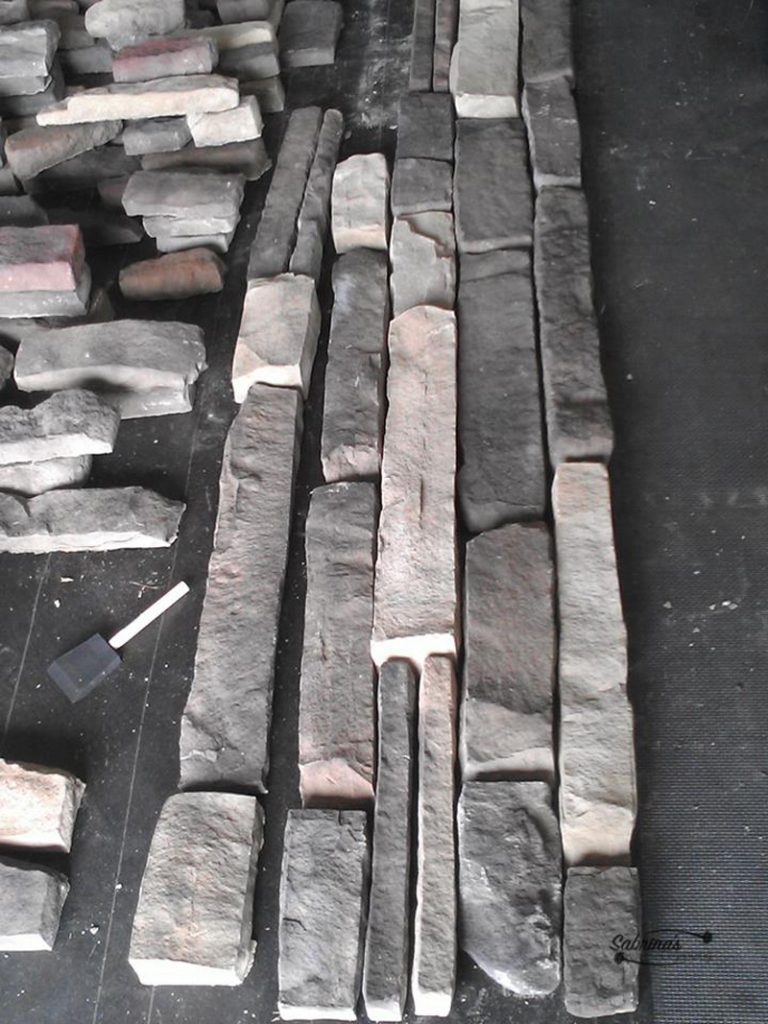
I brought down the stones two to three rows at a time using the boxes (affiliate) they came in. We laid out the rows near the wall on more tar paper to ensure they were in the right order.
Mix the mortar and start attaching the stones to the wall.
Then, we started mixing the mortar, adding it to the back of the stone, and adhering it to the wall.
Day 1 Activities:
The photo below is the end of day one. We started from the bottom and worked our way up the wall.
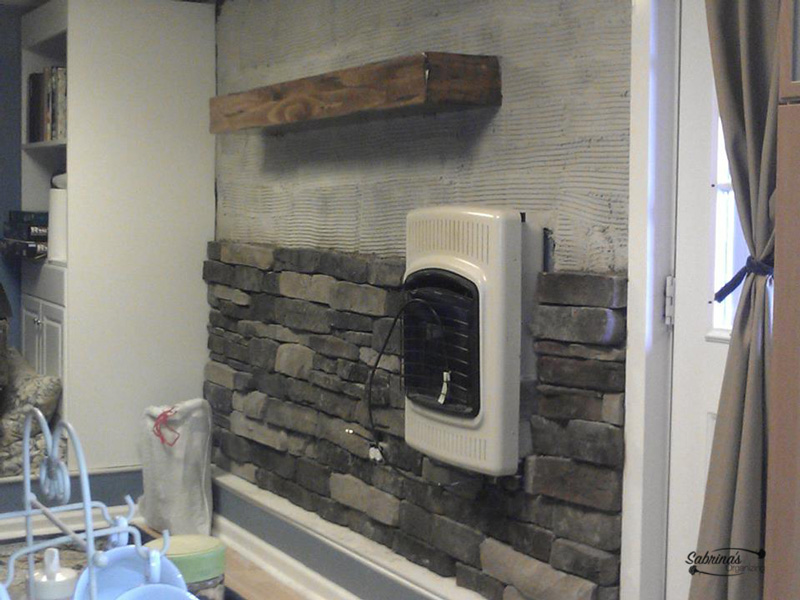
Day 2 activities:
Here is the end of day two. And we added stone right up against the mantel.
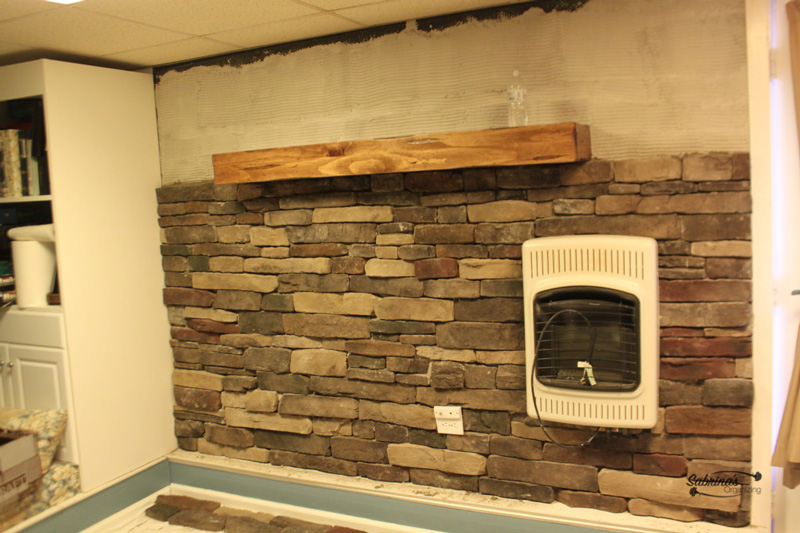
Day 3 activities:
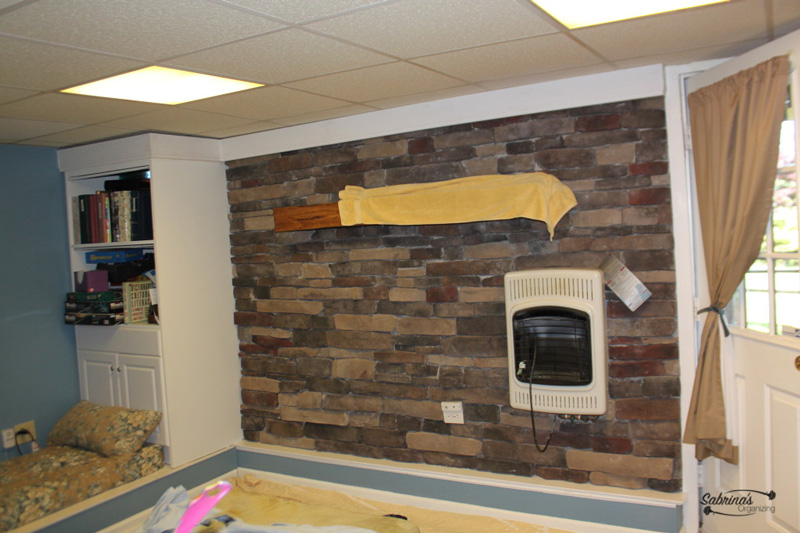
This photo is from the end of day three. We finished up the stone above the mantel and let it dry completely. We left a gap at the top to install the molding.
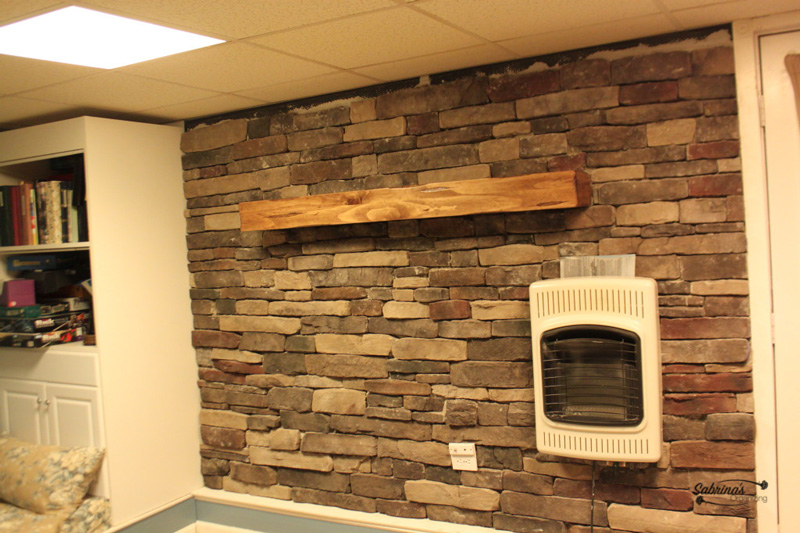
Day 4 activities:
This photo is from the end of day four. We put up the molding around the top to finish off the top part near the drop ceiling and had it continue around the cabinet so it would look seamless.
I used a 5-inch baseboard strip molding and added it to the top of the wall where we didn't add the stone.
To bring the molding in front of the stone, we added 1 x 2 strips of wood and a few small pieces of wood to bring it out further. Then, attached the molding to the wood pieces to create a clean edge that didn't need to be attached to the drop ceiling.
Reveal Image:
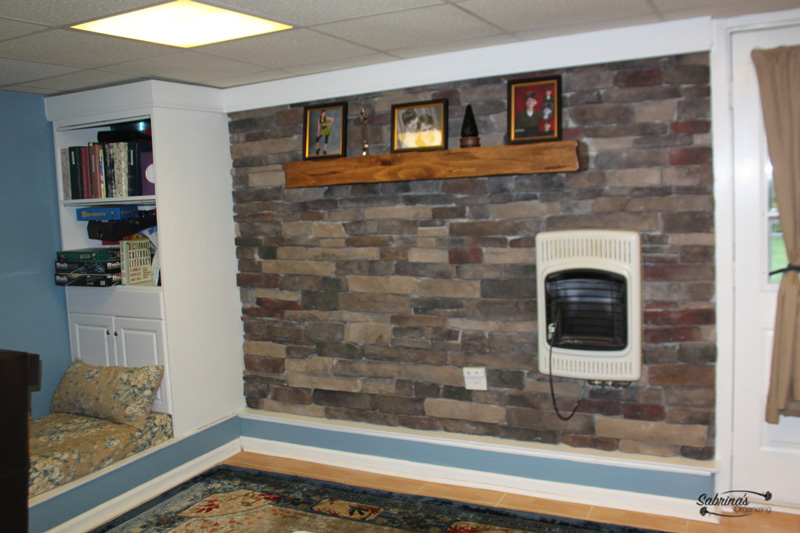
Here is the final product after cleanup. No mortar was needed between the stones. What do you think?
Tips:
Below are some additional tips you will need to know when doing this project.
- Be sure to read through the instructions a few times. There are many steps to this project, and it did help us understand what we were getting ourselves into before starting.
- Be sure to cover everything. The mortar will make a mess.
- When ordering the stone, add an additional 10 % overage to ensure you mix and match the sizes to minimize the spacing. Some stones could be broken too.
- A tile saw (affiliate) may be handy. You may want a tile saw (affiliate) to help you cut any pieces for the sides.
Check out our other post, which discusses how we filled in the hole after we removed the heater and installed a split unit.
Please note that the links above are affiliate links through Amazon (affiliate). At no additional cost to you, I will receive affiliate fees if you click through and decide to make a purchase.
Visit these posts to help you with your faux stone wall.
How to Apply a Faux-Stone Treatment to a Wall
Visit our other DIY Room Makeover Posts:



Leave a Reply