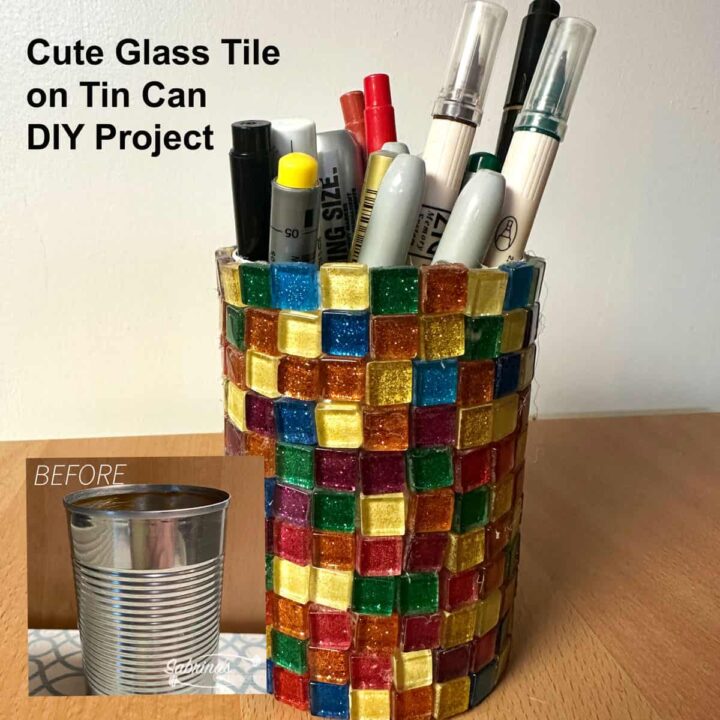
Glass tiles are so cute and can be attached to pretty much anything to make it feel pretty and upscale. But, how about tin cans or soup cans? Well, I am here to say that you can even make soup cans and tin cans look attractive. Check out my Cute Glass Tile on Tin Can DIY project post below for inspiration.
Note: Pick glass tiles that are small enough that you do not have to worry about the curved can. I picked tiles that were ⅜ inches so it would be easier to place on a round surface.
Jump to:
- What inspired me to do this Cute Glass Tile on Tin Can DIY Project?
- What supplies did I use to make this Cute Glass Tile on a tin can DIY Project?
- How much did it cost to make this Cute Glass Tile on a tin can DIY Project?
- How long did it take to make this project?
- How did I make this project?
- The Big Reveal
What inspired me to do this Cute Glass Tile on Tin Can DIY Project?
The repurposing of tin cans has been pretty important to me. You see, I am a home cook and love to share recipes, but I don't love to have to recycle cute jars or cans all the time. So, when I found these cute glass tiles on clearance, I had to buy them and try to upcycle a tin can.
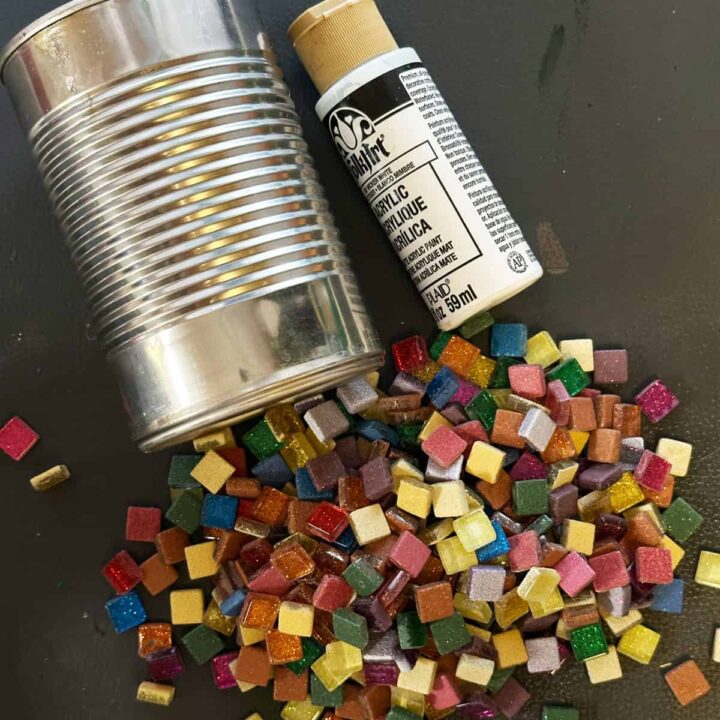
What supplies did I use to make this Cute Glass Tile on a tin can DIY Project?
It's a pretty easy supply list.
- 15 oz tin can cleaned and removed, labeled, and let dry
- White acrylic paint by Folkart
- Paintbrush for acrylic paints
- ⅜ inch square glass title, colored bag or two
- A hot glue gun (affiliate) on low setting and hot glue sticks
Please note these are affiliate links through Amazon (affiliate) and at no additional cost to you, I will earn an affiliate commission if you decide to make a purchase.
How much did it cost to make this Cute Glass Tile on a tin can DIY Project?
This project cost me about $2.00 since I bought the glass tile on clearance and had the can, paint, and glue gun (affiliate) supplies.
How long did it take to make this project?
It took me about 3 hours total, including dry time.
How did I make this project?
First, I cleaned the tin can and removed the label (affiliate), and let it dry completely. Then, I painted it white with a paintbrush (affiliate) and did two coats to minimize streaking. The tiles I used were a little see-through, so I wanted the title color to pop instead of picking up the background silver color. This picture shows one coat of paint on the can.

Then I lined up the titles to ensure they were flush with the top and bottom. It turns out my can will need 11 glass tiles per row.
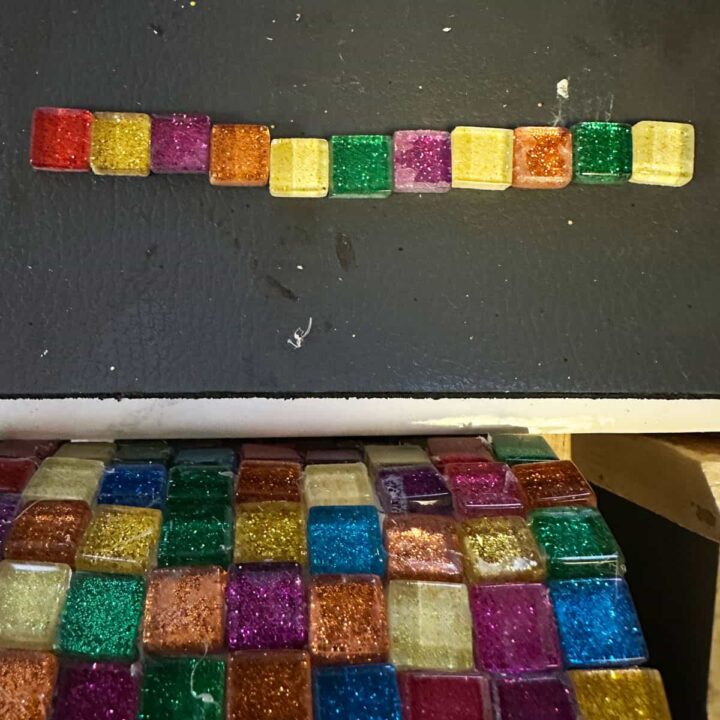
Now, using the inside of a drawer (filled with acrylic paint), I laid the can on its side and ran a bead of hot glue from left to right as I placed each piece of glass tile on the tin can. Pausing at the end of each row to set up the next row of glass tiles on the table.

The Big Reveal
This Cute Glass Tile on Tin Can DIY Project looks lovely. I am probably going to make it again. This time, I will make sure the tiles are a little closer together and have straighter edges.
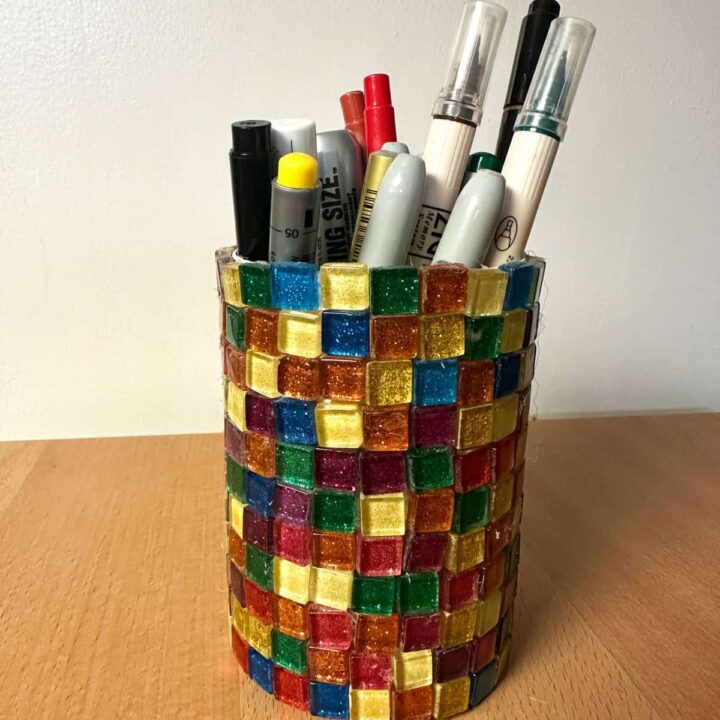
I hope this DIY project inspires you to try something new to upcycle your tin can. Please leave a comment and share if you think people would like to see how I made this project!
Recycling Tin Cans / Soup Cans!


Mary says
I think this is something that I can do!!!! I might try punching hole around it and putting a flameless candle inside....will let you know how it turns out!!
Sabrina Quairoli says
That's great, Mary! Thanks for stopping by and commenting. I really appreciate it.