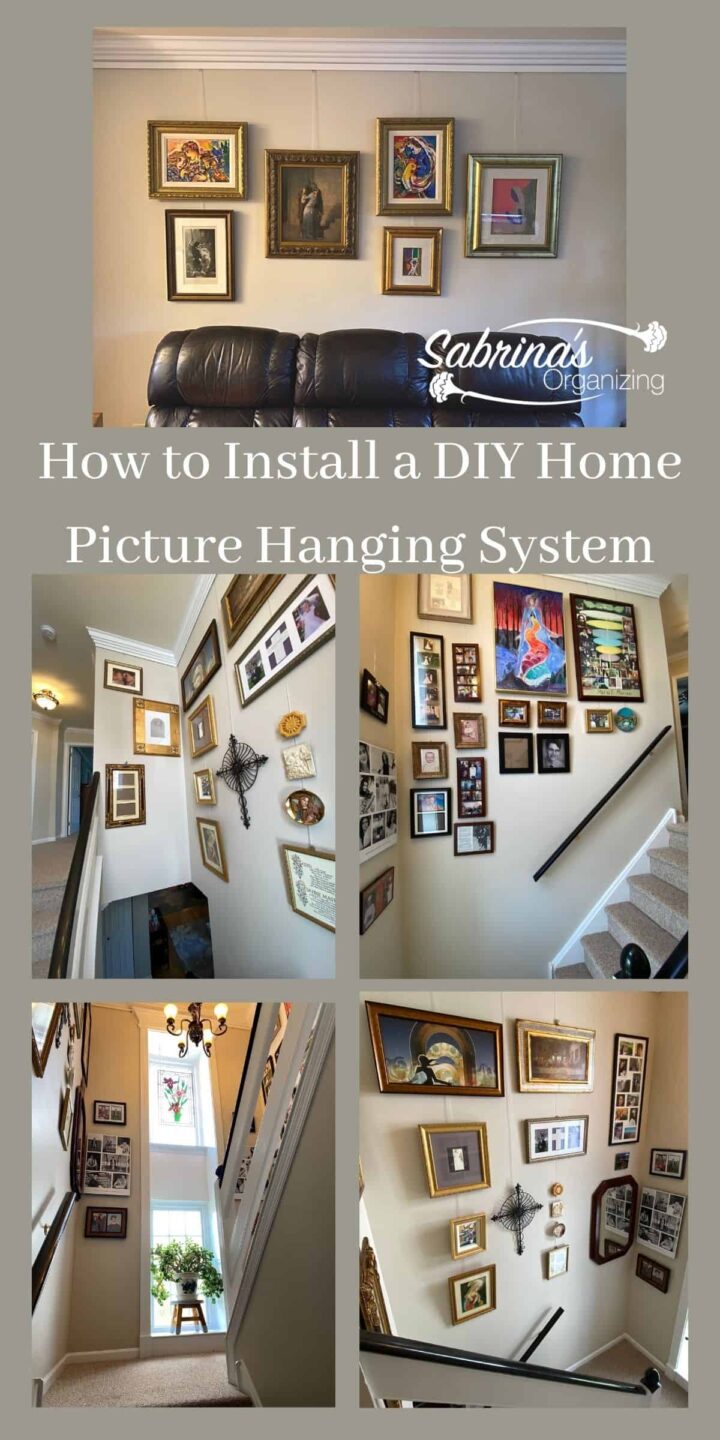
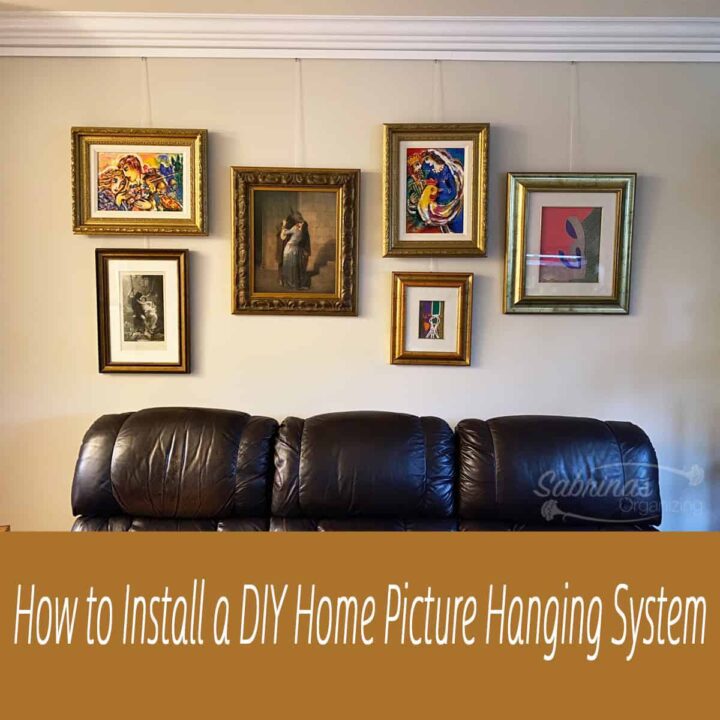
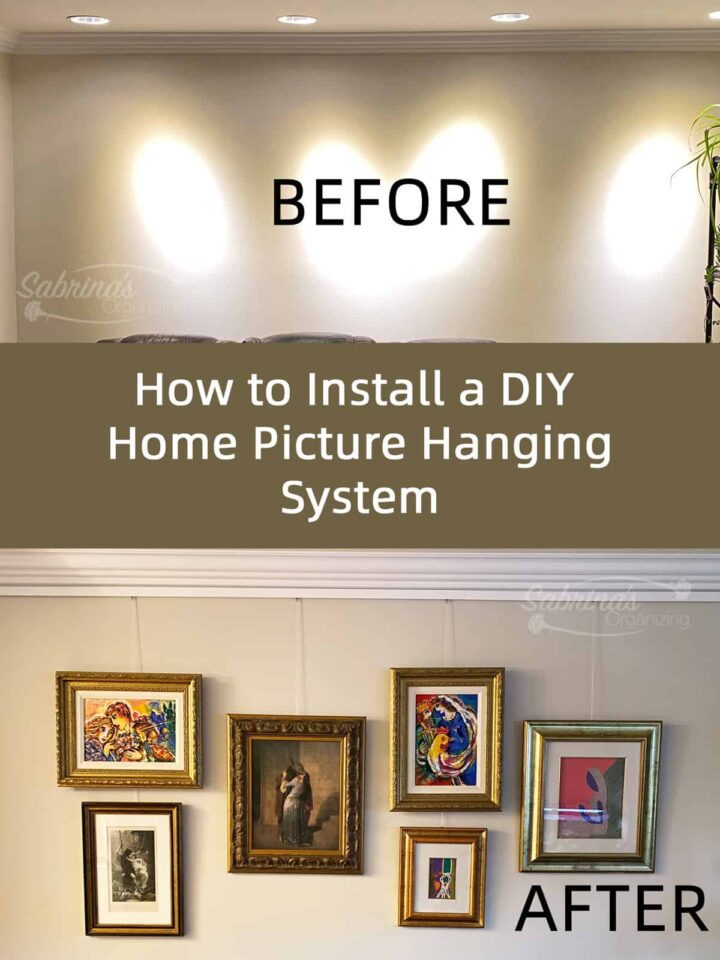
If you have ever been to an art display in an art gallery, the art is hanging from cables so as not to damage the walls. These gallery walls are super movable and come in different cable lengths. Today, I will share a picture hanging system we recently did in our home to hang our picture frames in the living room and stairway.
Note: This is NOT a PAID Sponsorship. We just wanted to try the products.
Jump to:
- Why did we decide to use a picture hanging system?
- What supplies did you need for this DIY Home Picture Hanging System by STAS?
- How much did it cost to buy STAS Picture Hanging System?
- How long did it take to install the STAS Picture Hanging System?
- How did you Install the STAS Picture Hanging System?
- REVEAL:
- Tips on how to install this STAS Picture Hanging System
Why did we decide to use a picture hanging system?
We had professional painters paint the entire first floor and the hallway leading to the second floor. After looking at the empty walls, my husband didn't want to mark them with all the nails, but I still wanted to have the collages I had before on the wall. So this was a hanging solution to avoid ugly holes or wall damage. It was a win-win for both of us!
Visit our other posts about how to hang collage artwork. HOW TO MAKE A FABULOUS PHOTO WALL COLLAGE AND HOW TO ARRANGE PHOTOS ON A TWO-STORY STAIRCASE WALL
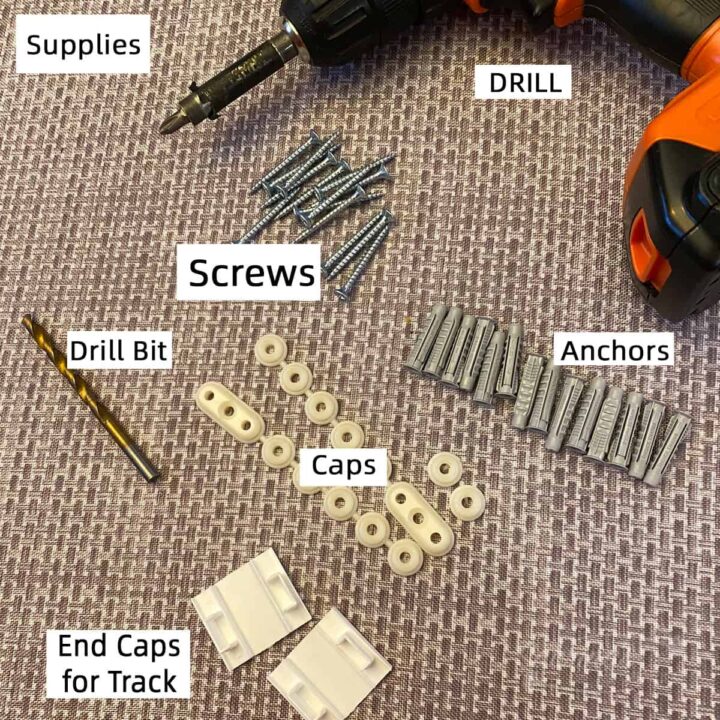
What supplies did you need for this DIY Home Picture Hanging System by STAS?
Since we were doing two areas, we first had to measure out the walls. The living room wall was 13 feet 2 inches long. The two-story (affiliate) hallways were 13 feet long on one side, then 6 feet on another side where the bump-out window was, and 7 feet 8 inches long on the other wall going up the steps. Above the lower steps wall was an additional 3 feet 2 inches. We wanted to have pictures around the staircase. Full Disclosure: AFFILIATE LINKS FROM AMAZON (affiliate) - Happy shopping.
- 4- STAS Cliprail pro + installation kit SKU BW96000 White length: 78.75
- 3- STAS cliprail pro/multirail corner caps SKU VD10400 White
- 6 - For loads up to 33 lbs: clear (perlon) cord with cobra end + STAS zipper hook SKU BW18000 length 59 inches - for the standard 8-foot walls
- 13 - For loads up to 33 lbs: clear (perlon) cord with cobra end + STAS zipper hook SKU BW20000 length 118 inches - for the tall walls
- 16 - STAS zipper SKU HA30501 - hooks
- 18 - STAS Smarspring SKU HA30900 - hooks
- Drill and .24 inch drill bit
- Saw
- Level
- Screwdriver
- Tape measure
- Pencil
- Hammer
- Picture frames
- Artwork
- Plates
How much did it cost to buy STAS Picture Hanging System?
This hanging system costs $512.09 - we ordered it directly from STAS. This system displays two different areas: my living room wall and the four two-story (affiliate) walls. If you decide you want to do this system on one wall, the cost would probably be about $150.00
How long did it take to install the STAS Picture Hanging System?
It took us 10 hours, spread over three days, to install the system. It took us extra long because of the two-story (affiliate) walls. The Living Room wall track system took about 1-2 hours.
How did you Install the STAS Picture Hanging System?
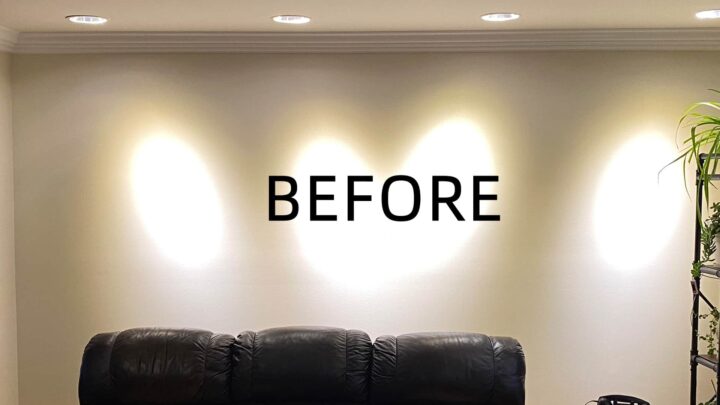
BEFORE Image
First, we cleared the area, leaving nothing behind. That was pretty easy to do since we were getting the room painted. Here is what the wall looked like before installing this picture-hanging system.
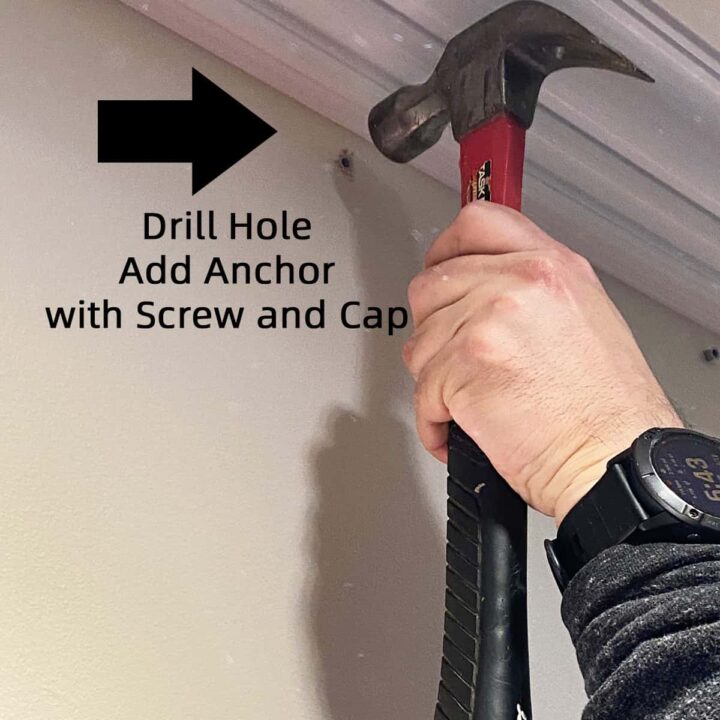
Step 1: Drill holes and add anchors and screws/caps.
Now it was time to drill (affiliate) holes. We measured ¾ inches down from the molding. And drilled about 12 inches apart from one another. Feel free to check the instructions on their website. Make sure you keep it level when making the holes. This will make it easier when you have to add the track later. Add the anchor to the holes, and then drill (affiliate) the screw with the cap into it. If you hit a stud, use the screw and cap. If you connect two tracks, make sure you use the oblong cap with the screw. Use the hammer to drive the anchor into the hole if it gets stuck.
The staircase system they were made differently because the system was intended for more weight. Depending on the weight system, you will need to follow those instructions.
IMPORTANT TIP: As you measure the length of the track, when you have to add another track, you will need to use the oblong caps with the screws instead of the round cap. The oblong cap will connect the two ends.
Step 2: Add the track system to the hooks (caps)
We added the caps at the end and clicked the tracks into place. Using the oblong caps between each track will keep the two tracks together. Snug them up next to each other so there's no gap.
Step 3: Install the cables.
Hook the cables to the track and let them hang down. Space them out according to your preference.
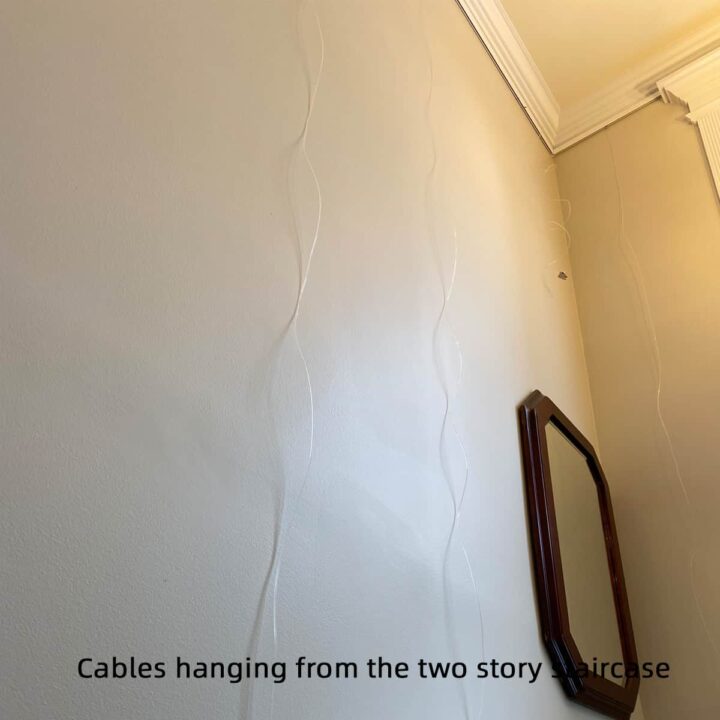
Step 4: Decide on the layout of the artwork.
We laid the artwork on the bed and determined the order in which we wanted to place them, ensuring that we took into account their weight and the placement of each next to the other. I then adjusted the cables so that they were spaced correctly. Note: We did this for every wall. The image above shows one side of the two-story (affiliate) wall.
Step 5: Straight the cables and add the clips.
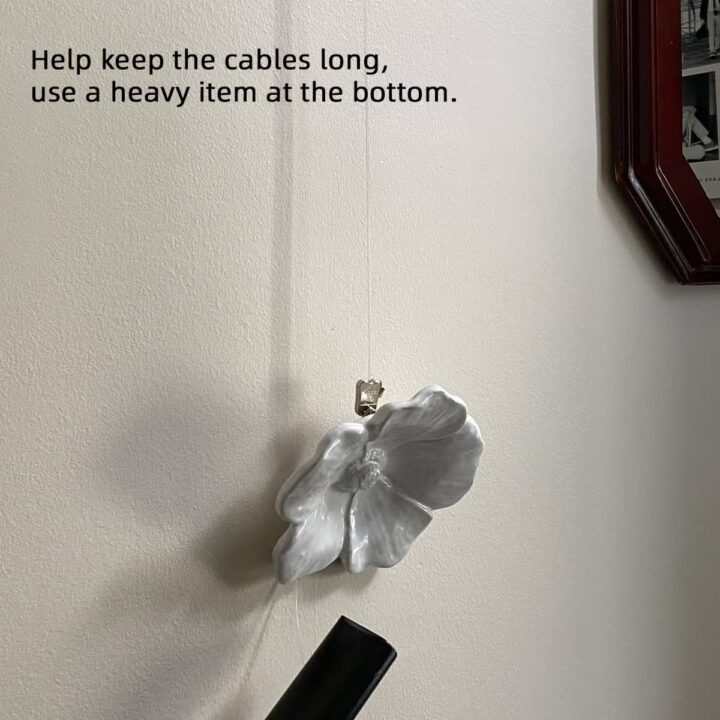
We found that the transparent plastic cables would curl up to keep them tight when sliding the clips along the cable; we used a weighted artwork we had previously on our wall. It worked wonderfully. If you want to wait a day, this helps keep the cables from being so curly.
Step 6: Now, we have added the artwork.
First, we worked the clips up the cable and then spaced them out throughout their length. We then made adjustments to make sure they were spaced correctly and leveled. Be patient with this process, as you will be moving several pieces of artwork on one cable. And, if you are on a ladder like I was, it was pretty stressful.
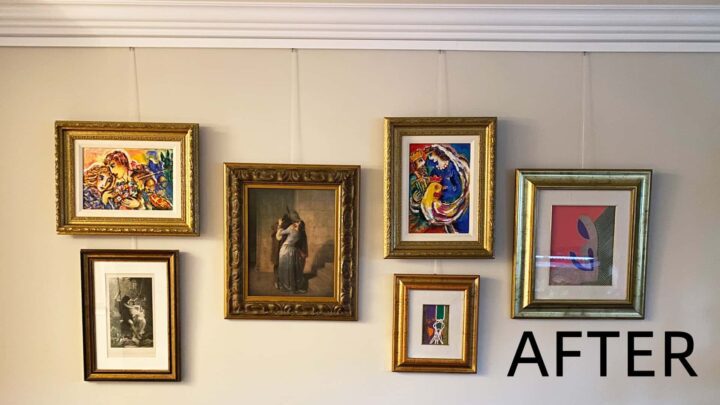
REVEAL:
And here is the after photo of the living room track system. What do you think? We love it. We could also rearrange the pictures to ensure they were positioned where we wanted them. I also added some artwork, photos of family members, and other symbols. My wall themes are still family and couples, faith, and family walls.
Note: You can use rubber feet to prevent the picture frames from swaying back and forth if desired.
The picture below shows the two-story (affiliate) staircase walls. It was pretty dangerous, so please be sure you have the right ladders and equipment to keep you safe (affiliate) when climbing this high.
Tips on how to install this STAS Picture Hanging System
- The transparent cable we used was curling up a lot, so to deal with this, we hooked to the bottom a decor hanging plate we had in the living room before we took everything down. It worked well to keep the cables straight and easy to work with.
- Determine what you want at the top, middle, and bottom first before hanging up the cables. We used a large bed to lay out the artwork to see how it would look before hanging it up. Place the hooks about where you need them, and then hang up the cable on the track.
- If you decide to go wall to wall with your track, be sure to cap the ends BEFORE you add the track. You will NOT be able to do that after the track is installed.
- If the picture hangs too far forward, tighten the cable or move up the hooks that hold the cables on the back of the picture frame.
- If you are going around a corner, start from the corner clip and work your way out from the corners. This made it easier to install the track when you were working away from the corners.
Well, there you have it. I hope this gives you some tips and instructions on installing this system. Feel free to watch our video here and subscribe to the channel on YouTube.
Please note these are affiliate links through Amazon (affiliate), and at no additional cost to you, I will earn an affiliate commission if you click through and decide to make a purchase.
Visit our other DIY Wall Art Project posts!

Leave a Reply