When buying your first home, you may not have all the pictures or artwork for your house. Finding the right photos to display could take years or decades. Or, you may give up altogether and not put anything on your walls. The best time to arrange pictures and artwork was when we installed crown molding in our main living areas.
Jump to:
I placed all the prints and artwork together, and surprisingly enough, we found a theme for each pile of artwork and pictures. With my parents' passing and our collection of photographs, we had amassed many prints with a faith and family theme Since we couldn't fit both of them on one wall, we decided to separate them on the two walls Our two-story (affiliate) wall space gave us enough room to spread out the prints and allow some negative space and the color of the wall to come through.
Benefits of creating a picture frame theme wall
First, let me explain the benefits of arranging your photos on the wall.
- The artwork is off the floor and gives purpose to a wall.
- It allows you to see all your favorite pieces in one place.
- The collection gives you ideas on what other items you can add to the wall that you may have in another room.
Are you ready to take action? Decide the theme, and let's begin.
What themes to use when arranging photos
If you want to group your pictures by theme and don't know what theme to use, below are examples of themes I used to arrange photos in my home.
A faith wall - this arrangement would include all your religious pieces.
A wedding wall - this collection would hold all the wedding photos of your ancestors over the years.
A family wall - An arrangement of all the family photos you collected over the years.
A flower wall - If you love pictures of flowers or nature, you can make a wall with all that artwork.
A reunion wall - This wall could hold all the pictures from your family reunions.
Your favorite hobby - A collection of your favorite artwork you created yourself or a family member.
Extended family wall - A wall that shares family photos of members in other countries.
Determining a theme for your wall will help you decide what to put on it.
You may wonder why you created a theme. This has many benefits, unlike slapping any old artwork or picture frame on the wall.
Now that you have decided on a theme for your wall, gather all the framed pictures and artwork related to that theme. Since the wall may be large, you can use sheets of paper cut out to the size of each print and tape them to the wall. This step is handy for seeing how all the photographs would lay out in the process. Visit my living room collection post to see a visual of this tip.
After you do this, it is time to add the prints to the wall. Remove the paper behind the wall one by one, add the picture hook, and print.
Walla, you are finished! What do you think of your customized picture wall? Please share your results in the comments below.
Two-Story Wall Reveal
I mentioned I did this with my walls; the images below are how we created our collection of artwork and picture frames for our walls.
My Faith Wall
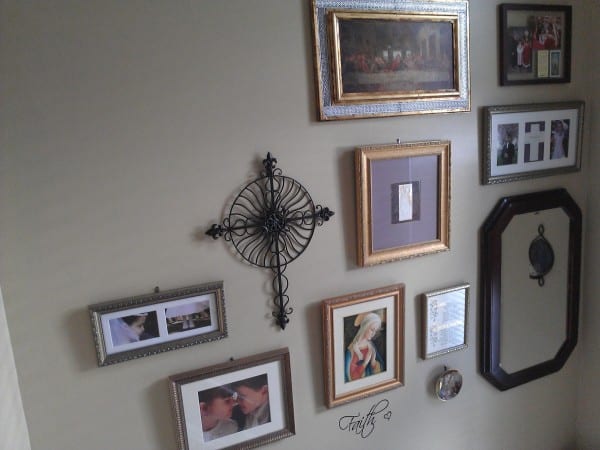
Here is my Faith wall. It is on the west wall of my staircase. I found the cross at a discount store, and the word "Faith" came from another quote (affiliate) pack, Faith, Hope, Love, from a rub-on wall sticker.
My Family Wall
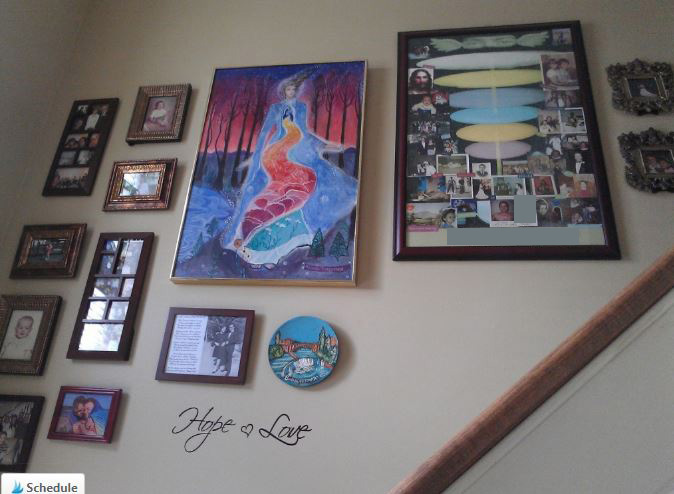
The photo above is what I call my family wall. It's on the east wall of my staircase. We had large pictures of my parents and wanted to surround them with all our other photos. I love it!
Hanging the photos and prints took time, so expect it to take a good day or so to do all of these steps. If you have a high wall, you may need a ladder and a helper to carry the artwork. Our project took a total of 3 hours.
Tips for hanging picture frame collections:
If you decide to gather your photos together, a common theme will emerge. Determine that theme and what wall will be able to hold the collection, and go with it. When I gathered all my prints together, I realized I liked the cherry and gold frames, relationship prints, colorful prints, and plates, as you can tell.
If your frames do not work well together, grab spray paint and change the frame color to make it work better. You can buy several sets of frames.
Conclusion
Now, are you ready to take all those piles of pictures and artwork off the floor and display them in a place of honor? I hope this inspires you to create your customized collage wall of your favorite framed photos. Read more about the collage process below, and check out my other wall to get even more inspired. The capital titles below are from this blog.
4 Steps to Perfectly Decorated Walls
How to Arrange Pictures on a Wall
HOW TO MAKE A FABULOUS PHOTO WALL COLLAGE
ARRANGING PHOTOS ON WALLS TIPS
HOW TO INSTALL A DIY HOME PICTURE HANGING SYSTEM




Andi Willis says
I just added a family wall of black and white photos of all of the couples in my family tree. My husband and I, our parents, grandparents and great-grandparents. It makes me smile every day! Thanks for the tips.
Sabrina Quairoli says
I love family walls. Thanks for stopping by and commenting.
Sarah Soboleski says
Some great tips here! I love that you incorporated some plates into the wall. I'm currently working on a plate wall for my dining room. 🙂
Janet Barclay says
I really like your suggestion to paint the frames to match. Believe it or not, I never thought of doing that!
Sabrina Quairoli says
These days spray paint with primer covers everything, even plastic. It's lots of fun.
Seana Turner says
I love the idea of having a "theme" to the wall. I've seen family galleries before, but your other ideas are new to me. This does take a bit of time to make it look right. If you tape the pieces of paper up, remember to use painter's tape, right? I've also heard - but never tried- the tip of putting a bit of toothpaste on the back of the photos where the hook would attach and gently pressing that into place on the wall so you know just where hammer!
Sabrina Quairoli says
Oh, of course. use tape that will not damage the wall. Thanks for mentioning this. The toothpaste idea is interesting. I never tried that either. Thanks for mentioning this tip.