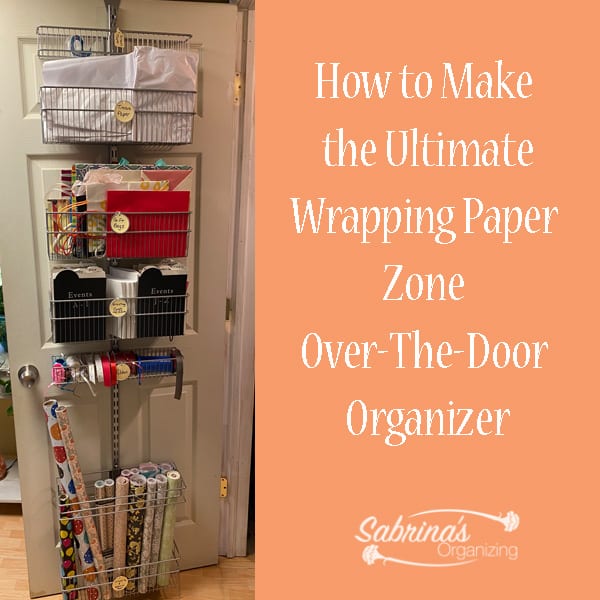
I was looking for a place to store my wrapping paper in my home. While my house is not large (affiliate), I wanted a place out of the way, like maybe behind a door in a basement closet. In there, I could have a place to store all the things I've used recently over the door, and I found this one. Reader Space: Great Gift Wrap Organization! from IHeart Organizing. This post gave me a starting point for my wrapping paper zone. However, I wanted to add more wrapping paper station items, like greeting cards (affiliate), envelopes, ribbons (affiliate), scissors (affiliate), and tape.
I am a big fan of keeping all the task items in the place where I will be doing the work. This zone will be near my desk, but in the closet. I can pull the things I need and lay them on my desk. That would make the task super easy and quick. Below is how I customized this wrapping paper zone for myself. Feel free to follow along and check it out.
Jump to:
I visited The Container Store's website and ordered the necessary parts for this organizing project. The post mentioned above also listed the products I needed. Then I added more bins to use for greeting cards (affiliate) and ribbons (affiliate). I picked a platinum color instead of white. I liked it better for an office.
What Do I Need to Make This Over-the-Door Gift Wrapping Station?
1 - Platinum Elfa Utility - Over the Door Hooks Set of 2 measures 1-⅜" - you can pick a different color if platinum is not available.
4 - Elfa Utility Large (affiliate) Basket Platinum measures 17-⅛" x 5-¼" x 5-½" h -
1 - Elfa Utility Medium Basket Platinum measures 17-⅛" x 4" x 2-⅞" h
One - Elfa Utility Small Basket Platinum measures 17-⅛" x 3-⅛" x 2-¾" h
1 - Elfa Utility Media Rack Platinum measures 17-⅛" x 6-½" x 2-¾" h
1 - Elfa Mounted Standard Platinum measures 77-¾" long
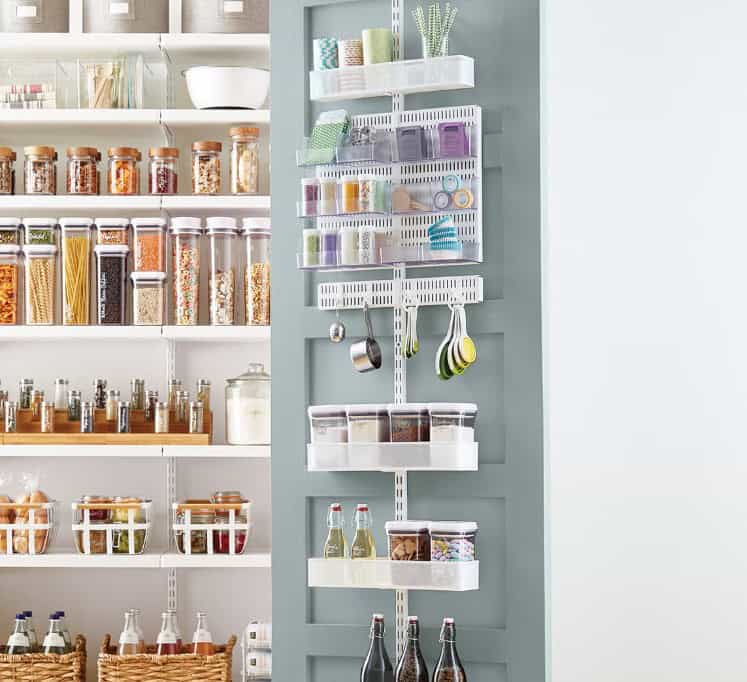
You can use this over-the-door utility kit for any door to create more organized storage space, from the pantry to a wrapping paper station, as shown in my post.
Click to learn more about what it includes.
***price may vary***
The price may vary. A few times a year, The Container Store deals with its Elfa products(affiliate). Sign up for their mailing list to receive notifications when they go on sale.
How to Assemble the Over-the-door Wrapping Paper Station?
Then, when everything arrived, I went to work assembling this over-the-door (affiliate) organizer. I was so excited that I didn't need to mount anything to the actual door except the top and bottom of the frame. This way, it would not damage the door.
Before photo of the door:
This is the closet door in my home office. I wanted to place it here since it was an unused space in my room.

Add the hooks and bar to the back of the door.
I added the hooks and bar to the top and bottom of the foam core door. It is pretty tight when you add the track bar.

Then I started from the bottom up and added the various-sized baskets.
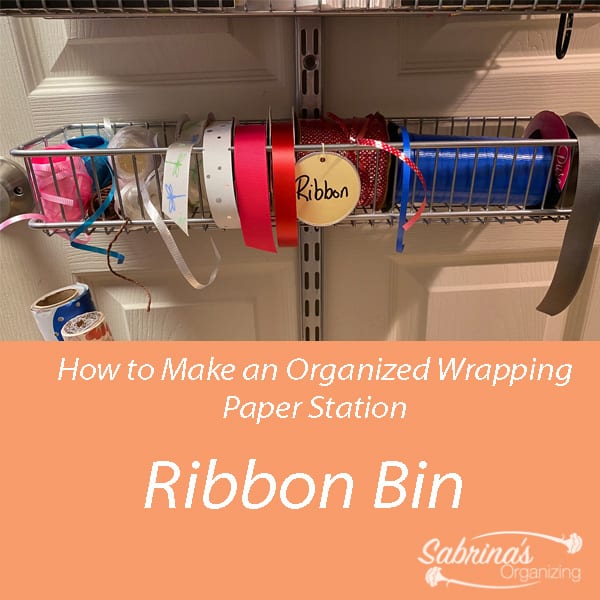
I added the ribbon bin right above the wrapping paper and adhesive paper so I had enough room for the long wrapping paper rolls. The Elfa Media Rack (I listed above) worked nicely to help keep the rolls upright.
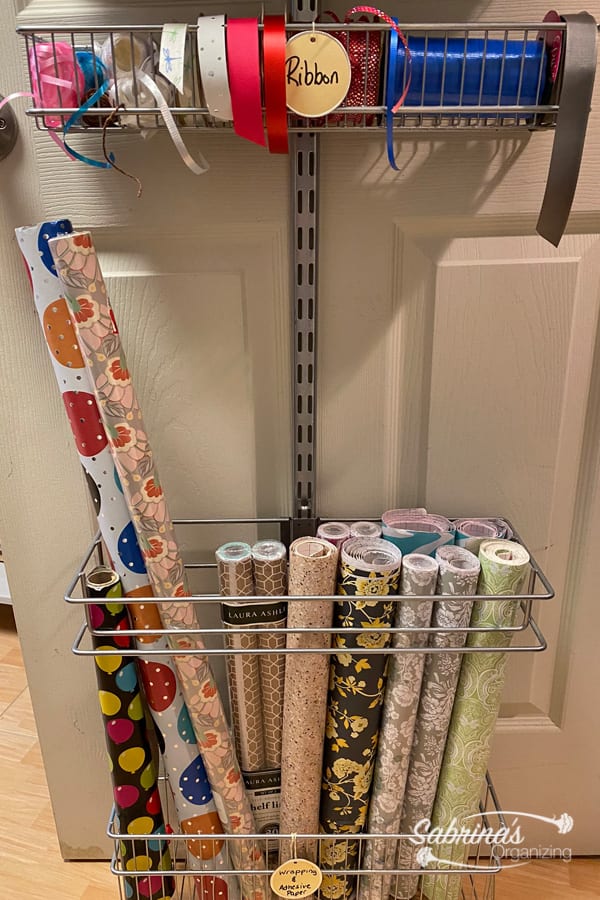
You may wonder why I have so many rolls of self-adhesive shelf liner (affiliate) paper. I use it sometimes to wrap the inside of boxes (affiliate) when sending a care package to my kids in college.
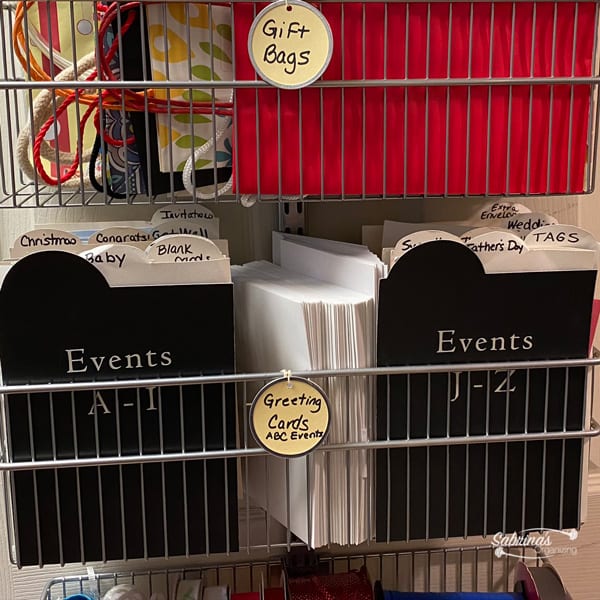
I added all the items I had, ensuring everything fit properly as I went along. Placing the greeting cards (affiliate) in the center was useful. We can all easily look through the cards and pick the ones we want.
Order of the Wrapping Paper Storage Zone
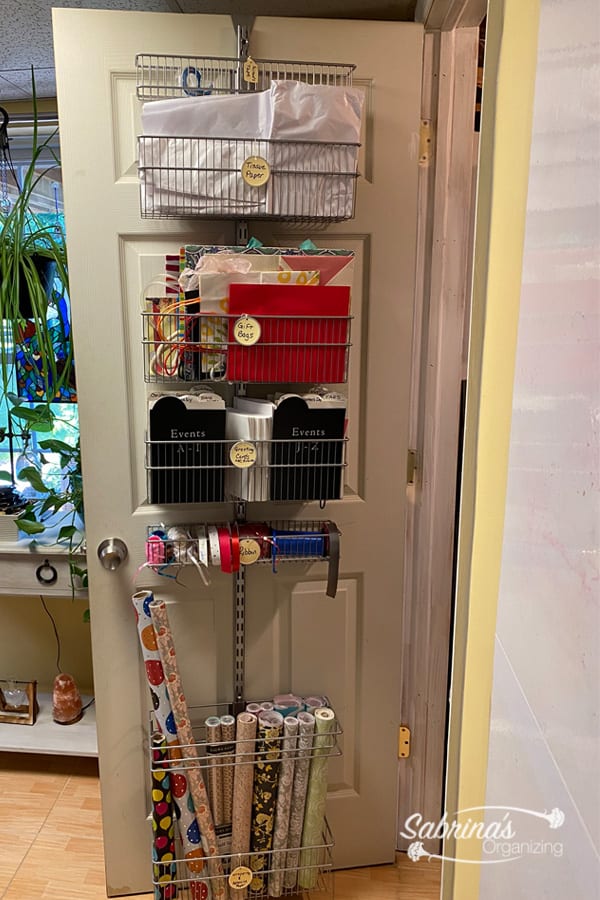
The order looked like this, starting from the top.
- The "Scissors (affiliate) and Tape" bin is in the first bin.
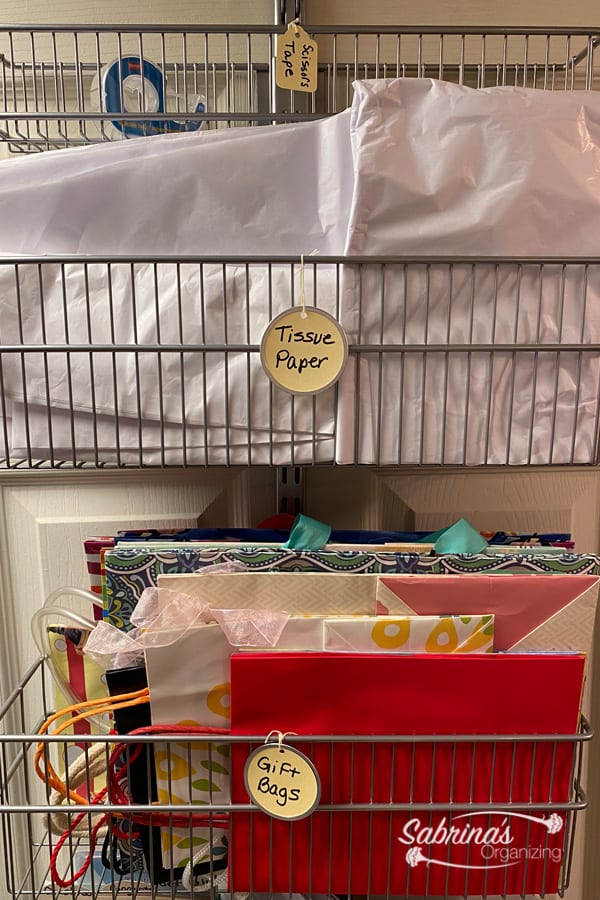
- The tissue paper (affiliate) bin is next.
- The third bin was for greeting cards (affiliate).
- Ribbons (affiliate) are in the fourth bin.
- The last bin is for wrapping paper rolls.
Then, I went to town with the details.
I added tags to each bin.
These tags were ones I purchased on clearance years ago. Nothing special, but it works. The bags are stored nicely in the third bin down.
Then, there was the greeting card bin.
I used my Cricut Machine to make these divider fronts. When I initially created this, I included sheet dividers on the front. They worked great for years, but I wanted more sturdy paper.
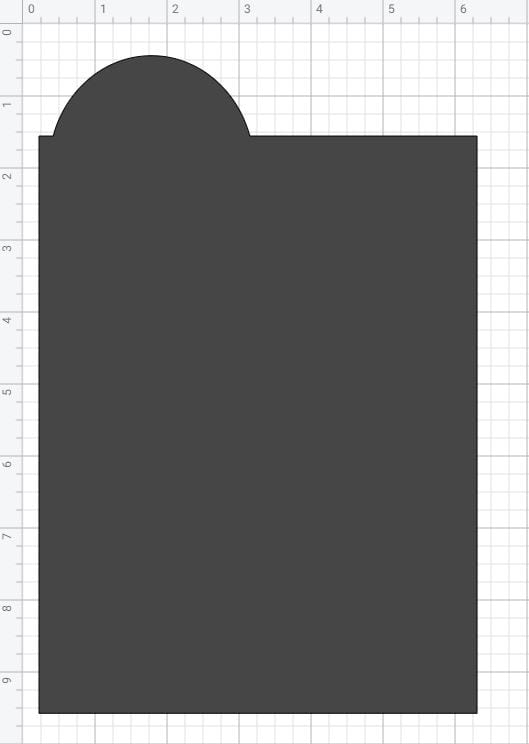
I had events (holiday) tabs (affiliate) from the greeting card organizer previously, so I reused the labels (affiliate). You can see the actual dimensions of this tab below if you want to duplicate it on your Cricut Machine. I used a circle and a rectangle and welded them together. Then, cut it out.
At the Cricut Shop, you can find Cricut machine bundles to heat presses, infusible ink & blanks, supplies, and tools, making any DIY inspiration possible. From sale items to specific products, you can find it all!
What are you waiting for? Visit their shop to see what is on Sale Today!

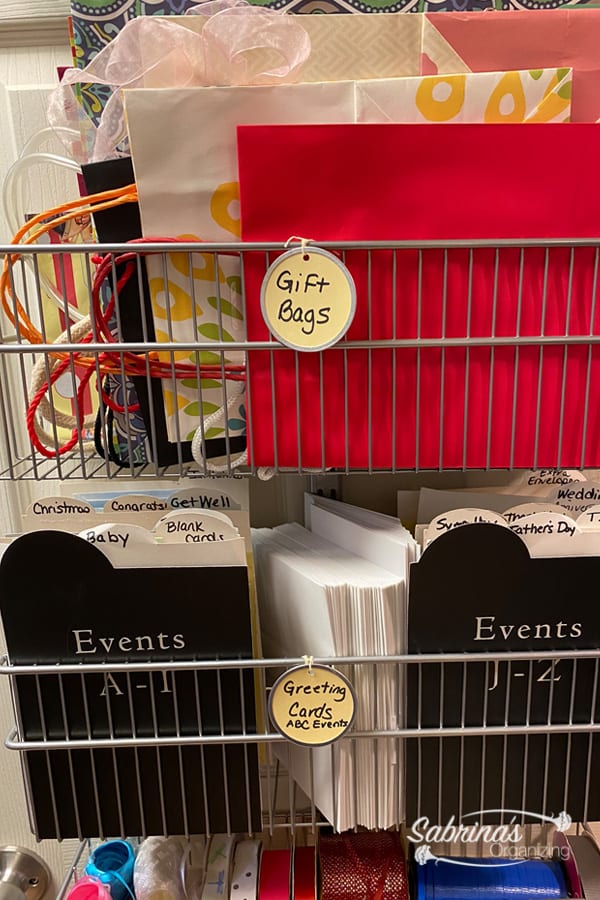
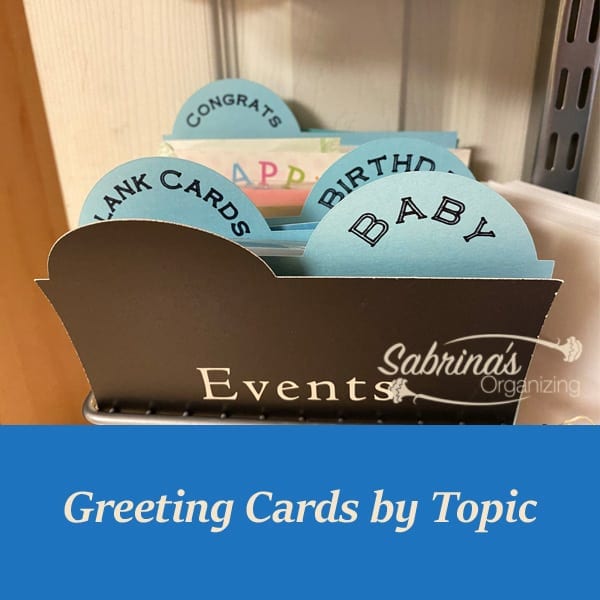
Below are the finished fronts of the greeting cards (affiliate) bin. If you like, feel free to use the template above; you can use this template for all your holiday (event) tabs (affiliate). I didn't want to use up all my thick stock paper.
I decided to organize the greeting cards in ABC order by the event (holiday) name, so I divided the greeting cards events into two piles. In the middle, to divide the piles, I stored extra envelopes.
I then labeled the rest of the bins since I was not the only one using this station.
How to Make a DIY Greeting Card Organizer?
Updated in 2025: I created a Cricut Design to help make these greeting card organizers labeled dividers. You can download the templates from Cricut using the links below.
Greeting Card Dividers Cut with Labels Printing - this one will cut out the labels (affiliate) and write the events on each label (affiliate)'s top.
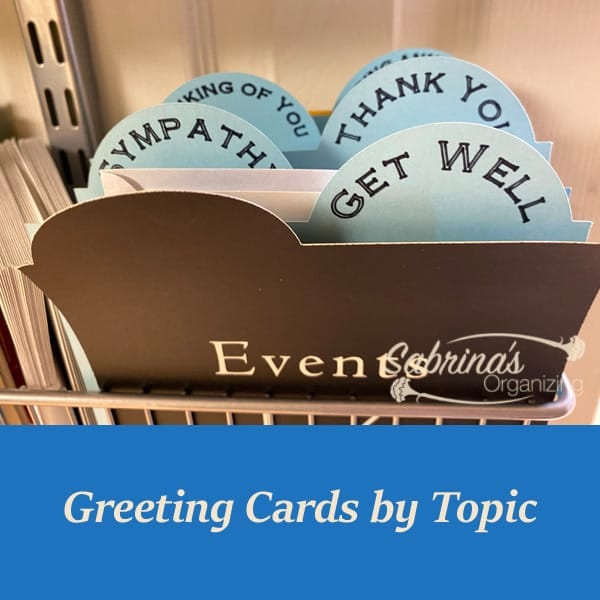
The labeled dividers above include the following event labels (affiliate): Blank Cards, Baby, Birthday, Congrats, Get Well, Sympathy, Thank You, Thinking of You, and Wedding Anniversary.
Greeting Cards Events Labels for Vinyl Cutting - this one is the vinyl lettering "Events A-I" and "Events J - Z" if you want to use them.
Check out the updated images below. What do you think?
I created the ribbon section.
The ribbon rolls sat nicely upright in the Elfa bin. You can easily place the ribbon end over the top if it is too thick to go through the wires.
I love it! If you like it, too, please share it! This organizing zone has been in place for years, and I am updating it to reflect its modifications over the years. Remember, organizing a space needs to be evolved, so keep revisiting it and asking yourself, Does this system still work for me?
Reveal
Would you make this for your home? What would you add to this wrapping paper station? Please leave a comment below. We would love to hear from you!
Looking for other DIY Home Organizing Projects? Check out our collection of tutorial posts here.