Sabrinas Organizing

menu icon
go to homepage
  • Home Organization
  • Healthy Recipes
  • DIY Home Projects
  • Browse Gift Ideas
  • Donate Stuff 2026
  • Recycling Events 2026
  • Solution Consultations
  • Virtual Organizing
  • Disclosure Policy and Cookies
search icon
Homepage link
  • Home Organization
  • Healthy Recipes
  • DIY Home Projects
  • Browse Gift Ideas
  • Donate Stuff 2026
  • Recycling Events 2026
  • Solution Consultations
  • Virtual Organizing
  • Disclosure Policy and Cookies
×
Home » Home Organization » DIY Projects For The Home

How to Upcycle an Old Bench into an Adorable Accent Table

Modified: Feb 3, 2026 Published: Feb 13, 2026 by Sabrina Quairoli Visit our "Disclosure Policy and Cookies" page in the menu for details. This post may contain affiliate links. Leave a Comment

Spread the Love

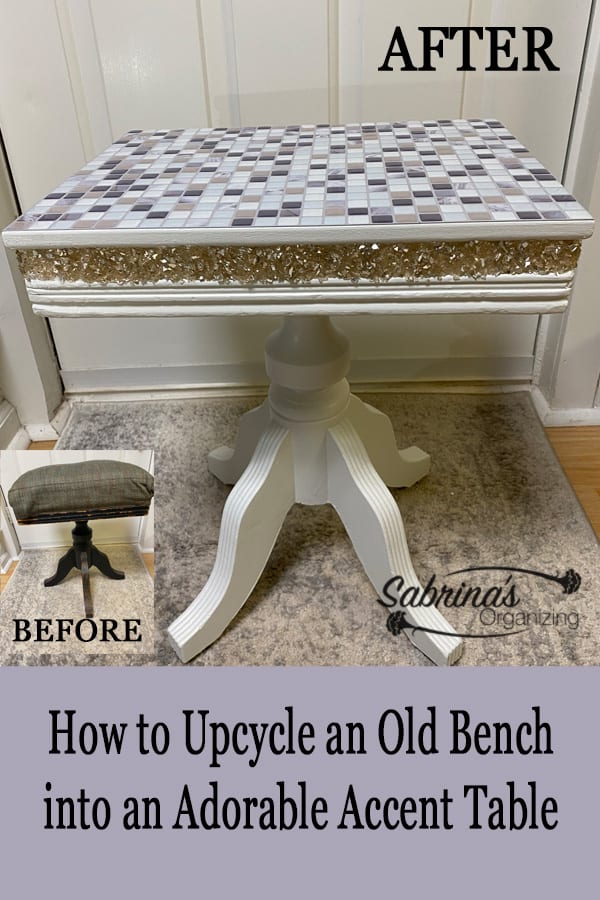
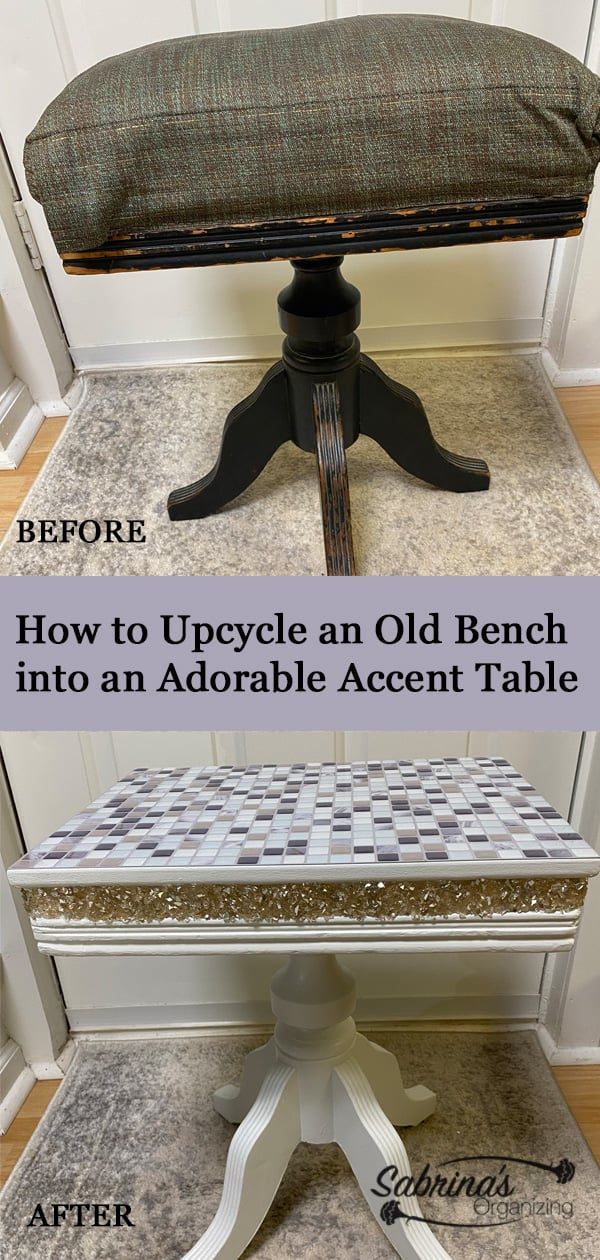
I recently acquired a bench from my mother-in-law's home when we cleared it out after her death. This particular bench was from my husband's grandmother's home. It was a sewing bench she used to sew. It was loved, and I wanted to bring it back to life. So, today, I will show you how I transformed an old bench into an adorable accent table. Follow along and watch the transformation.

Questions and Answers for this Accent Table Project

Below are questions and answers you may want to read before you do this project.

What Supplies and Tools are needed to create this Accent Table?

Sewing bench - from Amazon.com
Decorative Crushed Mirror Filler - broken mirror pieces - from Michaels.com
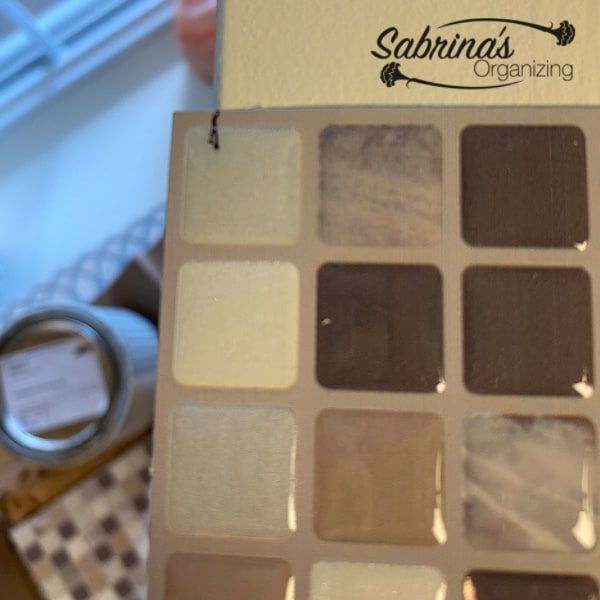
Smart Tiles - Tile made simple 1 package - from Home Depot
½ an inch high x 16 inches wide x 12 inches long finished wood piece - it had a beveled curve on one side. That side was used to face the base to create an edge for the glue. From Michaels.com
Dry Dex Spackling and Nail Hole Filler - from Lowes.com
Clear Gorilla Glue - from Amazon.com
Shiplap Magnolia Home Satin Finish - from AceHardware.com
Tack cloth - from Amazon.com
Rag and water for cleaning - from AceHardware.com
Fine Sandpaper - from Amazon.com

Other supplies you will need:
Drill and Drill bit - from Amazon.com
Screws 1 inch - four
Paintbrush and/or small roller
Plastic gloves - 2 sets
Wood stirring stick
4 rubber feet - from Amazon
Cutting board and a rotary cutter and/or scissors
T Square ruler - from Amazon
Tape measure
Painters Tape
Mask used when sanding and removing the cover

Some of the links below are from Amazon. If you click through and make a purchase on Amazon, I will receive a small referral commission at no additional cost to you. Happy shopping!

What should I know before doing this DIY accent table project?

Some supplies were used from other projects, like the paint, which I used for other projects on this blog.

I did not disturb the stain besides a light sanding.

Since I was going from dark to light, in some areas I needed to add a third or even a fourth coat.

I wore a mask when removing the foam and fabric because it was very dusty.

How long did it take to do this project?

This project took 8 hours, including all the layers I added, and it did require some time to complete. The majority of the time was spent drying.

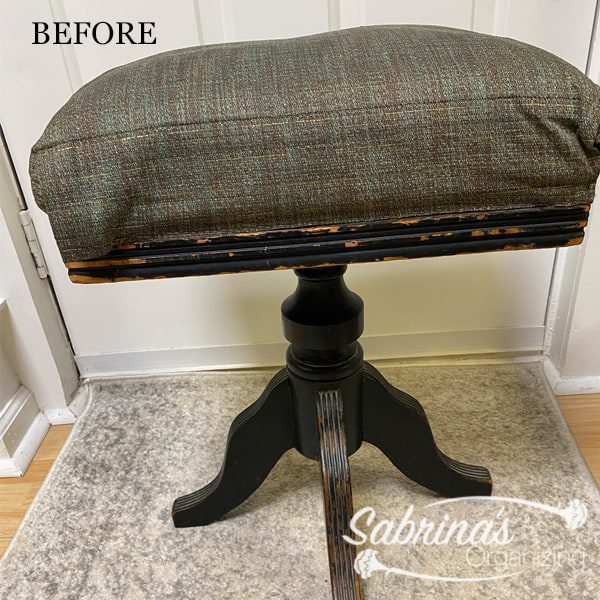
Before Accent Table Transformation

So, this is what the bench looked like before I saved it from the trash. The fabric was shabby, and the wood bevels were chipped. I didn't do much about that since I was painting it, and it would be hidden when it was all one color.

Before Stool

Now that you have all the supplies and tools (affiliate), you can make this accent table.

How-to Steps to transform this accent table.

Time needed: 8 hours

These steps took some time, but were so worth it. Follow along, and feel free to ask me questions in the comments.

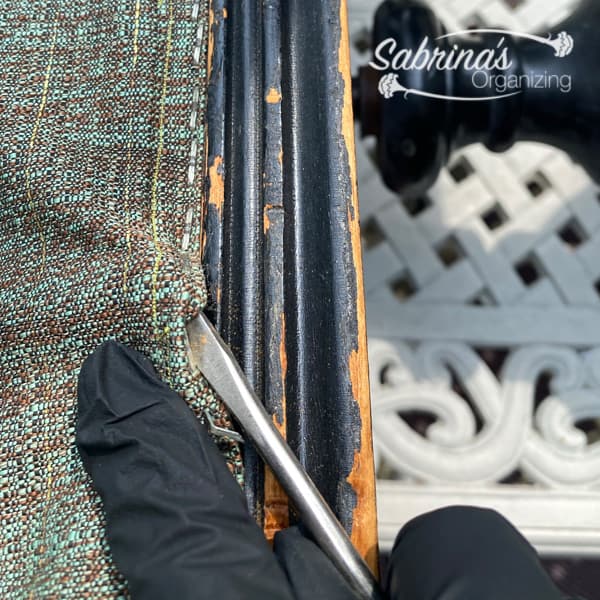
  1. Removed the fabric and foam.

    Staples were holding the fabric in, so I could remove them fairly easily. If there were broken staples, I pulled them out when plyers.Remove the cover on the bench

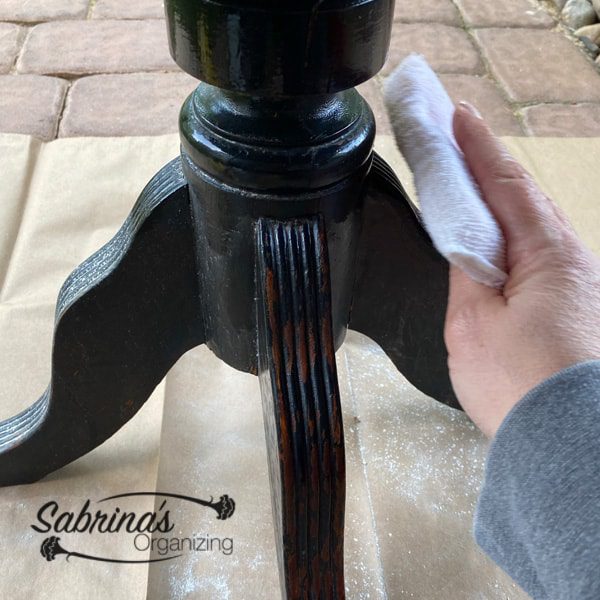
  2. Clean the wood with a damp rag and remove any nails or raised surfaces.

    This is how it looked after I took off the top. Since the top was a solid wooden one, I decided not to make it a bench but an accent table.Take off the nails and wipe clean

  3. Don't forget the Pedestal Table Base.

    The bottom needed to be brushed clean and sanded to smooth out any rough edges.
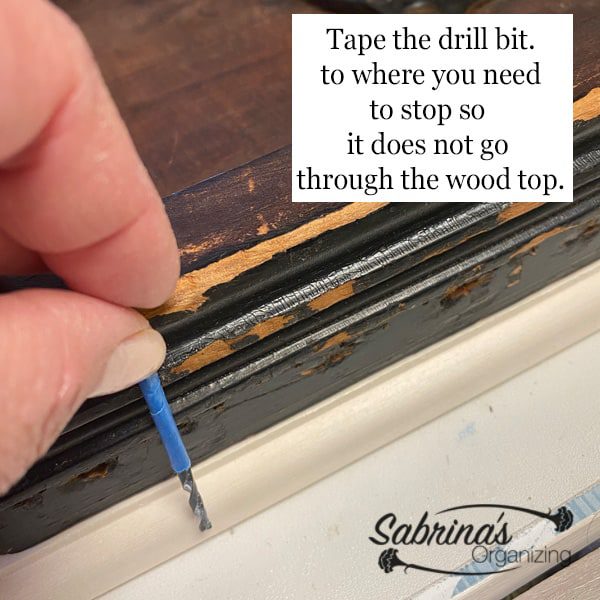
 Clean off the wood to get ready to paint

  4. Add the wood top.

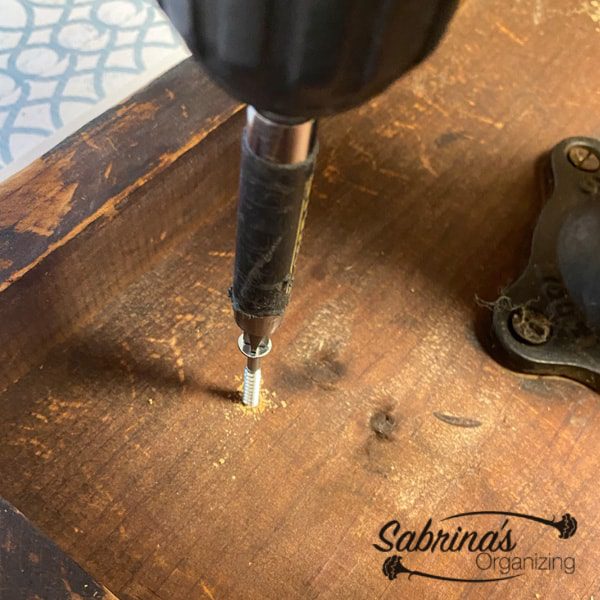
    I wrapped a drill (affiliate) bit with painter's tape (affiliate) to the point where I needed to stop to go completely through the top piece. The piece of wood was the exact size of the base. It gave me an edge to use later on.Tape the drill bit to where you need to stop

  5. Screw from the bottom.


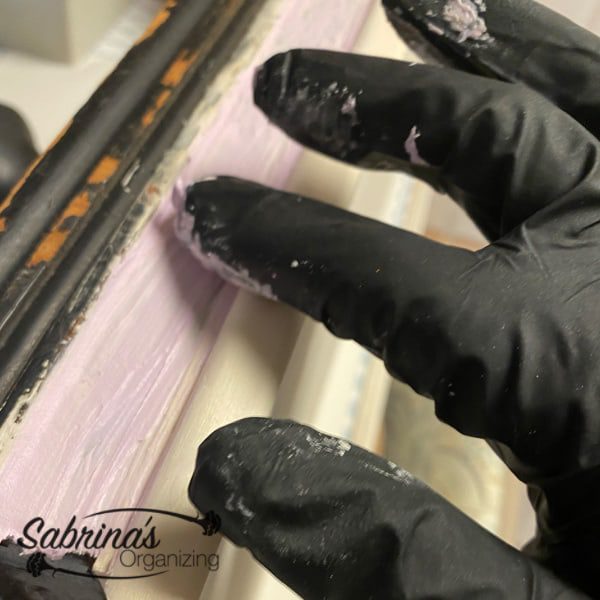
    Turn over the table and screw the top wood to the base from the bottom.Attached the wood top to the base with screws

  6. I lightly sanded the surface and then patched the holes.

    I used the wood filler to fill in the holes. I ensured it was smooth so I did not have to sand it too much when it dried. The wood filler is pink when wet and white when dry, which helped me tell when it was dry.

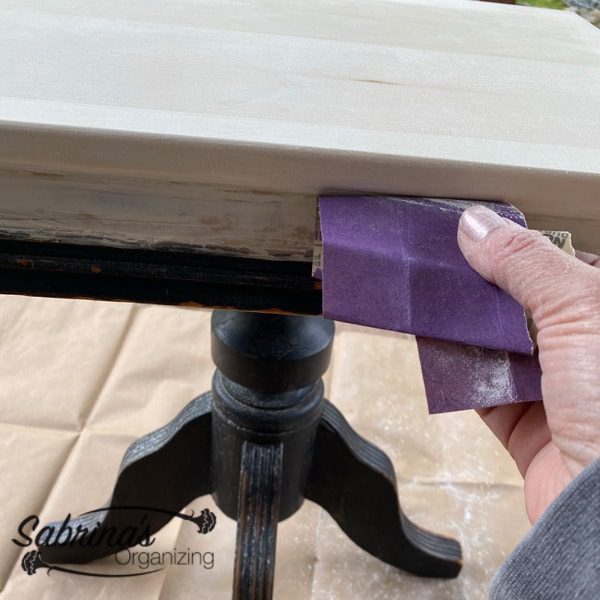
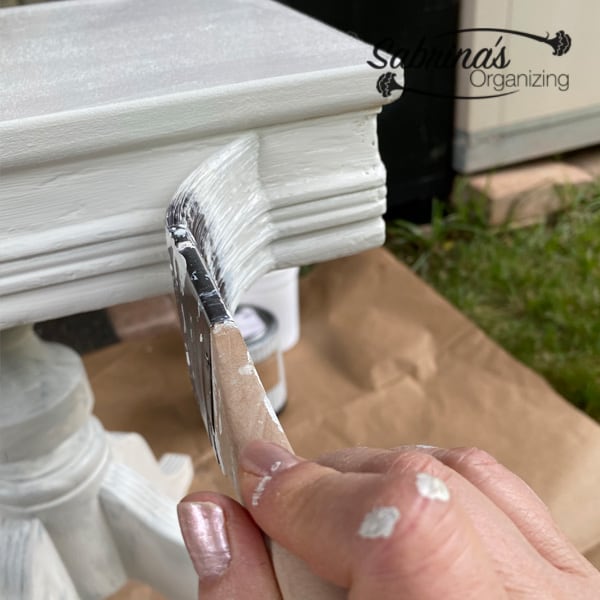
    I continued to do all four sides, which took some time. Because I didn't want it to run, I did one side at a time and then let it dry completely.
    Apply the wood filler over the staples and wipe smooth.

  7. Lightly Sand Smooth and then paint at least three times.

    I then added a coat after lightly sanding and using a tack cloth (affiliate) to remove the dust. Then, I repainted it and let it dry completely. I also needed to touch up the white paint since the wood was dark.Sand the wood filler smooth

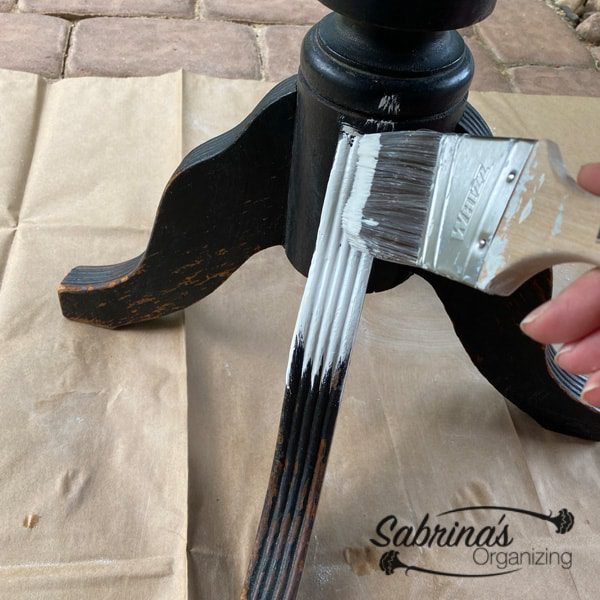
  8. Paint the pedestal as well.

    Make sure you get in the groves and underneath the pedestal. Paint the wood bench

  9. Here's the start of the second coat.

    A second coat is important. I added another coat when it was completely dried.
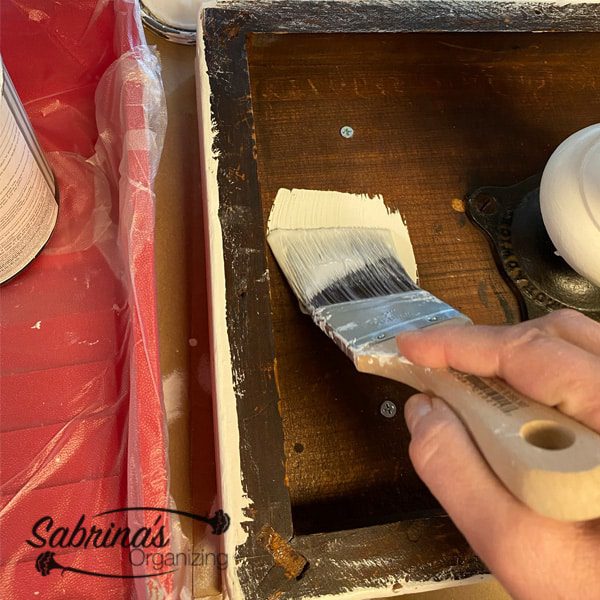
 Paint the top and sides of bench

  10. Paint the Bottom.

    The bottom must be painted as well. It will not look finished if you don't paint the bottom.

    Then, I painted the bottom since it was so dark from the top. I didn't paint it more than once since no one will look under it.

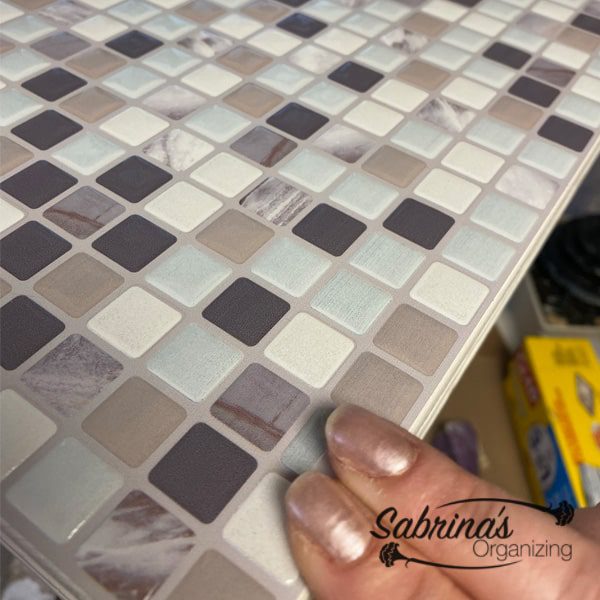
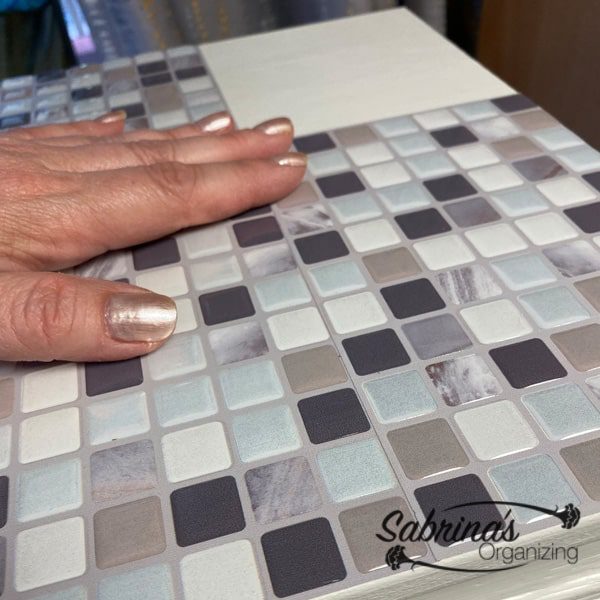
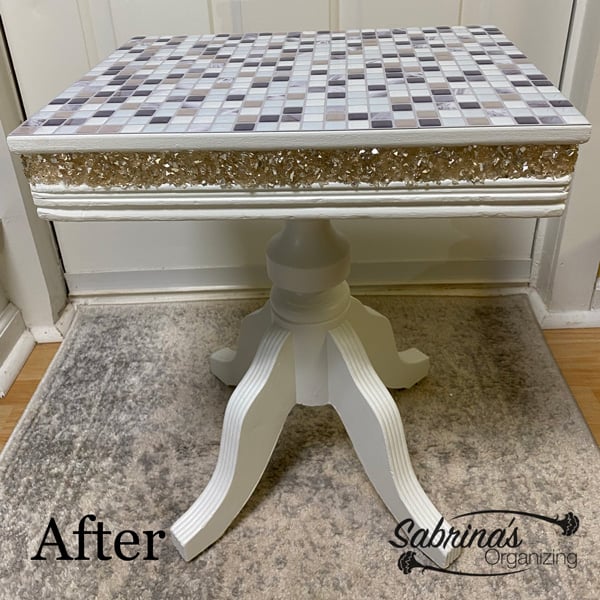
    After letting it dry completely, I felt it needed something. So, this is what I added.

    Paint the bottom

  11. Add Vinyl Tiles.

    I added a full sheet of this Smart Tile to the top. It is plastic and has a sticky back. I pressed the edges to ensure they would adhere.Add a smart tile full sheet to top

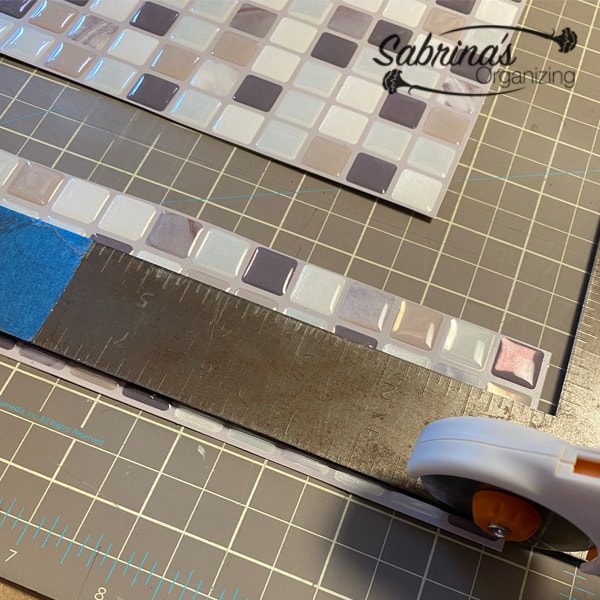
  12. Trim with scissors (affiliate)

    Since the accent table was larger than the tile, I had to do some patching. Then, I cut it down with scissors (affiliate) or a rolling cutter and marked it to see how much I was over. I then used a T-square ruler to create a line and cut it.Cut and add enough to overhang then mark where to cut

  13. Scissors (affiliate) work well on vinyl tile.

    I used scissors (affiliate) to separate it if it did not go all the way through.Using a cutter cut the excess tile off

  14. Add more to cover the complete top

    And, I continued and added the remaining vinyl tile pieces.

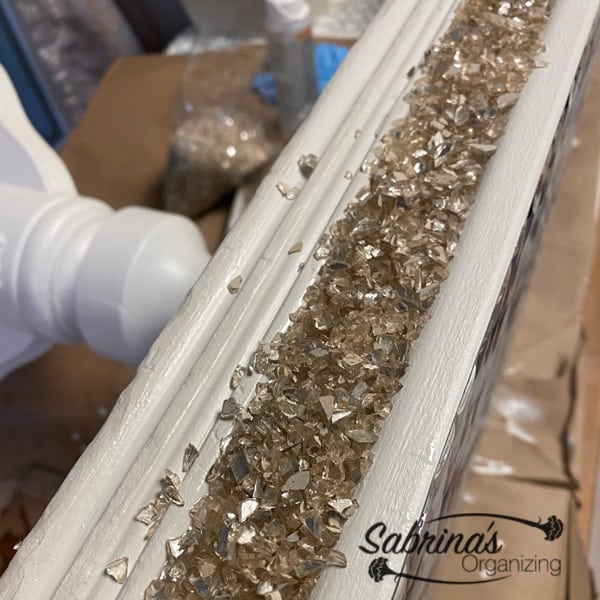
    I ensured I had no small pieces to work with to avoid any cutting issues.

    Measure and cut the next tile to fill the top

  15. Add the Clear Gorilla Glue (affiliate) and glue decorative crushed mirror pieces.

    To dress up the sides, I used glue and crushed mirror pieces. I added Gorilla Glue (affiliate) and a handful of decorative mirror pieces, pressing them down to help them stick. I then let it dry completely. Then I continued and did the other sides, drying them completely between tasks.

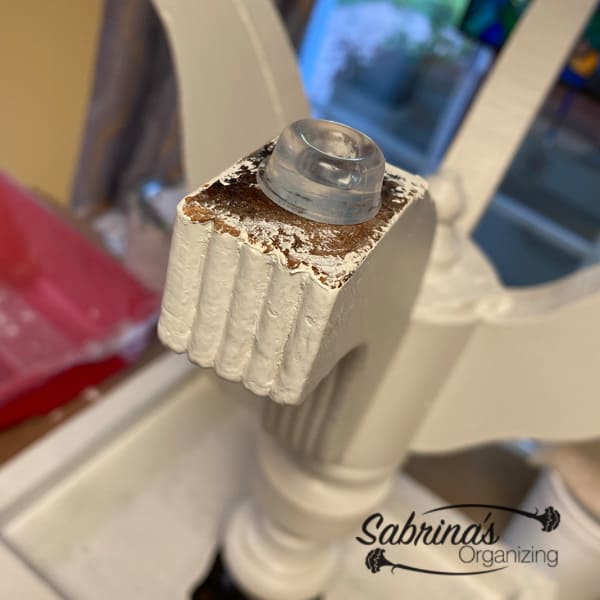
    I removed any excess mirror pieces that did not stick after it dried.

    Add glue then press the broken mirror pieces on all four sides

  16. Add the feet to the bottom.

    After the sides were completely dried, I added feet to the bottom.
    Add rubber feet

Reveal

There you have it! My finished project is done! Here is what it looked like when it was finished. I love it! What do you think? Please leave a comment below. I would love to hear from you.

After accent table

Feel free to check out the video and follow us on YouTube!

Visit our other DIY paint projects below for more inspiration.

HOW TO UPCYCLE DINING ROOM CHAIRS INTO FUN ACCENT CHAIRS

HOW TO TRANSFORM A WOODEN FOLDING CARD TABLE FROM BLAH TO FABULOUS

TRANSFORMING COFFEE TABLE WITH GRAY CHALK PAINT

HOW TO TRANSFORM A TABLE FROM A VANITY BACK TO A CONSOLE TABLE

If you click through and buy something on Amazon (affiliate) (affiliate), I will receive a small referral fee at no extra cost to you. Happy Shopping! Thank you for supporting my small business.

How to Upcycle an Old Bench into an Adorable Accent Table
(Visited 2,831 times, 2 visits today)

Spread the Love

More Easy DIY Home Organizing Projects You Can Do To Get Organized

  • zipper pouches in the background -square image - title in the center middle.
    20 Ways to Use Zipper Pouches to Organize Your Home
  • How to organize standing desk cables square image
    How to Organize Standing Desk Cables
  • Title of post at the top of the image - finished coffee can and lid angled on a cork bottom - square image
    Update Coffee Can with Lid with Mod Podge and Tissue Paper {DIY Project}
  • title in the right with a box around it, a girl on her phone at a desk - a button that says learn more - Square image
    16 Creative Ways to Hide Chargers in Small Spaces

About Sabrina Quairoli

I love sharing my passion for organizing life and home. I hope you get inspired when visiting my home organizing tips, quick weeknight recipes, party planning ideas, and DIY organizing projects. Visit the About Me page to read my story.

Leave a Reply Cancel reply

Your email address will not be published. Required fields are marked *

This site uses Akismet to reduce spam. Learn how your comment data is processed.

Sabrina owner of Sabrina's Organizing and Admin Services

Hey, I'm Sabrina!

Thanks for stopping by and checking out my blog, where you can find Home Organizing, Quick Weeknight Recipes, and DIY Craft Home Organizing Projects. Feel free to browse around to get motivated to improve your home life!

Learn About My Story
Sabrina Morresi Quairoli Received the NAPO Certificate of Study for Essentials of Productivity - digital badge
Sabrina's Organizing Supporting individuals since 1997 BANNER 25 year banner

Recent Posts

  • Surefire Ways to Downsize Your Life Without Guilt
    9 Surefire Ways to Downsize Your Life Without Guilt
  • a bowl of homemade gnocchi ( potato dumplings) from scratch). square image with title at top center.
    Homemade Gnocchi Recipe Like Mom Makes
  • A image with a sprinkler (round) in the middle of my raised bed with the title at the center - square image
    Super Smart Raised Bed Water System for Your Garden {Review}
  • The title of the post is in the upder center in a rectangular transparent box below is a learn more button - a person is cleaning the windows in the background image - Square image size
    The Spring Cleaning Guide for Busy Parents and Homeowners

Popular Posts

  • Yummy Curry Chicken Salad Recipe
  • Places To Donate Jewelry You Do Not Want
  • The Ultimate Cruise Packing List Everyone Needs
  • 43 Positive Mantra Sayings to Keep You on the…
  • This Year's Recycling and Shredder Events

Planners You And Your Family Will Love!

Buy Yours Today!

For Students, planning time and homework

OOOC Planners in various colors

Order Out of Chaos® Academic Planners - Student Academic Planners

Buy Now →

For 8x11" Planner Lovers, and Moms

planner with colorful tabs and open book square image

Simplified by Emily Ley for AT-A-GLANCE®

Buy Now →

(affiliate)

Click on this badge to learn what this badge means on NAPO.net

NAPO Registered & Insured Badge for Sabrina's Organizing & Admin Services valid through 2026
Get your free copy of our Home Management binder ebook
Get our Holiday Season Planner to help you save money and time with free checklists and Printables to make this season amazing

Amazon Disclosure


Sabrina's Organizing blog is a participant in the Amazon Services LLC Associates Program, an affiliate advertising program designed to provide a means for sites to earn advertising fees by advertising and linking to Amazon.com.

Footer

Visit our "Disclosure Policy and Cookies" for details. Affiliate links appear on this page from Google Adsense, Amazon, Order Out of Chaos, Impact affiliate members, Rakuten affiliate members, and Awin affiliate members.

Services

Banner ad for Sabrina's Organizing Solution meeting services - has a check and says What do you get for this service?
Face-to-face with an Expert; 1-2 hour meeting duration
Plus, a personalized Solution Report with customized room-by-room plans in 24 Hours
Let's Talk to Get a Fresh Perspective of Your Home!
I want a fresh perspective
This fee is for a 1–3-bedroom home or a small single-room office. 
For larger homes, please get in touch with me to discuss your specific situation. 
-horizontal banner ad
banner ad that says Feeling overwhelmed and at a loss on how to finish the goal quickly and easily? Need someone to help you be accountable to complete your goal? This service is for you! What's your goal? Organizing Accountability for one(1) room or small area Important Smaller Organizing Projects - See examples on service page. Staying Consistently Accountable to Tasks Ready to Get Your Goals Done? Let's Talk Today. -horizontal banner ad

My Cookbook for Sale

banner ad with my information about my ebook - Do you love to Grill but don't like to make a Meal Plan? This digital cookbook shares 14 recipes (Entrée, Side, & Dessert) to choose from, allowing you to mix and match to create your own 3-course dinner your family will love!

↑ back to top

About

  • About Me
  • Privacy Policy
  • Disclosure Policy and Cookies
  • Google Analytics Privacy Statement and Opt-Out Option
Sabrina's Organizing Supporting individuals since 1997 BANNER 25 year banner

Certifications and Associations

  • 2025 NAPO Business Stamp of Approval
Sabrina Morresi-Quairoli received Essentials of Productivity Certificate of Study from NAPO.

Contact

  • Contact
  • Solution Consultations
  • Virtual Organizing Consults
  • Write for Us
Productivity and Organizing Blog Carnival Ultimate Star Blogger Member
Sabrina's Organizing,  Sabrina's Admin Services, Organizing on a Dime, and Recipes to Chew On blogs by Sabrina Morresi-Quairoli is licensed under CC BY-NC-ND 4.0

As an Amazon Associate, I earn from qualifying purchases.

Copyright © 2011-2026. Sabrina's Organizing Blog content by Sabrina Morresi-Quairoli is licensed. Based on work at Sabrina’s Organizing blog, social media content, and newsletters, permissions beyond the scope of this license may be available upon request.

Manage Consent
To provide the best experiences, we use technologies like cookies to store and/or access device information. Consenting to these technologies will allow us to process data such as browsing behavior or unique IDs on this site. Not consenting or withdrawing consent, may adversely affect certain features and functions.
Functional Always active
The technical storage or access is strictly necessary for the legitimate purpose of enabling the use of a specific service explicitly requested by the subscriber or user, or for the sole purpose of carrying out the transmission of a communication over an electronic communications network.
Preferences
The technical storage or access is necessary for the legitimate purpose of storing preferences that are not requested by the subscriber or user.
Statistics
The technical storage or access that is used exclusively for statistical purposes. The technical storage or access that is used exclusively for anonymous statistical purposes. Without a subpoena, voluntary compliance on the part of your Internet Service Provider, or additional records from a third party, information stored or retrieved for this purpose alone cannot usually be used to identify you.
Marketing
The technical storage or access is required to create user profiles to send advertising, or to track the user on a website or across several websites for similar marketing purposes.
  • Manage options
  • Manage services
  • Manage {vendor_count} vendors
  • Read more about these purposes
View preferences
  • {title}
  • {title}
  • {title}