Food trays are great for a variety of uses. They help contain items together to display or carry things without walking back and forth, bringing stuff into another room. Today, I will show you how to do a tray makeover for only five dollars. It's a table I still use as an addition to my buffet table for plates and other things.
Jump to:
Unique Ways to Use Trays in Your Home
While trays are commonly used to carry food and things from place to place quickly, they can also do so much more. Below, we share other unique ways to use a tray.
- Craft area organizing on a craft table.
- You can display items in a kitchen while propping the tray on its side.
- Organize and sort party plates/forks/knives on a buffet.
- Individual snack package sorting is displayed on the counter for the kids to enjoy.
- Add legs to a large (affiliate) wooden tray and turn it into a bistro table.
Today, I will share an easy way to turn a large (affiliate) tray into a bistro table. Follow along and check it out.
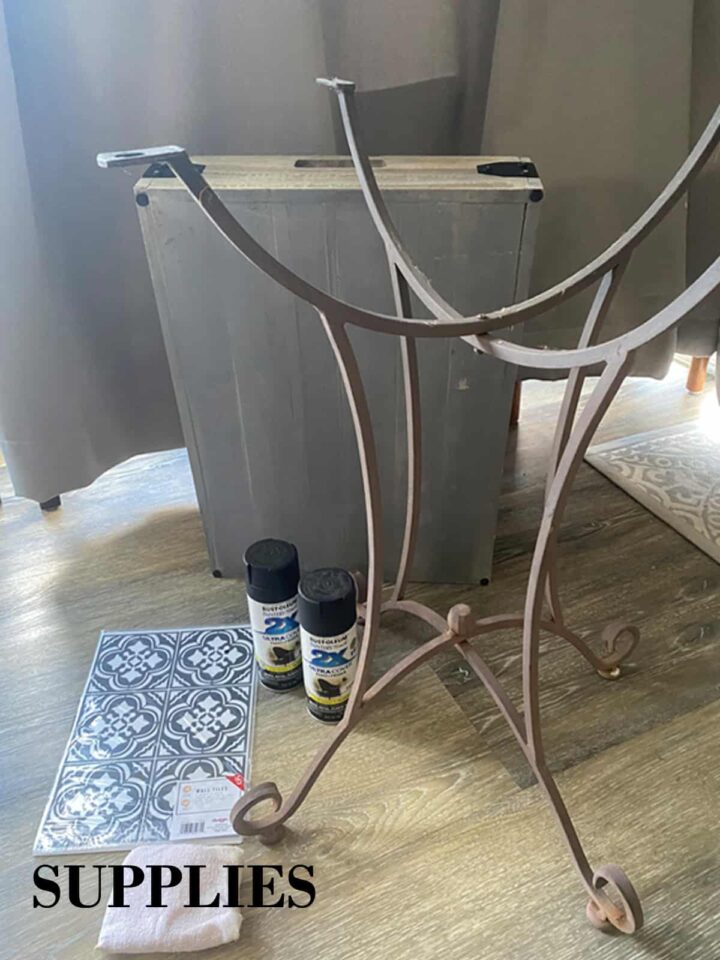
What supplies and tools did I use to make this tray makeover?
Many of these supplies/tools (affiliate) I had at home. The only thing I had to buy was the vinyl tile stickers from Target. See below for details on the DIY DIY project for the repurposed tray and bistro legs.
- Large (affiliate) serving tray - wood
- Bistro table legs and screws
- Black (affiliate) spray paint - I used one can of spraypaint - Rust-Oleum(R) Ultra Cover Paint +Primer (affiliate)
- Vinyl tile stickers - These were five-dollar vinyl stickers from Target's five and below section.
- Wrench - This tool was used after I had drilled the pilot holes.
- 4 Screws - I used ¾ inch screws and could not use a Philips screwdriver (affiliate), so I had to use a wrench to tighten the legs to the wood tray.
- Drill (affiliate) and drill (affiliate) bit
How to make a tray into a table?
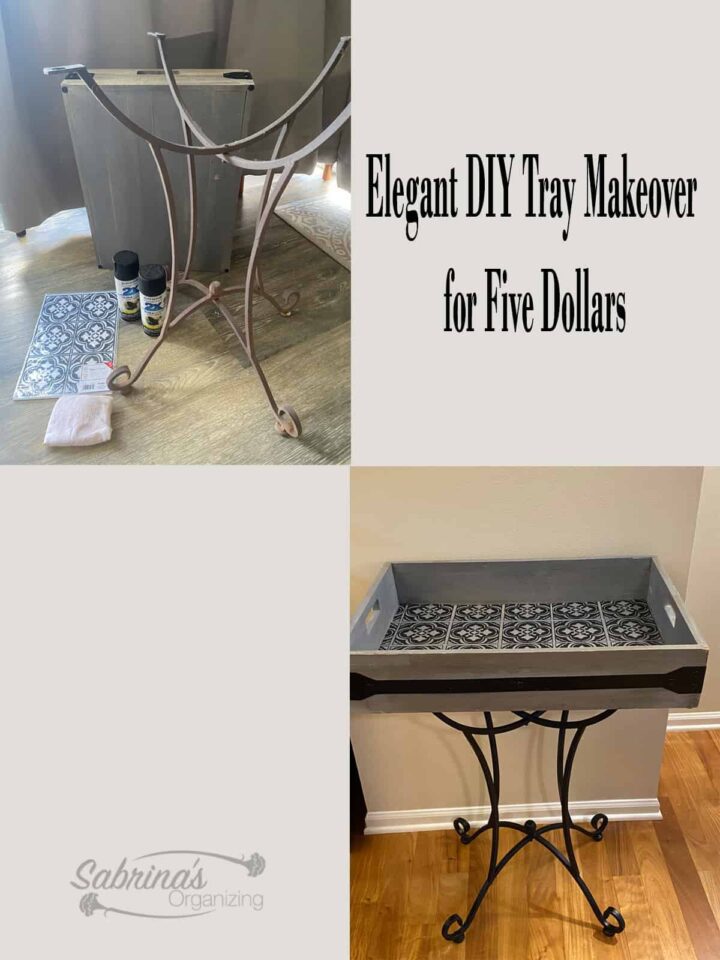
First, I pulled out this large (affiliate) 18 inches by 24 inches long wood tray. I removed the bistro table from the garage (affiliate) where I had removed the top years ago because it had broken. I then purchased these five-dollar vinyl tiles from Target.
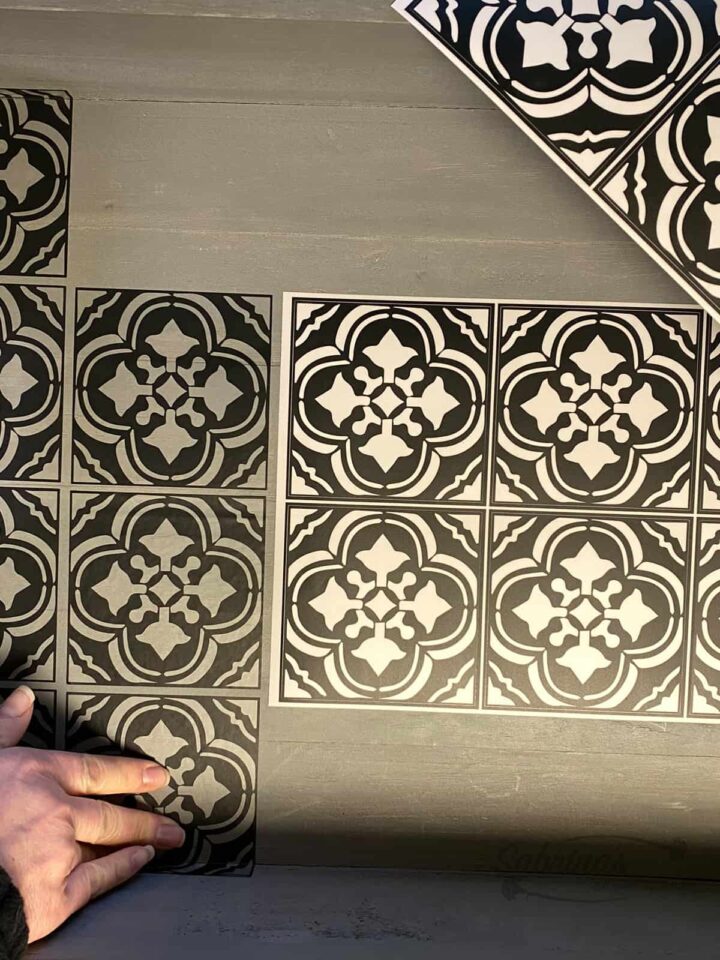
These tiles back were clear, so the gray came through.
Add the tiles to the top of the wood tray to give it character.
I used the tiles sheet and added it to the center (without removing the stickers). Then I took another sheet, removed the stickers, lined it up from the center next to the tiles sheet, and worked my way from the center to the left and then to the write.
Cut the excess off with an Exacto knife.
I then added the edges and folded them up the side. Then, I took a knife and cut off the excess going up the side of the tray. I set the tray aside to work on the legs next.
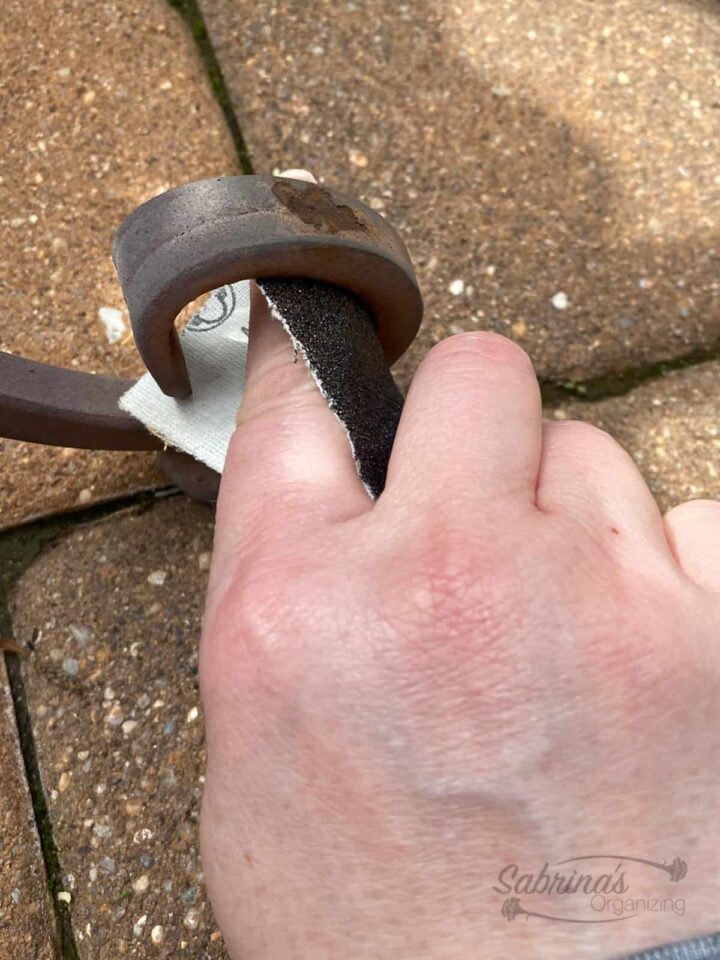
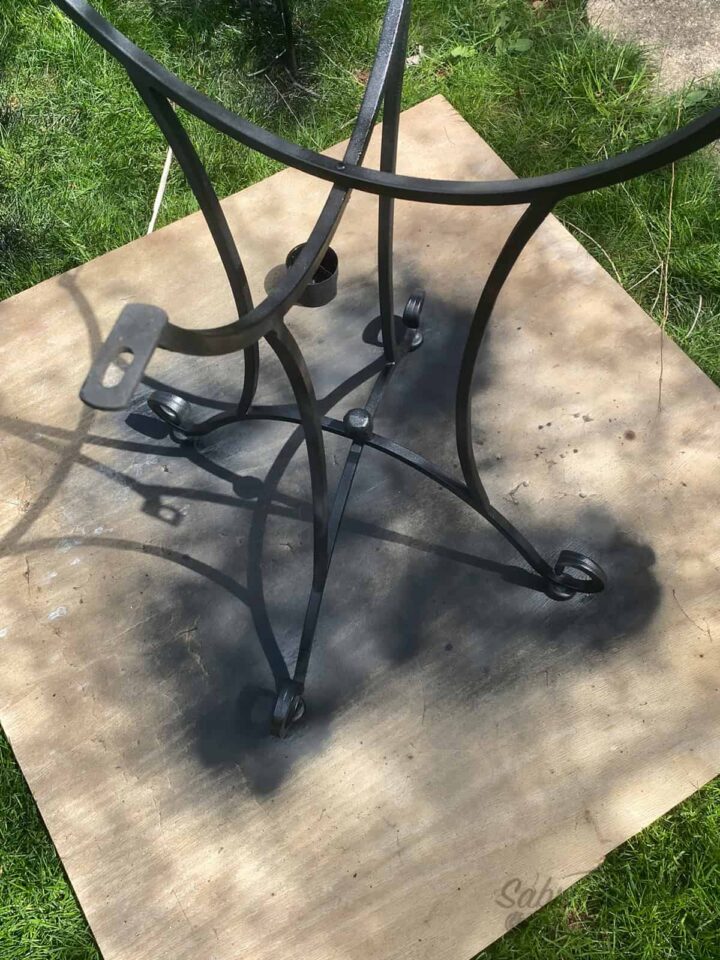
Updated the old bistro legs.
I then pulled out the old bistro table legs because the weather destroyed the tabletop. It was in good condition but just needed freshening up. I took sandpaper and sanded and cleaned any loose rust spots.
Spray-painted the legs.
While standing the legs up on a piece of wood. I spray-painted the legs - two coats. I let it dry completely.
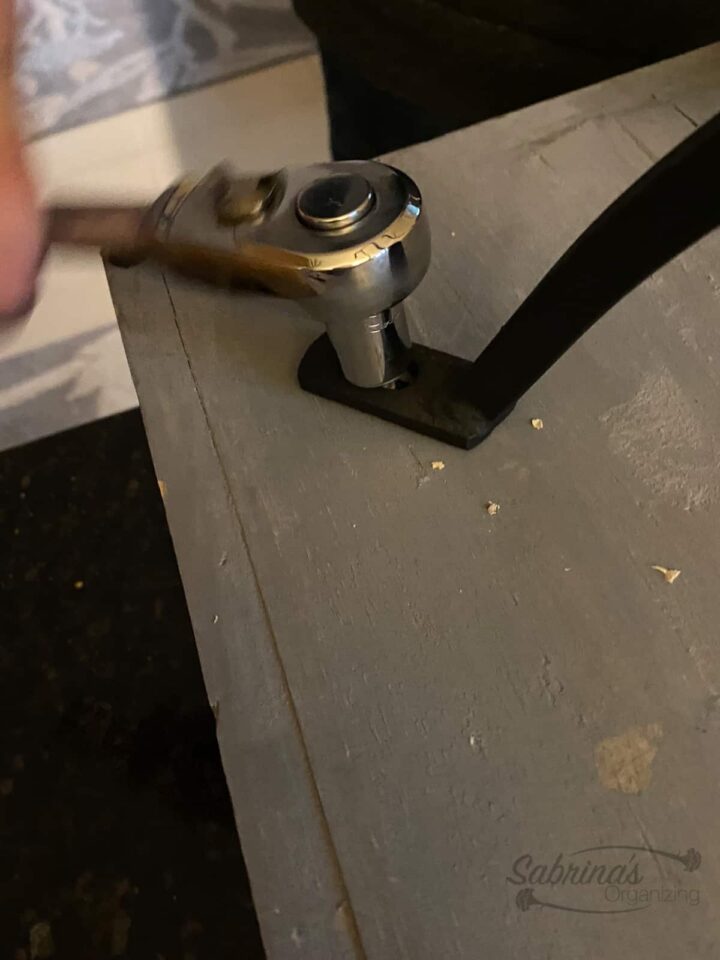
Add the top to the legs.
I turned the tray over on the countertop and turned the legs over so the holes would be facing the bottom of the tray. Then, I marked the leg holes on the table and removed the table leg, and set it aside.
I then took a drill (affiliate) and drilled about ¼ inch into the bottom of the tray. I made sure I did not go entirely through the tray.
Now, using the correct size screws, I added the legs back to the bottom of the tray and screwed the tray to the base with a wrench.
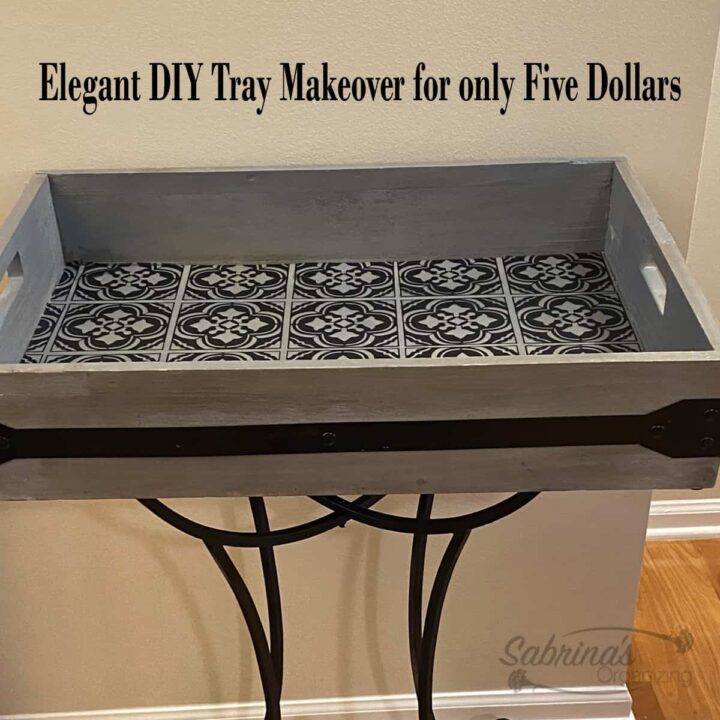
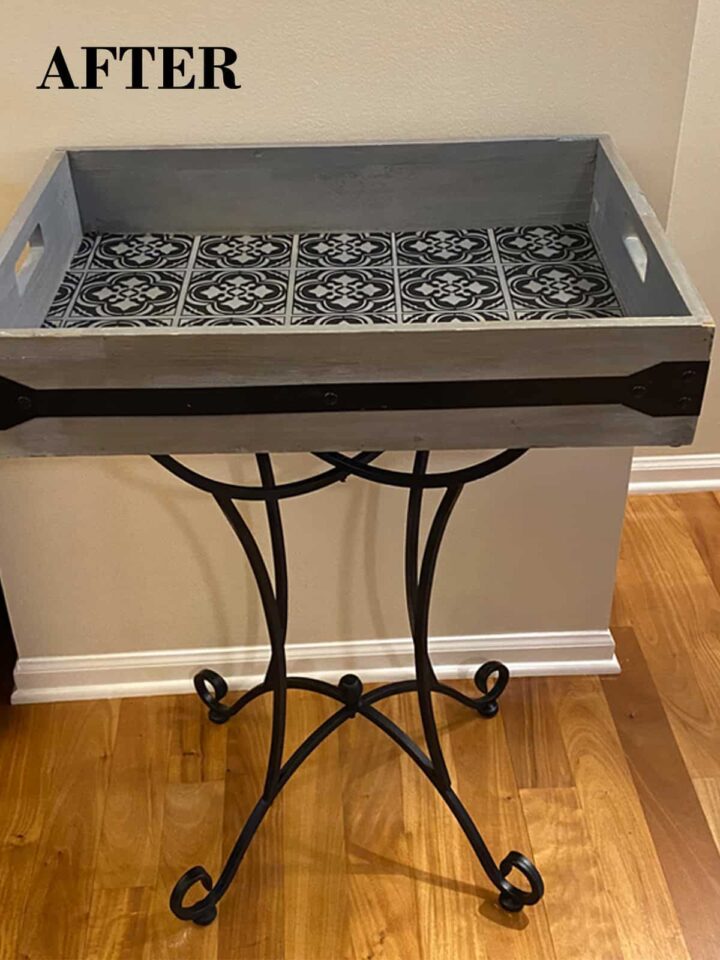
I turned the table back over, and walla, I have a tray bistro table to use for my next family gathering.
The Tray Makeover Reveal:
Here is what the tray and bistro legs have turned into now. Great, right? What do you think? Please leave a comment below.
Tips when doing this tray makeover:
Some tips for this project are:
- Spray paint the legs in a warmer shaded area to help them dry slowly.
- Get extra spray paint if the legs are in super bad shape.
- To figure out the screw size to use for the depth of the wood tray, measure the depth of the tray on the outside, then measure the tray on the inside. The difference is the wood's depth on the tray's bottom.
- If the bistro table is uneven, add felt pads to help even out the tray table.
I hope this post inspires you to upcycle your tray and bistro legs. If you have any questions, please leave a comment below.
Please note these are affiliate links through Amazon (affiliate), and at no additional cost to you, I will earn an affiliate commission if you click through and decide to make a purchase.
Visit our other recent DIY Projects below!