I found out the start date of the kitchen demo is two weeks away. If you read my previous post, we started the kitchen remodel project planning process about six months ago. Since the weather was so bad this past winter, the start of the process was delayed a bit, too. But that was OK. I didn't feel like cooking outside in the freezing temperatures. Now, I can get down to business and start doing what I do best: decluttering and organizing.
Of course, I first purged the different cabinets of anything I didn't use. Since I have been doing this all along, there wasn't much to eliminate. Then, I organized the stuff I kept. Here are the kitchen remodel project tips I wrote up just for you. This helped me clear the cabinets and get me organized for this major remodel.
Helpful kitchen remodel tips to help reduce stress
I started with the cabinets I did not use often, like those above the fridge and the small corner cabinets.
I cleared out many old plastic water bottles and moved wine glasses that I hadn't used in years because they were stored above the refrigerator to an area where my other smaller supplies of wine glassware were in our dining room. Now, I can use them.
I cleared the upper cabinet decor.
I washed them and put them in a cabinet in the other room for safekeeping. Most of these decorations will be reused in my new kitchen.
I could store all the stapled foods in the foyer closet/pantry I had been using.
Yes, if you know my posts, I had a pantry (affiliate) in my foyer that I use for my kitchen supplies. You can check out this post.
I place all my pots and pans and cookbooks in our enclosed sunroom.
I wanted them handy since I have a few weeks till the demo.
The items under the sink were put in their own opened box and stored in the sunroom as well.
I knew I would use these items to wash cooking supplies when grilling (affiliate), so I wanted to keep it nearby.
And for the rest, I boxed items into categories, just in case I needed them.
I bought cheap dividers for my utensils and organized them into the organizers' sections.
I purchased them from a discount store. Then, I could stack the organizing trays on top of one another and store them downstairs out of the way. This helped when I needed to put everything back into the new kitchen.
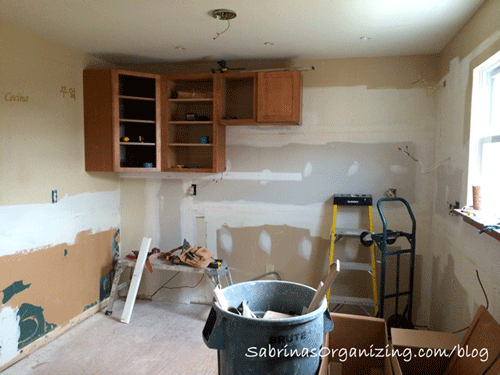
BEFORE image of the Kitchen Remodel
The room was cleared out, the electrical was already done, and the cabinets were put up. It was starting to come together.
In the next post, I will discuss how we ate during those three weeks of demo and reconstruction. And no, we didn't eat out all the time. I hope you enjoyed this post. Please share to show your love.
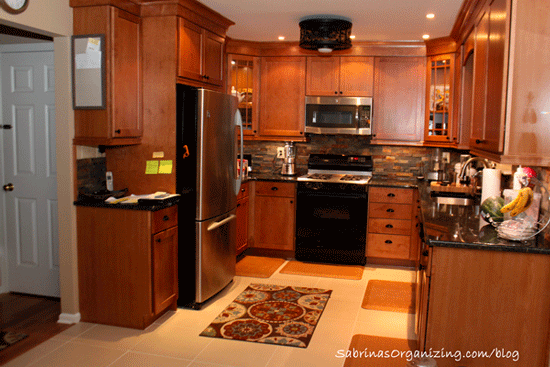
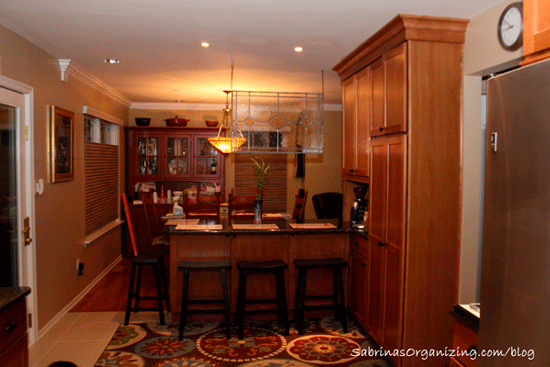
AFTER
Below are some after-photo images to check out the finishing touches.
Below are links to the other two posts:
PART 1: KITCHEN ZONES TO ADD TO YOUR NEW KITCHEN
PART 3: EATING HEALTHY TIPS WITHOUT A KITCHEN
Please note these are affiliate links through Amazon (affiliate), and at no additional cost to you, I will earn affiliate fees if you decide to make a purchase.


Leave a Reply