Does this ever happen to you? Arriving home from the grocery store and placing all the pantry (affiliate) items away, you are so proud of how you organized it. You think to yourself, "This pantry (affiliate) looks great." The next day, you go into your beloved pantry (affiliate), and there it is, the perfectly organized space you were so proud of, destroyed by other household members. =( If you are like so many others I know, this is a common issue. I know firsthand how unruly a pantry (affiliate) can get. Today, I will share my favorite tips to keep your pantry (affiliate) organized forever and my pantry (affiliate) makeover in my tiny pantry.
Jump to:
- Create zones in your pantry.
- Decide which part of the pantry you want these zones to be.
- Pick the right shelf for the different items.
- Questions To Ask to Determine Your Needs
- Add organizers for the different zones.
- My Favorite food containers
- My favorite wicker bins
- My Favorite Plastic Bins
- What is the ideal depth for a pantry?
- How to organize deep-shelf pantries?
- How do you organize a door in your pantry?
- How to organize with wire pantry shelves?
- Get family members involved in the planning and organizing of the pantry
- The Before and After Small Pantry DIY project.
- BEFORE Pantry modification:
- How long did it take to reorganize my pantry?
- Things I used for the update:
- How I organized my pantry?
- The Pantry Freshen-Up Reveal
To keep the pantry from getting disorganized every time someone is in it, here are DIY ways to keep the pantry organized:
The pantry needs to have labeled zones that every family in your home can understand.
Create zones in your pantry.
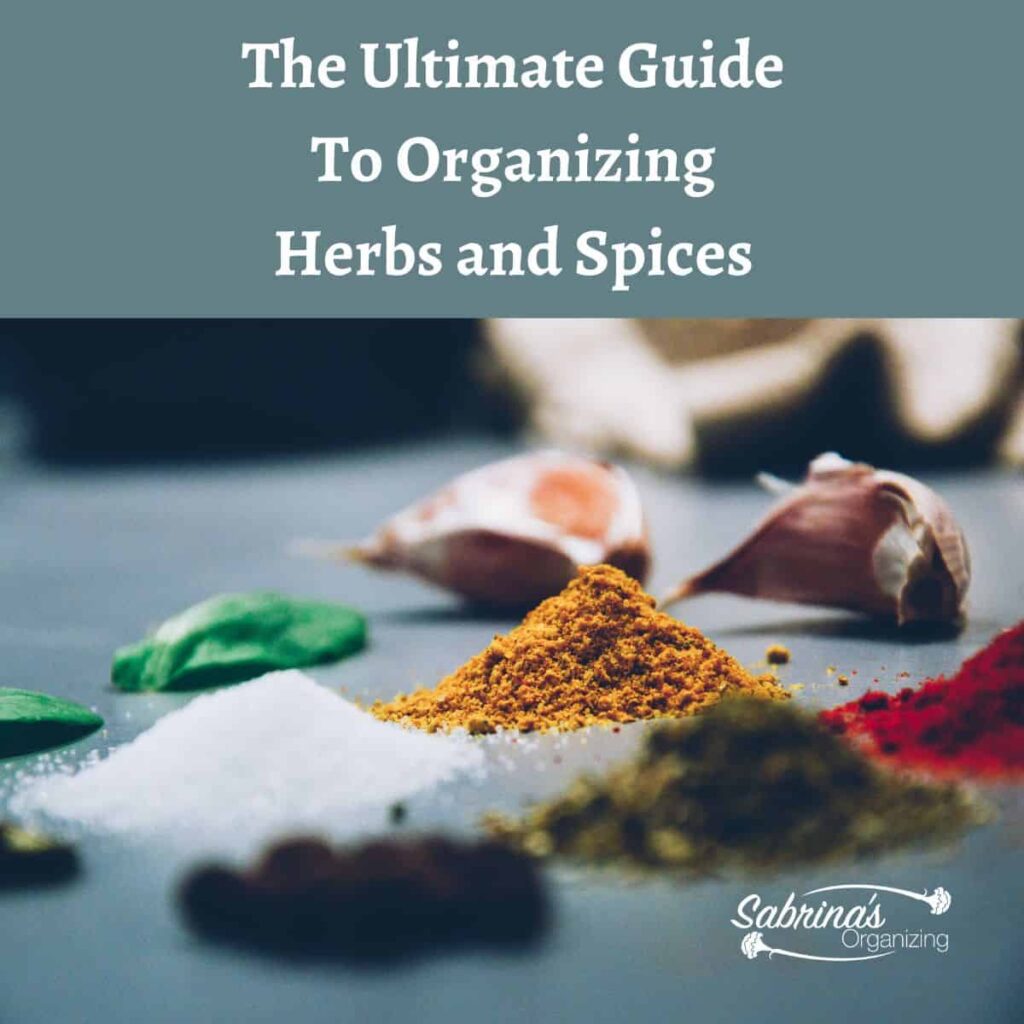
Some examples of pantry zones are baking, weekly meals, herbs (affiliate) and spices (affiliate), canned soups, canned vegetables and fruits, pasta, grains, condiments, legumes (affiliate) canned and dried, bulk items, paper products, and drinks.
Decide which part of the pantry you want these zones to be.
Now that you have divided your items into groups (zones) determine where you want to place the items. Each zone should be labeled clearly and easy to understand. Instead of labeling a bin "our snacks," instead use "gluten-free snacks (affiliate)" or "regular snacks" if you have family members that are gluten intolerant.
Pick the right shelf for the different items.
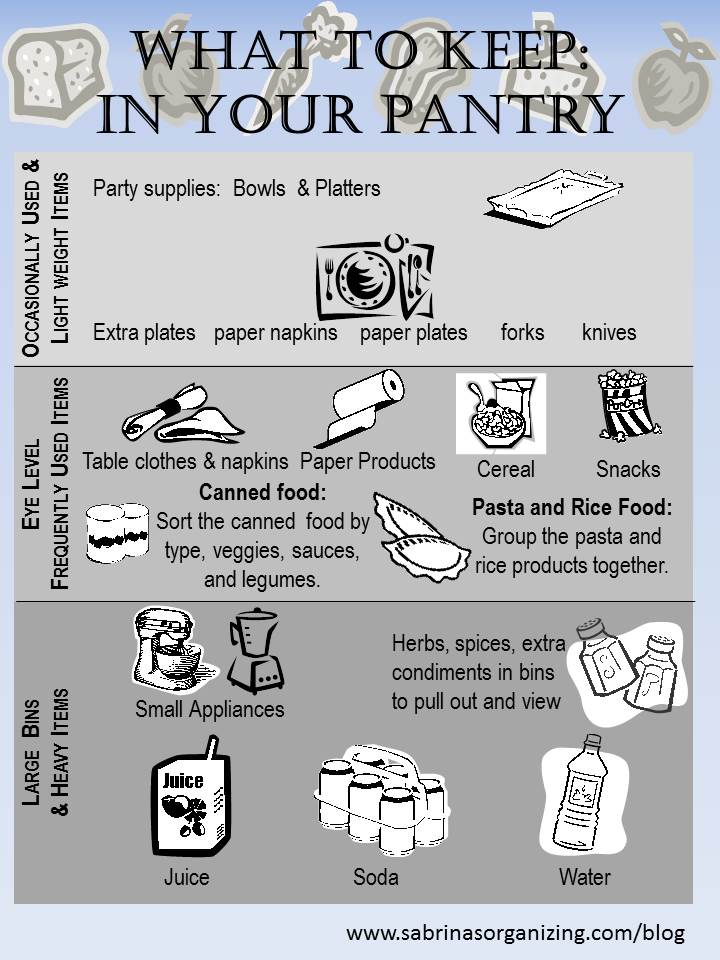
Each shelf should be designed for the people who will be using it. Some items for young children may need to be lower on the shelves (affiliate) until they have grown enough so you can place them higher on the shelves (affiliate). The easiest way to keep this pantry organized is to assign the shelves (affiliate) by weight of items and frequency of use. Below I divided the pantry into three parts - bottom, middle, and top.
Large and heavy items are closer to the bottom of the pantry.
They can be placed on the floor and/or the bottom shelves (affiliate). Examples of the items at the bottom are juice boxes (affiliate), broth, soda cans and bottles, cases of water, pet food, pet snacks, and small appliances (affiliate) stored in the pantry.
Frequently Used Items are stored in the middle of the pantry.
The frequently used items should be in the middle of the pantry. Some examples of things stored in this area are pasta boxes (affiliate), rice containers, food used for cooking, lunch ideas items, healthy snacks, and bread.
Infrequently used items are stored at the top part of the pantry.
And the occasionally used and lighter-weight items should be stored at the top. Items on this shelf are paper towels, napkins (affiliate), party supplies, and platters (affiliate).
Questions To Ask to Determine Your Needs
To help determine what each shelf and zone you want, answer these questions to decide on your personal pantry needs:
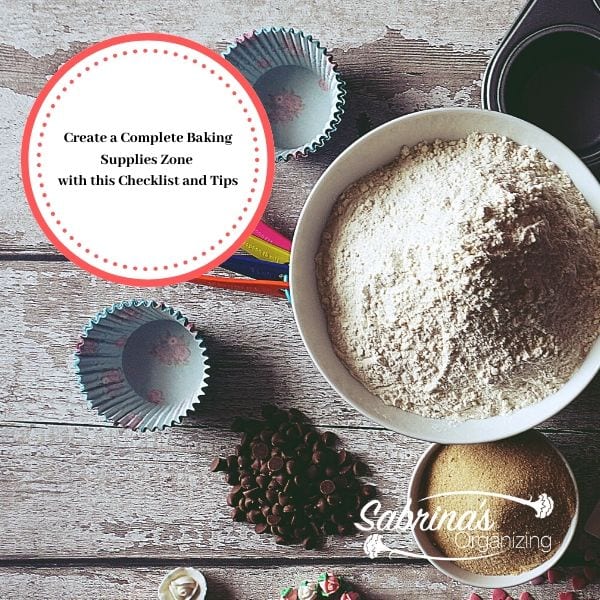
- What items do you use when baking?
- What products do you use regularly?
- Are there pantry items you use on certain days of the week?
- Do I entertain often and at the last minute?
- Can all my things fit into the pantry, or do I need to store items in other areas?
When organizing your pantry, do these tasks to make for a smooth update:
Clear out the entire pantry. Then, sort your pantry items into groups. These groups will become your zones. Here's a list of things you can use in the pantry.
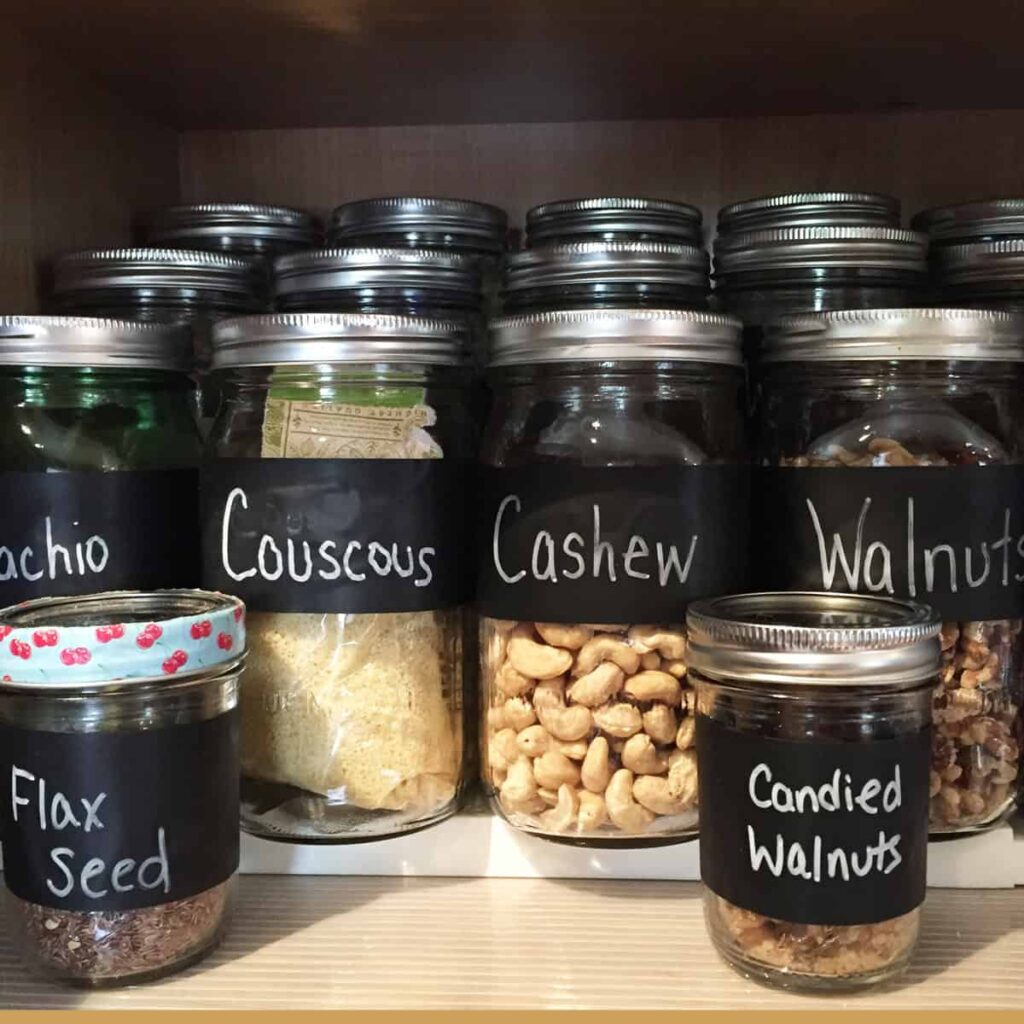
Add organizers for the different zones.
Each zone could use a different organizer depending on the area's purpose and the products that will be held in it. Below are some of the organizers that work well in a pantry.
Please note these are affiliate links through Amazon (affiliate), and at no additional cost, I will earn affiliate fees if you decide to make a purchase.
Carousel Organizers:
Carousel organizers (affiliate) are an excellent option if you have the space for them. Depending on what you place on them, there are single-tier and two-tier options. These organizers are ideal for storing spices and herbs.
Tiered shelves:
Tier shelving for canned goods works well, but you have to be vigilant and push the older cans forward so you can see them. They can also be used for mason jars (affiliate) that store other dried foods.
Sturdy Single Shelves:
These sturdy stand-alone shelves (affiliate) are great for pantries with fixed shelves (affiliate) that are far apart. They raise the items in the back to help you see them clearly.
Can Organizers:
I like to have cans on can organizers  (Affiliate). I have two of them, similar to the ones in the picture above. They are very useful and keep the cans always moving forward.
Storage Containers and food-safe mason jars:
Storage food containers (affiliate) are great for bulk products, like flour, nuts, sugar, etc. Make sure you get large (affiliate) enough containers for the size of the product you usually buy.
My Favorite food containers

Container 10-Piece by OXO Good Grips
Buy Now →(affiliate)
Baskets (large or small):
Then, use baskets to hold several small things in groups. The larger the bin, the heavier it will be, so stick with smaller, manageable containers. Wicker, acrylic, plastic, and wire baskets are some popular bins on wire shelves (affiliate). They all work well.
My favorite wicker bins

Baskets with Built-in Handles, Medium Rectangular Wicker Basket
Buy Now →(affiliate)
Label (affiliate) baskets if you use them so everyone can see where things belong. If family members need to see where the items go, use clear plastic bins (affiliate). Below are label (affiliate) options from Amazon (affiliate) (affiliate).
My Favorite Plastic Bins
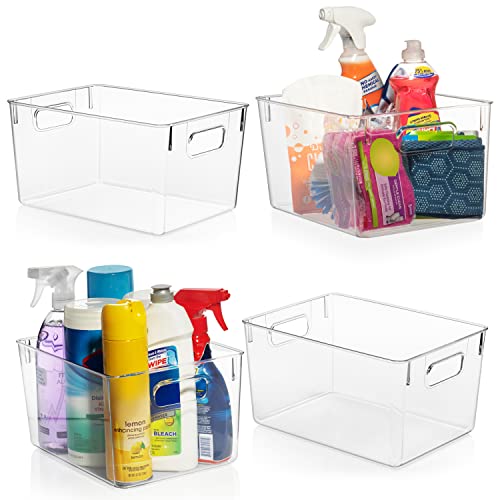
Plastic Storage Bins by ClearSpace
Buy Now →
Refrigerator Organizer Bins - 8pcs Clear Plastic Bins 12.5 inch deep
Buy Now →(affiliate)
Here are some additional tips to help you keep your pantry organized.
What is the ideal depth for a pantry?
For the best possible organization process in a pantry, it is essential to get the right depth. Otherwise, you may have issues with getting lost or not having enough room for everything.
When possible, use 15-18-inch deep shelving (affiliate). The shallower the shelf, the easier it is to keep organized and not lose anything in the back of the pantry.
How to organize deep-shelf pantries?
If you have deeper shelves, use baskets to store grouped items that can be easily slid forward. If the shelf is sturdy and well-mounted, you can install pull-out drawers.
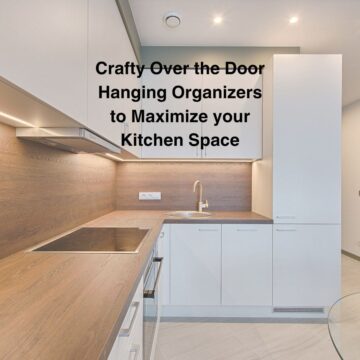
How do you organize a door in your pantry?
If you have a door for your pantry, use over the door shelving unit to maximize your space. Look for ones with deeper bottom shelves. They will help with storing items like cereal and dried goods. Below are some options from Amazon (affiliate).com (affiliate).
Check out our 6 CRAFTY OVER THE DOOR HANGING ORGANIZERS TO MAXIMIZE YOUR KITCHEN SPACE post to give you more tips!
How to organize with wire pantry shelves?
Wire shelving (affiliate) is standard in pantries and can be an obstacle when organizing. Below are suggestions on what to do to make wire pantry shelves more usable.
First, cover wire shelves with plastic liners so nothing can fall between the wires.

Pick the right organizers to sit properly on the wire shelving (affiliate). The more solid the bottom organizers, the better for wire shelving (affiliate).
Get family members involved in the planning and organizing of the pantry
Above all else, ensure everyone knows where everything goes in the pantry. It doesn't matter how large (affiliate) or small your pantry is; if users do not know where to put things, they will never stay organized.
And to maintain a well-organized pantry, don't forget these routine (affiliate) steps!
- Review and adjust your zones every few months. Modifying your pantry will keep it organized for longer.
- Make sure all the groups still fit in the space you assigned for them.
- Replace any labels (affiliate) that may have broken.
- Create new labels (affiliate) for new group items that may be created.
- Keep reminding everyone about where items go. You may sound like a nag, but it does pay off.
Now that you learned how to keep your pantry organized, I will share with you the steps I had to take with my pantry to get it to function better in our home. Let me give you the back story (affiliate).
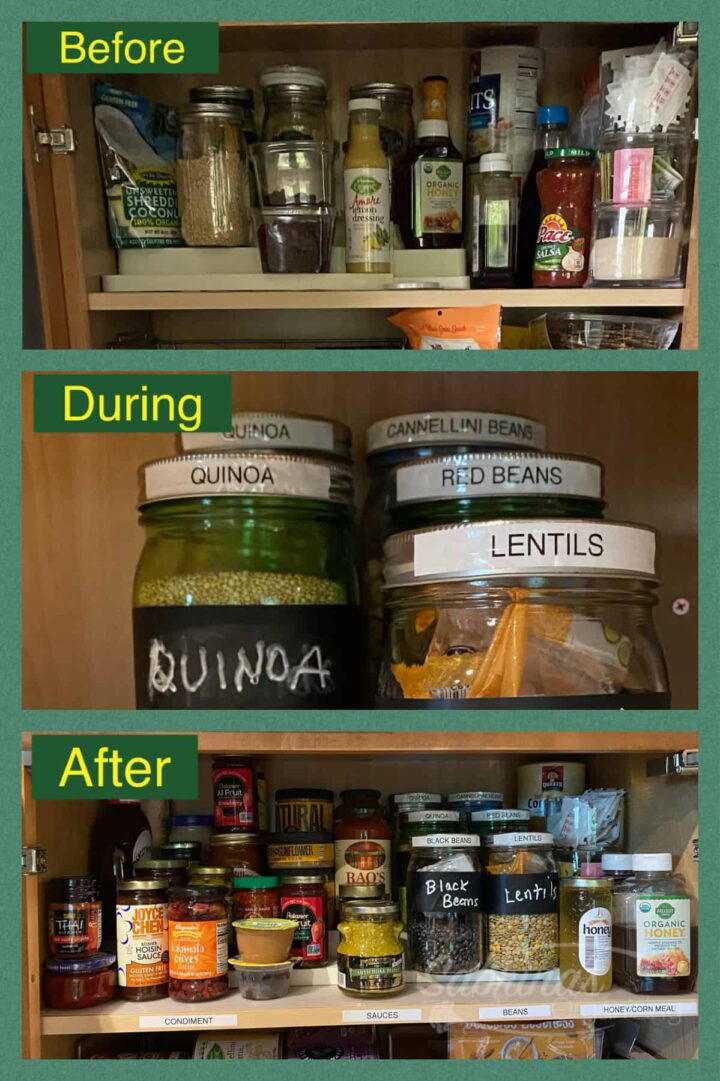
The Before and After Small Pantry DIY project.
We remodeled our kitchen in 2014, and the pantry was one area I needed to make accessible since I never had a pantry before that point (we had to do a makeshift pantry in the hallway off the kitchen, feel free to check it out here). So, we installed 18-inch deep shelving (affiliate) to allow for more space in the kitchen. While it worked for a while, it needed some tweaks. First, I started by adding larger white Ikea bins, which worked well since I could slide them out quickly. These bins were used for pasta boxes (affiliate), gluten-free snacks (affiliate), dog treats/food, and broths.
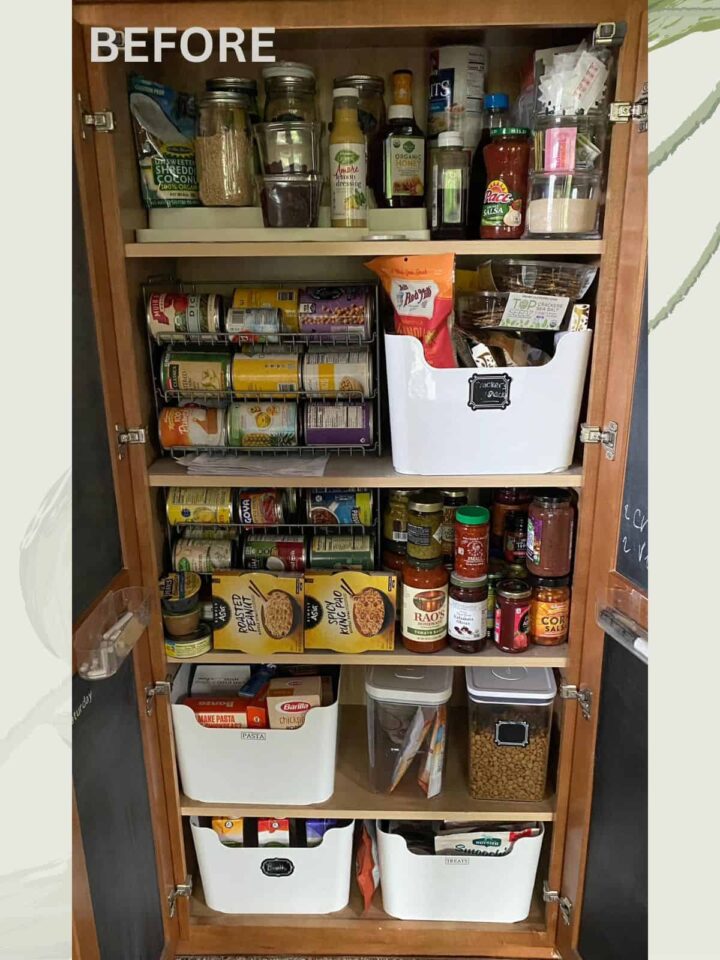
But now, I needed to take another look at my pantry because two shelves were not working out. It was the condiment and legumes (affiliate) shelf and my canned goods and lunch idea shelf. Here's how I corrected this issue.
BEFORE Pantry modification:
As you can see, the other shelves were organized, but these two shelves were not.
How long did it take to reorganize my pantry?
It only took about 1 hour to freshen up my partially organized pantry. I already had the needed organizers, so there was zero cost.
Things I used for the update:
Below are the products I used for this pantry update.
- 4- already used Ikea bins
- One tiered shelving that was expandable
- Containers for larger items like rice
- Mason jars
- Can organizers
- Label maker (affiliate) and label (affiliate) cartridge
How I organized my pantry?
First, I removed all the items from the shelves that were cluttered. Removed them, determined the things that were too far gone to enjoy, and disposed of them.
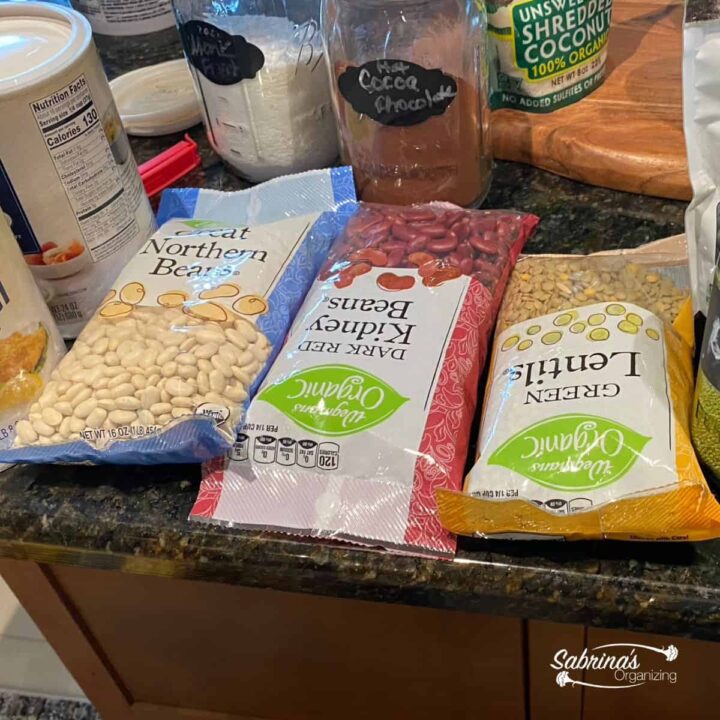
Next, I sorted all the items on the countertop from these two shelves.
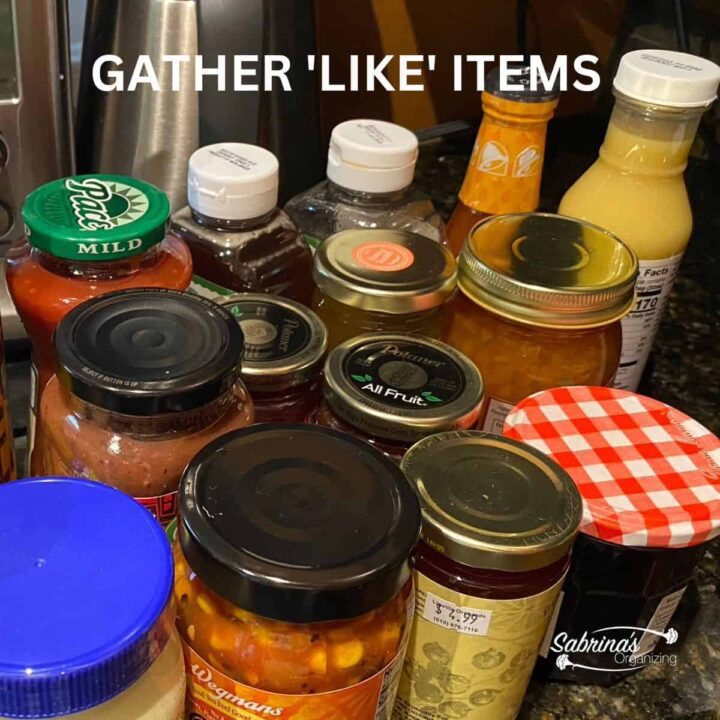
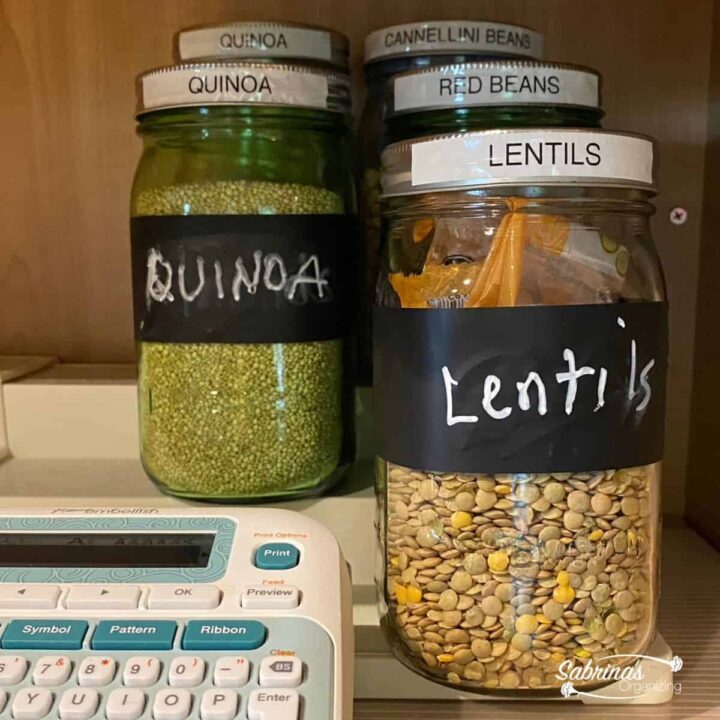
Then, I went through my legumes (affiliate), pulled extra mason jars (affiliate) I already had in another part of the kitchen, and filled and labeled them.
To help see what each mason jar (affiliate) name is, I added a label maker (affiliate) printed at the top rim of the lids. This helped me when I needed to see what item needed replacing before shopping.
I then moved the condiments to the top left and was able to modify the canned organizers so the second shelf down one was just for items to use for cooking and the third one down was items to use for lunches like soups.
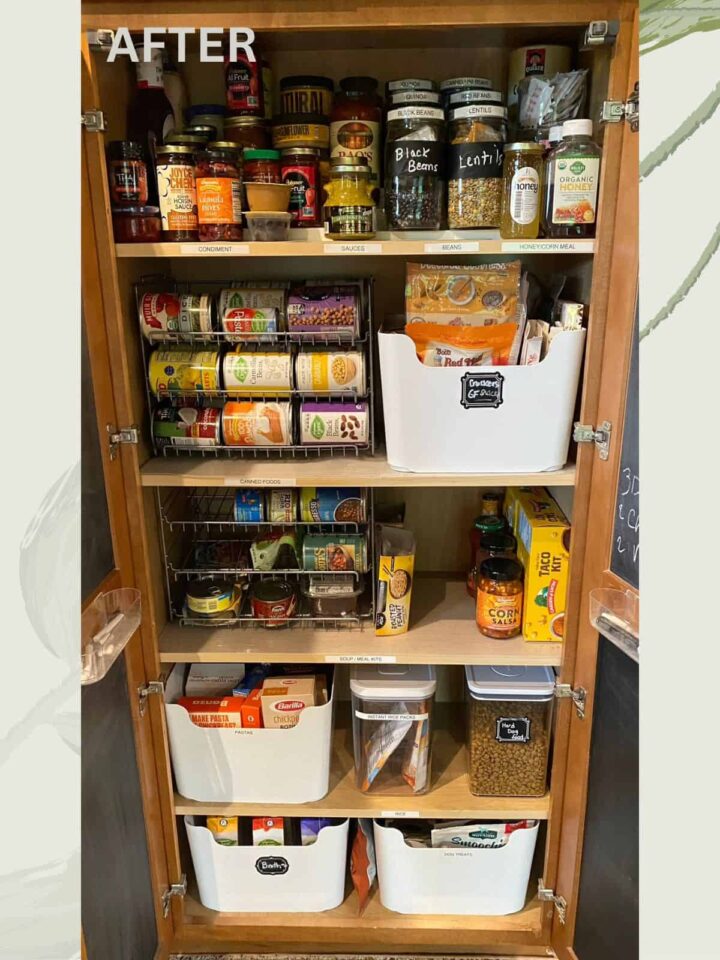
The Pantry Freshen-Up Reveal
And this is how my pantry looks now. I love it and can see all my condiments and sauces when I am making my recipes. Yay! Just a slight modification made a world of difference in this small pantry. I have more room now!
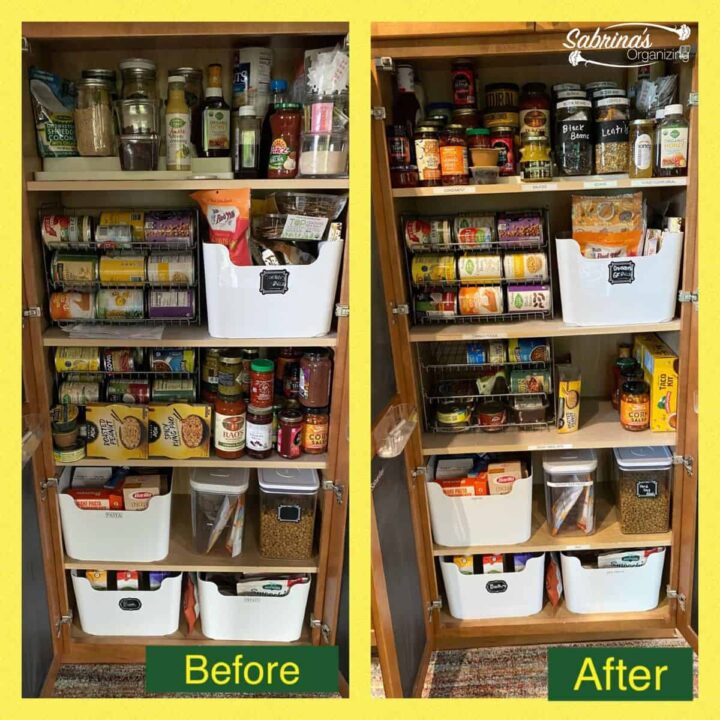
The below image is a side-by-side before and after of my pantry.
The image below shows the top shelf's appearance before, during, and after.
Well, there you have it, ways to help you keep your well-used pantry organized. Now it's your turn.
What tips do you have to keep your pantry organized? Do you love the layout of your pantry? What is your favorite part? Feel free to share below.
Take a moment and look at our other organizing posts about pantry:
Julie Bestry says
Excellent points. It's heartbreaking when I work in a client's pantry and find that it's been designed with 2 feet or more of depth, and there's just nothing you can put that far back. Putting items in dishpans so that you can reach in and get a group of items helps, but shallower is definitely better. And that three-tier organizer is so useful!
Nancy Haworth says
Thank you for these wonderful tips, Sabrina! I like the graphic that shows how light-weight items are best on the top shelves, and heavier items should go on the bottom shelves. So many people don't consider weight of items when organizing.
Janet Schiesl says
I love the labels you suggested. I'll look into those. I also like to decant any items that come in bags like dried fruit or nuts. I don't like how the bags never sit straight on the shelves. I also think it's prettier.
Linda Samuels says
I love using bins and risers to organize pantries. I especially love the clear open containers. They make for easy access and visibility. We have a tiny pantry, so it's pretty simple to keep it organized. Many of my clients have large pantries, and that's when it's beneficial to create zones, as you described. I have zones in my tiny pantry too, but in the big ones, it becomes even more essential so that you can see what you have and don't overbuy supplies.
Diane Quintana says
These are great tips, Sabrina. My pantry has pullout shelves which I love.
Seana Turner says
I love those over-the-door racks. They can hold a TON of stuff, and it is all shallow enough that you can see every item. Perfect for cans, which can be tricky! I love your idea of zones, because the actual items you have may vary from one week to the next. At times like these, we may be stocking up and then working our way through it all for a couple of weeks, so having a pantry system that can stretch is important. Of course, even having a pantry is a wonderful luxury that not everyone has. Why kitchen designers ever made kitchens without them is a mystery to me!
Autumn says
Great post Sabrina! Keeping a pantry organized does involve monthly maintenance. My biggest tip is get all of the packaging out of the pantry. Using Snapware saves me so much room! I also take seldom used utensils and kitchen items and store them in the pantry. If they don't get used in six months I donate.
Sabrina says
Great tip, Autumn. Thanks for sharing.
Janet Barclay says
I love that 3-tier cabinet organizer. It's always hard to see what's hiding in the back!
Sarah Soboleski says
Nice graphic! I love a neatly zoned pantry with bins and baskets. And with your pantry organized it makes it that much easier to make your grocery list as you can see what you're getting low on.
Jamie Steele says
Great post, Sabrina! Maintenance is the key to pantry organization. My favorite product for the pantry is the Elfa overdoor organizer. I use them in every closet of my house.
Liana George says
I love your graphic on what to keep in your pantry! It's a great visual. Great tips and I think it is so important to not only know how to organize your pantry, but to keep it organized too! Wonderful post 🙂
Jill Robson says
Great blog post Sabrina, it seems we are on the same theme this week, kitchens are one of my favourite spaces to organize.
Ellen Delap says
Can organizers are a great way to maximize storage space.
Sabrina says
I totally agree. =)