Kitchen baking cabinets can range from large (affiliate) to small. Although I have a larger kitchen, my baking cabinet, which houses all my baking pans, is small. Follow along to see how I organized my baking cabinet in this small 24-inch-wide cabinet in my kitchen. Here is an easy way to manage this one small baking cabinet. And, spoiler alert, all the items are still this way to this day.
Jump to:
- Before the small baking cabinet.
- Supplies used for this cabinet organization project.
- How long did it take you to organize this small baking cabinet?
- How much does it cost to organize this small baking supplies cabinet?
- Steps on how to organize a small baking cabinet.
- After small baking cabinet organization revealed.
Before the small baking cabinet.
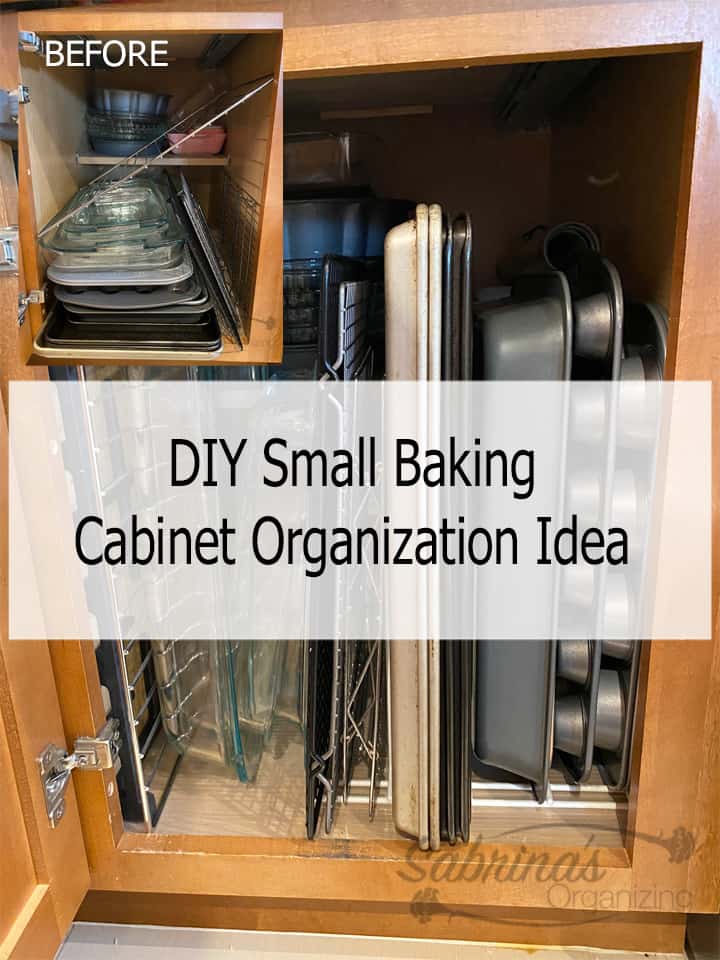
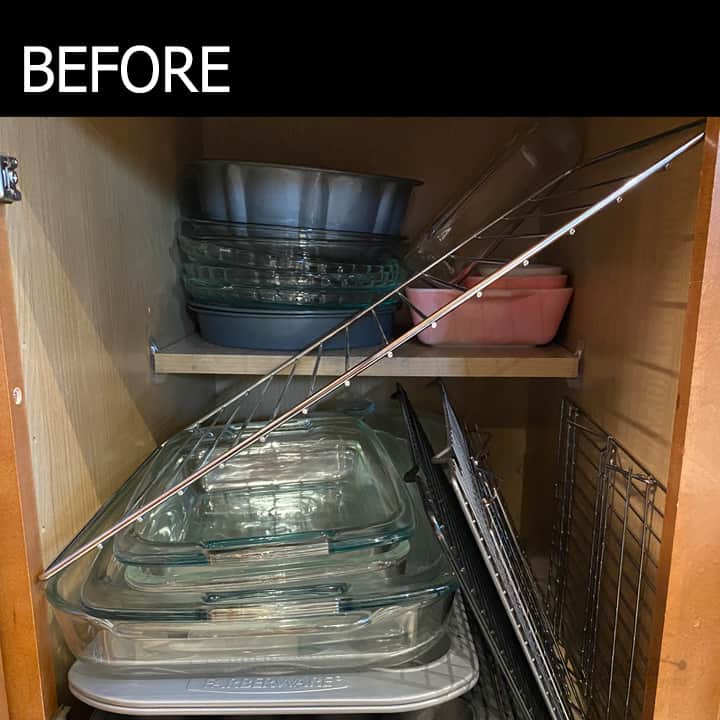
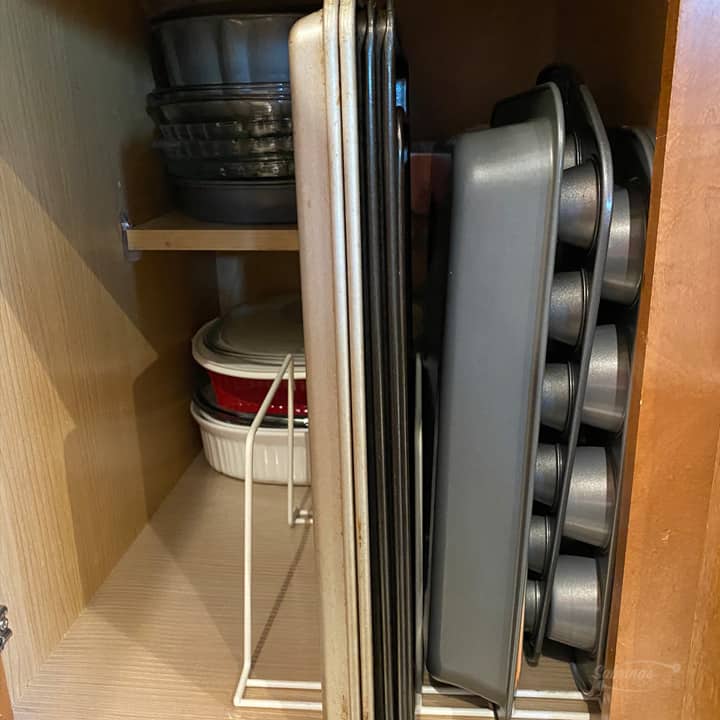
This image is what this cabinet looked like before the organizing idea I used. The stuff did not fit in the cabinet at all, and I had reduced it as much as possible. I used all these items and had items from my oven and microwave in here as well.
It was super frustrating to go into this cabinet, as you can see.
Supplies used for this cabinet organization project.
1 large storage bakeware organizer. Tall dividers are at least 1 foot high. This helps to hold pans and sheet pans vertically. It should not be the ones affixed to the cabinet since I needed to access the back of the cabinet for other supplies. (This link is from Amazon (affiliate). I will receive a commission if you click through and buy on Amazon (affiliate).com.)
One roll of plastic cabinet liner. This will help the cabinet remain scratch-free from the baking pans. (This link is from Amazon (affiliate). I will receive a commission if you click through and buy on Amazon (affiliate).com.)
Please note these are affiliate links through Amazon (affiliate), and at no additional cost to you, I will earn an affiliate commission if you click through and decide to make a purchase.
The Container Store's Kitchen department offers a wide range of products, including food canisters, drawer organizers, pantry organizers, spice racks, storage carts, cookware, kitchen gadgets, and more. Visit their website for more wonderful products!

How long did it take you to organize this small baking cabinet?
This project only took me about 1 hour to do. It was pretty easy. See below for the tips on how I organized this baking cabinet.
How much does it cost to organize this small baking supplies cabinet?
Between the bakeware organizer and the liner, I spent about $40.00. I have extra liner left for my other lower cabinets.
Steps on how to organize a small baking cabinet.
Below are the steps I used to create this organized cabinet.
First, clear the cabinet out completely.
I removed all the items from the cabinet and wiped down the shelf and base of the cabinet.
Add the liner.
I then added the liner by cutting it down to size. This helped me keep the bottom mark free from the pans.
I added a small piece of the liner to the shelf as well.

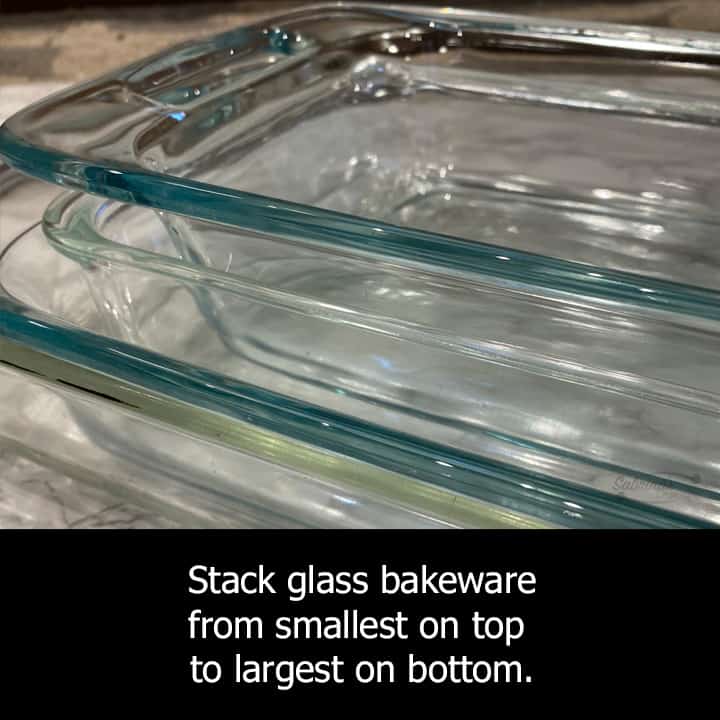
Stack the glassware.
I added the glassware from largest on the bottom and smallest on top. They fit nicely together and could stand on their sides easily.
Stack the round baking pans together.
I then stacked all the round baking pans from smallest on top to largest on the bottom on the shelf and added other less used supplies on the shelf and in the back on the bottom of the cabinet.

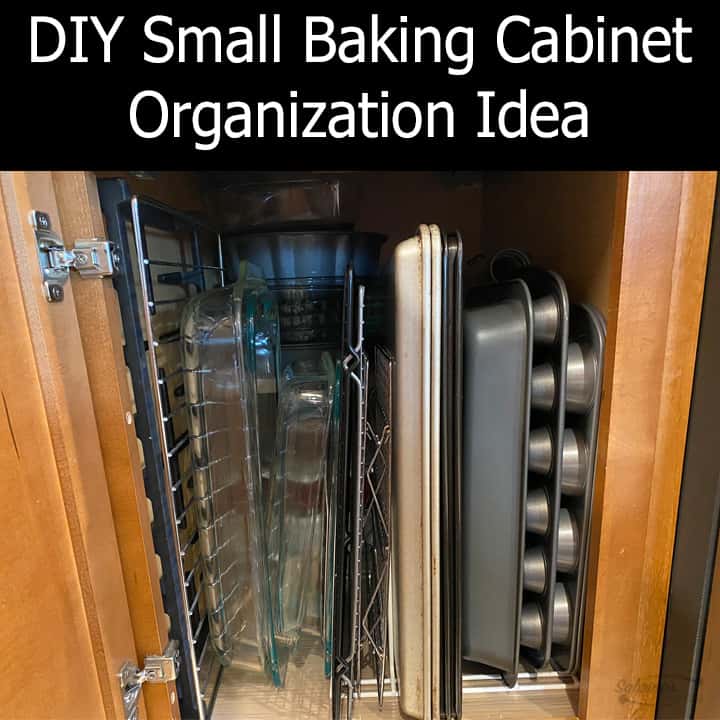
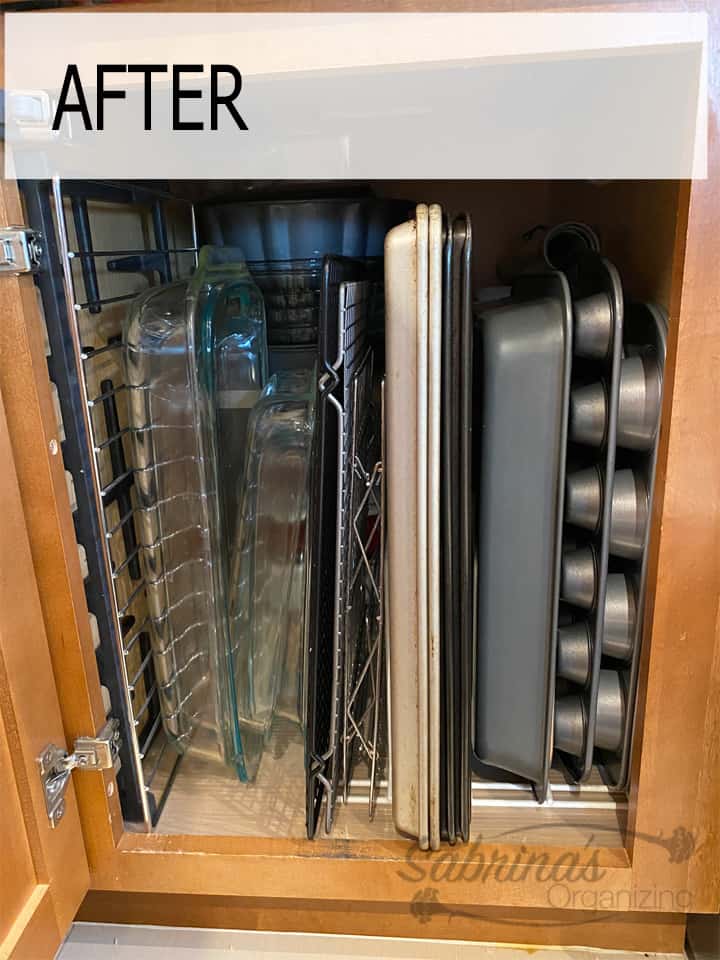
Add the bakeware organizer to the front part of the cabinet.
I then added the bakeware organizer to the front right side and started with the muffin tins. I placed them to the side because they are not used that often. This makes them out of the way but accessible when I need them.
Then, add the baking sheets next.
I added the baking sheets (affiliate) next inside the organizer. This organizer dividers could hold about 2 inches wide stacked baking sheets (affiliate) so that I could have FIVE baking sheets (affiliate) in various sizes.
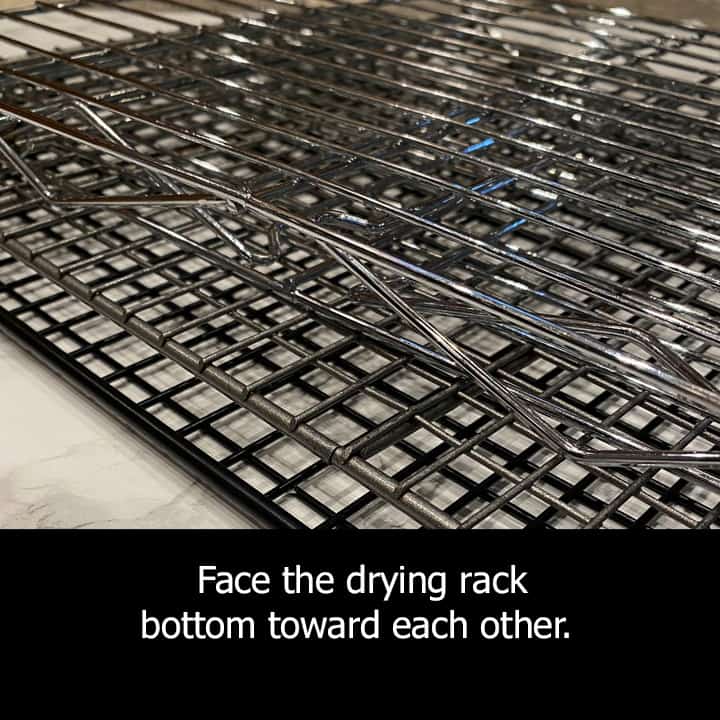
Next was the drying racks.
The drying racks (affiliate)' bottoms were facing each other because the racks would get stuck on the wire part of the organizer. By doing this simple change, it made it easier to pull out from the organizer.
Next, add the glassware.
The glassware baking dishes were not inside the organizer. If I could find an organizer in this small space, I would add it here to complete the area, but I didn't find one.
Then, I added the extra supplies from the range and microwave. They filled up the rest of the cabinet.
After small baking cabinet organization revealed.
I am thrilled with the outcome. The cabinet door closes too! YAY! And, here is what the cabinet looks like now.
What do you think? Would you try this in your kitchen? Please share your comments and questions below. I would love to hear from you.
Please note these are affiliate links through Amazon (affiliate), and at no additional cost to you, I will earn an affiliate commission if you click through and decide to make a purchase.
Visit our other baking organization posts below for more tips and ways to organize these cabinets.