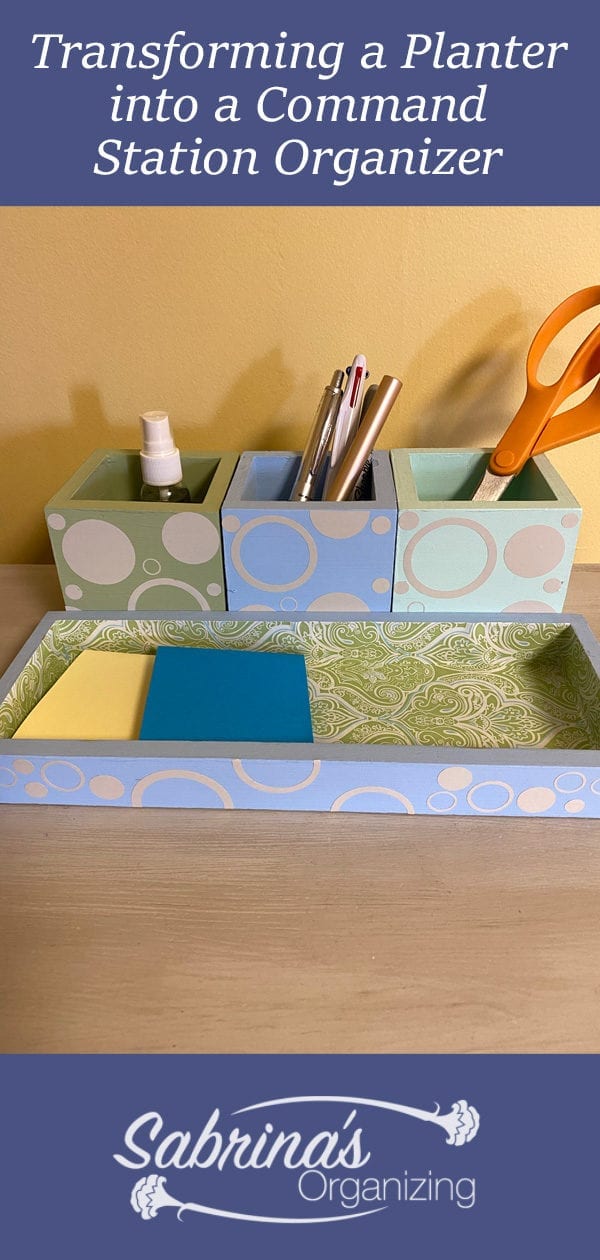
I'm a huge fan of upcycling things. I love turning items that were not used into new and improved organizing products. It's helped me use the items in a different more effective way instead of trashing them or donating the items. Today I am going to transform a planter into a Command Station Organizer. Follow along and make your own, today!
First, the supplies and tools (affiliate) we will need.
Jump to:
- Supplies needed to make this command station organizer:
- Tools needed for this DIY project:
- Instructions on how to transform this planter into a command station organizer:
- Before Command Station Organizer:
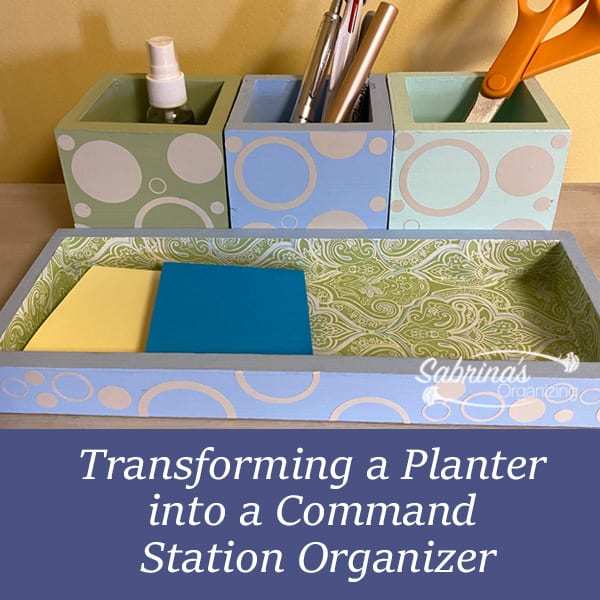
- Paint the boxes the different colors.
- Add the Circles to Dress Up the Box.
- Attach the Tray to the Boxes.
- Add the Vinyl to the Tray Inside.
- The Finished Command Center Organizer.
Supplies needed to make this command station organizer:
1 - FolkArt 4621 Minted Aqua Acrylic Paint bottle - affiliate link from Amazon (affiliate).com
1 - FolkArt 402 Light Blue Acrylic Paint bottle - affiliate link from Amazon (affiliate).com
Wood Planter 3 boxes (affiliate) and a base box (tray) from Micheals
Peel and stick decorative liner paper - green/blue/white
1 - FolkArt 6455 Wild Wasabi Acrylic Paint bottle - affiliate link from Amazon (affiliate).com
Cream Vinyl sheet
Tools needed for this DIY project:
3 - Paintbrushes (affiliate)
Cricut cutter machine
Cricut mat
Weeder
Scissors (affiliate)
Three screws
Drill (affiliate)
3/32 in the drill (affiliate) bit
X-Acto Knife (affiliate)
Something to remove the bubbles when sticking the liner paper down.
Now, let's see how we made this organizer.
Instructions on how to transform this planter into a command station organizer:
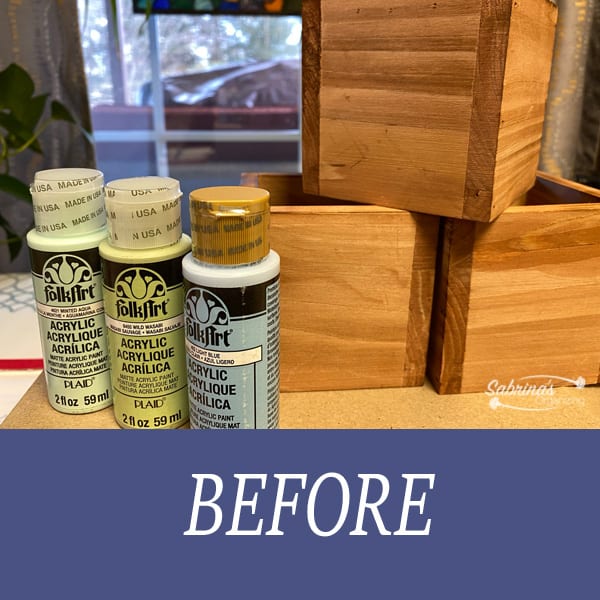
Before Command Station Organizer:
Here are the before planter and the base box they were inside of. They came together for about $12.00 from Michaels. I decided to use these paints because they matched the liner paper.
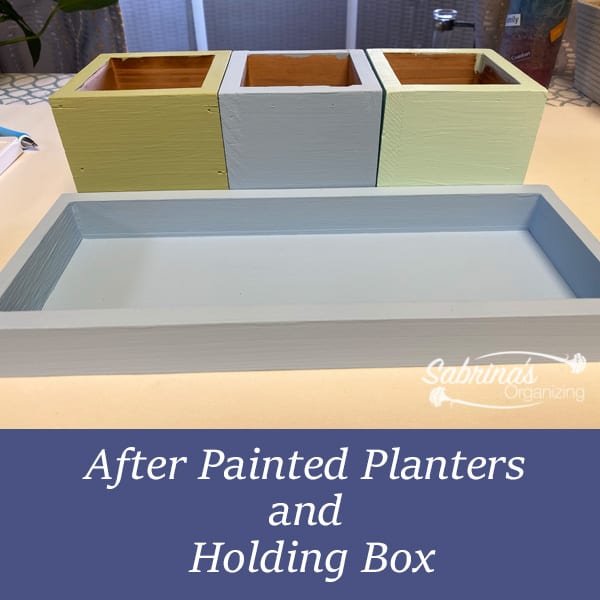
Paint the boxes the different colors.
Then, I painted the three boxes (affiliate) and base box. I picked three colors.
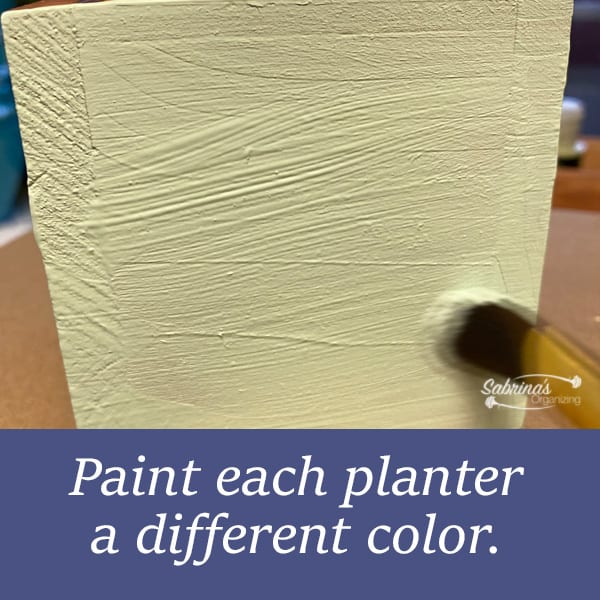
Here is what it looked like when I finished painting all the boxes (affiliate). They looked cute, but I wanted to kick it up a notch.
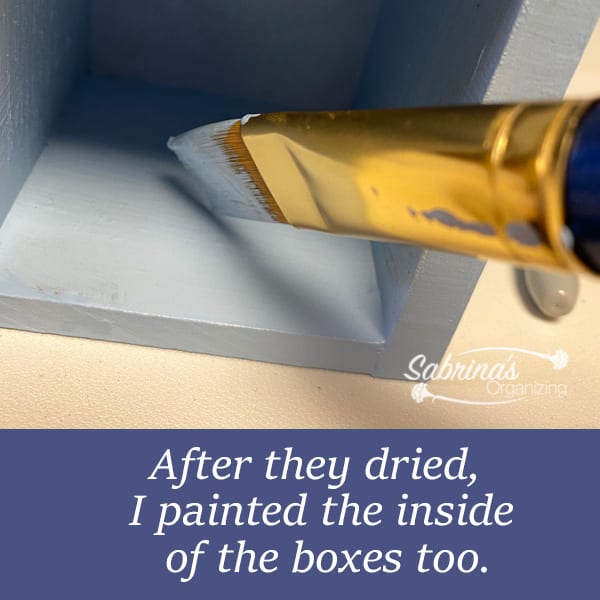
After the bins were dried completely, I went back and painted the boxes (affiliate) inside. It made it look more complete.
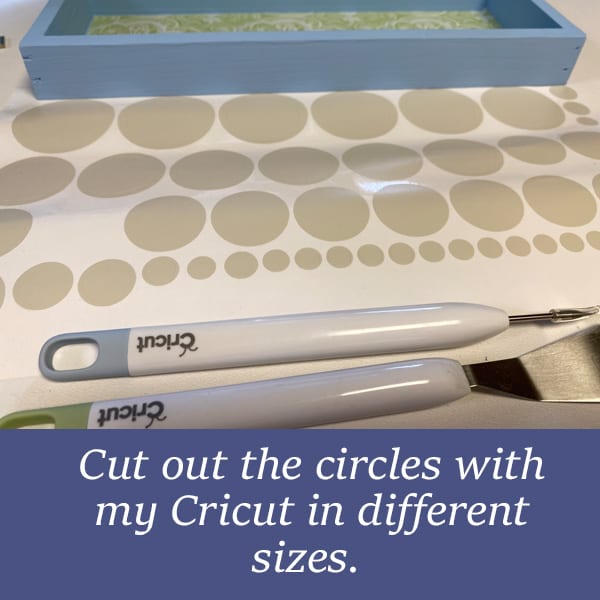
Add the Circles to Dress Up the Box.
So, I decided to add various circles of various sizes with my Cricut machine. I used cream vinyl and cut them out into various circles of various sizes. Some circles were solid, and others were just a circle design.
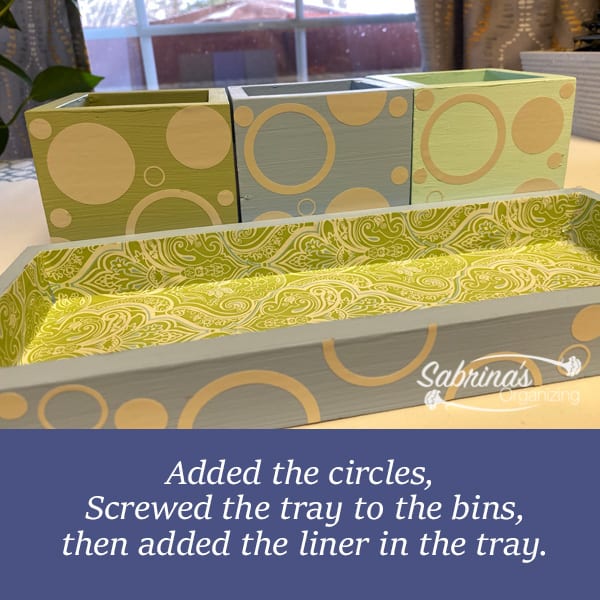
I added the circles in various locations to the front of all four bins. To cover the small staples for the manufacturer, I covered them with small circles. Watch the YouTube video to see the complete process.
Feel free to check out the video below and share it if you want!
Attach the Tray to the Boxes.
I then drilled three holes and then added the screws to them to attach the planters to the tray. I only needed three screws for this process. Take your time. When screwing in the screws, it cracked the wood a little bit.
Note: if you have a small electric screwdriver (affiliate) that adjusts, your screws would go in straight. My screws were a little angled because I did not have a short electric screwdriver (affiliate).
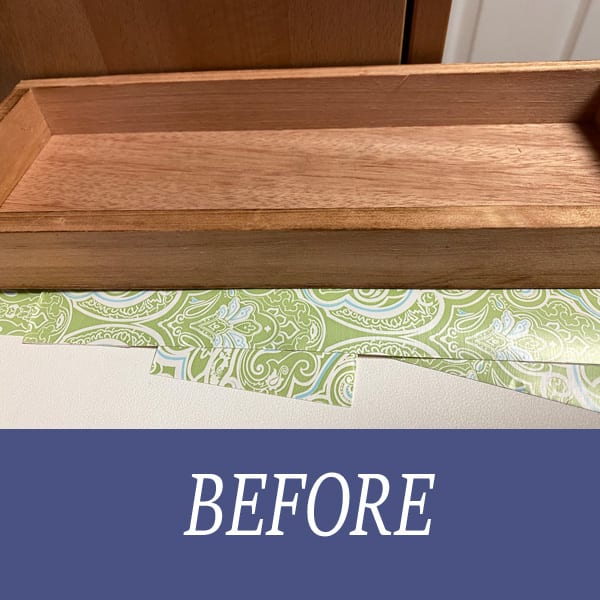
Add the Vinyl to the Tray Inside.
Then, I added the decorative vinyl to the tray inside, but it did not fit, so I removed it, added the side pieces to the bin, and then added a center vinyl liner to cover the bottom of the tray. I added the sides first so that when I added the tray's bottom, it would look completely covered, and I would not see the blue coming through.
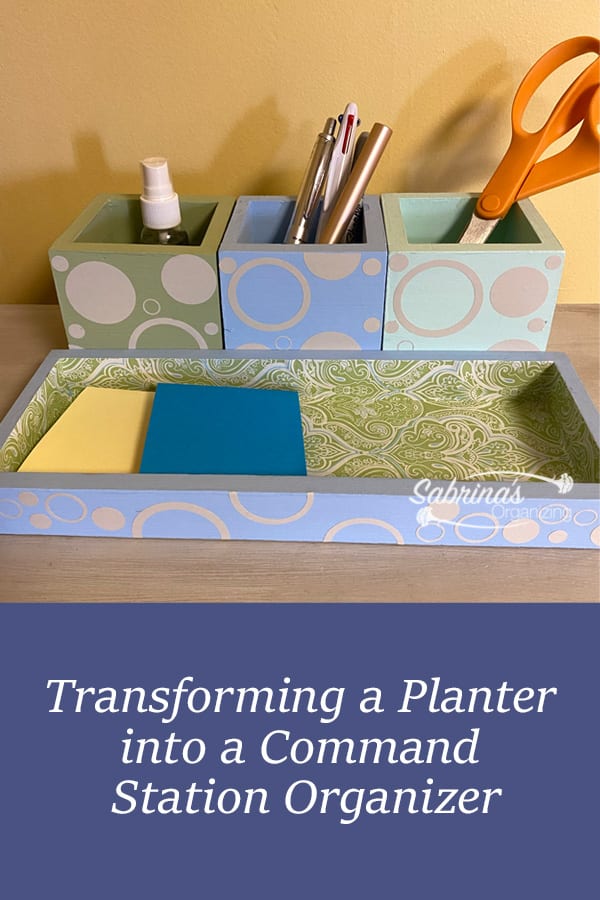
The Finished Command Center Organizer.
Here's the finished project. I love it. It's very bright and colorful. And everyone knows where the scissors (affiliate)' home is now. Then, I found a home for it in my command center (affiliate) area. Here's the finished DIY project. What do you think? Please leave a comment below and share it with your DIYers. Thanks for stopping by!
Feel free to check out our other family command station tips:
HOW TO KEEP A FAMILY COMMAND STATION ORGANIZED
HOW TO UPCYCLE PLANTERS INTO A DESK PENCIL HOLDER
Visit our other kitchen organizing posts!