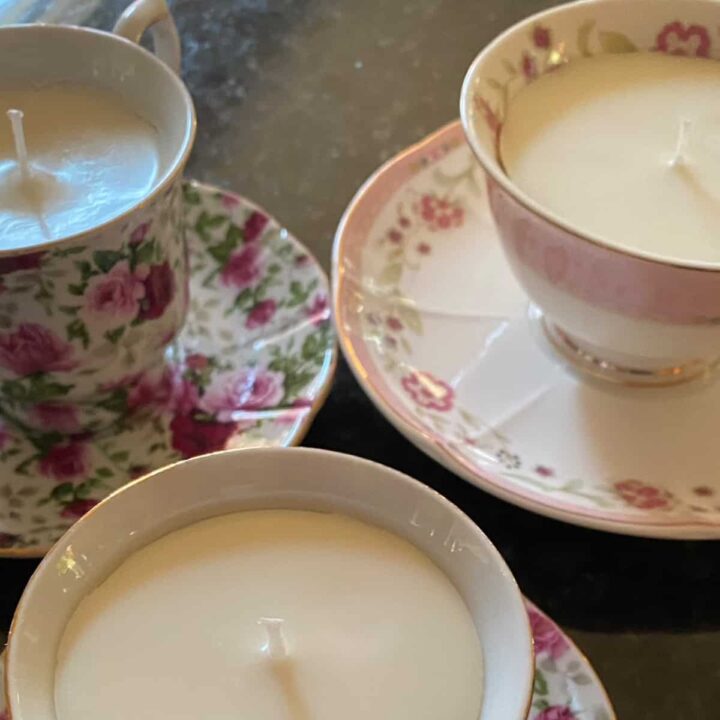
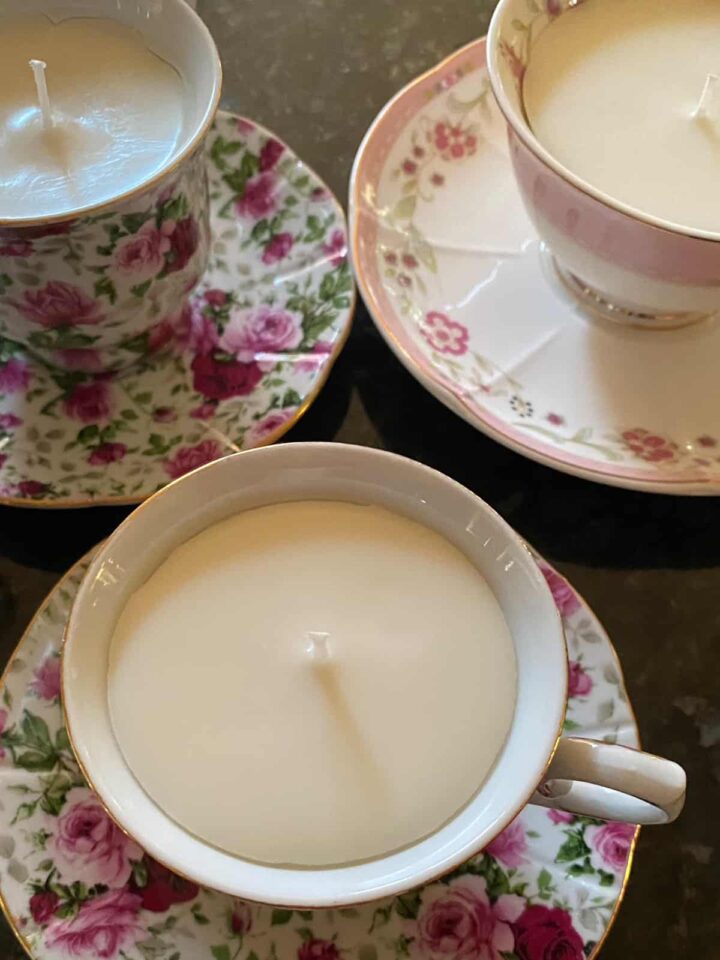
Vintage teacups are so pretty. However, if you have several of them that you don't use, why not try making this teacup and saucer candle? I attempted to make two of them, and this post outlines the easy steps I took to create them. Follow along to complete this DIY TeaCup Candle Project and discover the steps and other tips to make your teacup candle fragrant.
Jump to:
- What inspired me to do this DIY teacup candle?
- What supplies did I use for this DIY teacup and saucer project?
- How did I make this DIY teacup candle?
- How much did it cost to make this DIY teacup candle?
- How long did it take to make this DIY teacup candle?
- Where to buy vintage teacups and saucers?
- Why should you make these teacup candles?
- The Big Reveal
- Tips on making this DIY teacup candle
- Popular DIY posts on the blog:
Note I used two different types, one I found from HomeGoods and the other two from a set I had from my mother. To better see the steps, the images below show both candles (affiliate) and may interchange the type of candle depending on the step.
What inspired me to do this DIY teacup candle?
I have always been fascinated by the process of making candles (affiliate). When my husband and I got engaged over 25 years ago, we attended a Renaissance faire and watched as people made candles (affiliate). It was very relaxing, and it was one thing I wanted to try. Upon researching it, I found that it is relatively easy to do. And, boy, I was glad because I am not a fan of challenging craft projects. So, I gave it a try with the candle-making kit.
Another reason I decided to make this DIY teacup is that I had adorable teacups and saucers from my mother before she passed away, and I wanted to honor her by repurposing them into something I could use. I love tea, but I do not use teacups.
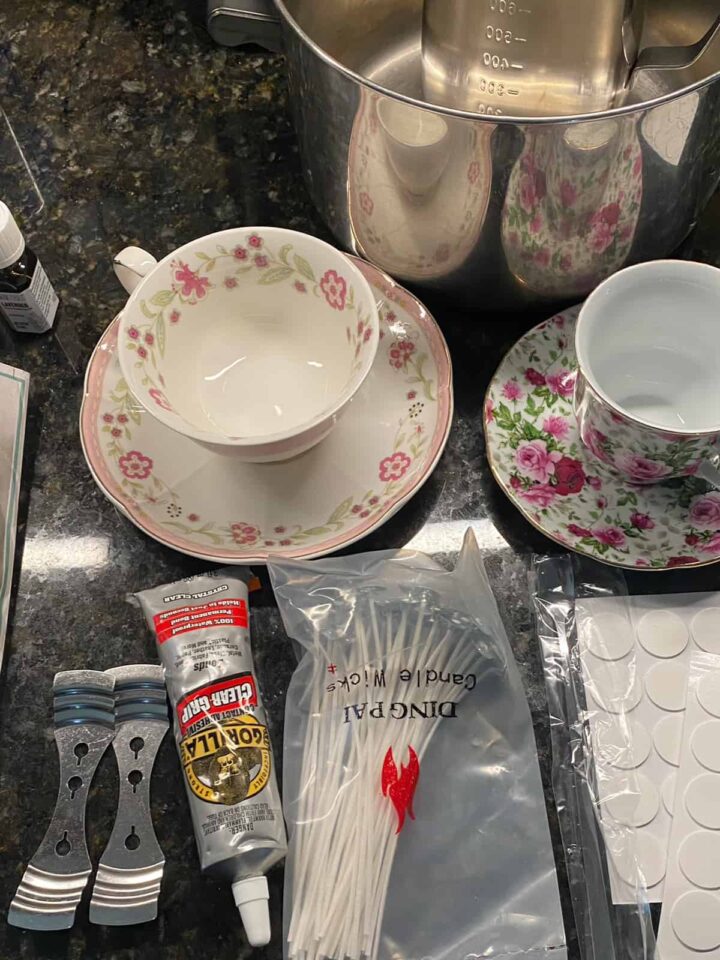
What supplies did I use for this DIY teacup and saucer project?
Below are the supplies and tools (affiliate) I used for this DIY candle project. The candle-making kit can make at least one of these teacup and saucer projects. To make more, you must buy more soy wax flakes.
Unused FREE or Cheap Teacup and saucer - Find them at a flea market or HomeGoods/Marshalls/TJMaxx for your best deals.
Gorilla Contact Adhesive Clear Grip 100% waterproof
Candle-making kit - includes soy wax flakes, pouring pot, Candle wicks, Candle Wick Stickers, stirring stick, and 2- Candlewick center devices
High-quality Sweet Orange Essential Oil
High-quality Lavender Essential Oil
Disclosure: At no additional cost to you, if you click through and make a purchase on Amazon (affiliate), I will receive a small referral fee. Thank you for supporting my small business.
Additional items needed:
Stainless steel or another saucepan large enough to hold the metal pouring pot.
An electric tea kettle boils water. If you do not have an electric tea kettle, bring a pot of water to boil and let it sit for a few minutes.
A heat-resistant surface to hold the saucepan while adding hot boiling water to the bottom.
Scissors to cut the wick.
How did I make this DIY teacup candle?
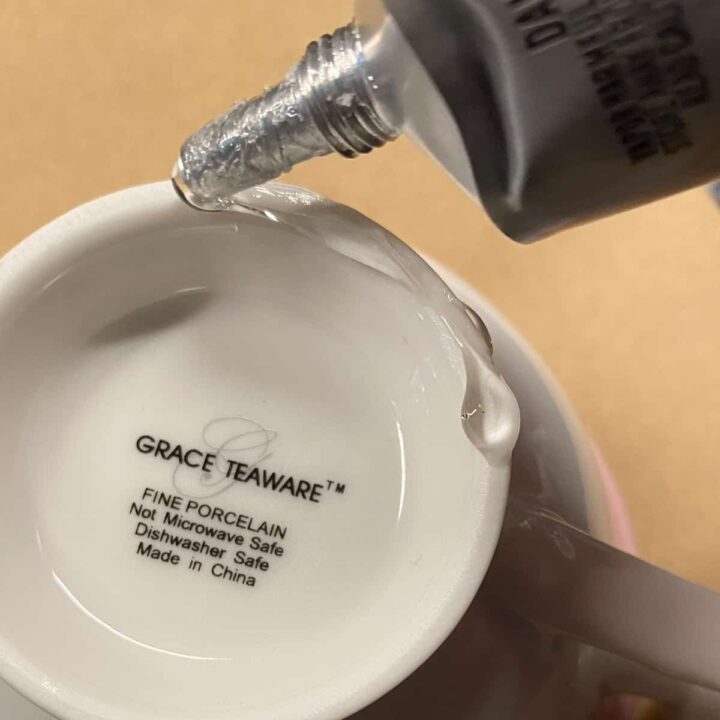
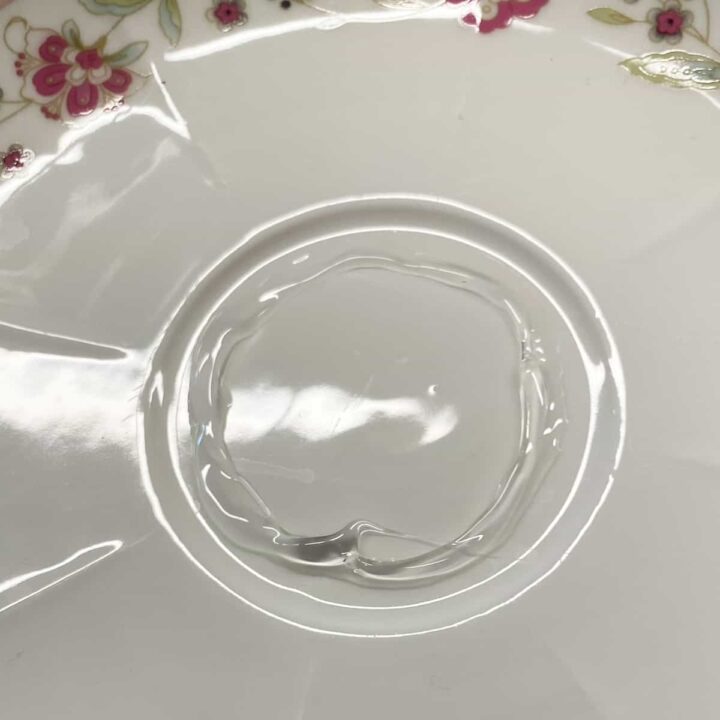
First, using the Gorilla Contact Adhesive Clear Grip, which is 100% waterproof, apply it to the bottom of the cleaned teacup and the center of the teacup saucer, ensuring each teacup bottom aligns with the center of the bead of glue. Both sides should have adhesive on them. To adhere them together, both the teacup's bottom rim and the saucer's base must be coated with glue. Wait 24 hours and confirm that the teacup and saucer are attached. NOTE: I used this saucer and cup because it was easier to see than the other flowering tea cup and saucer.
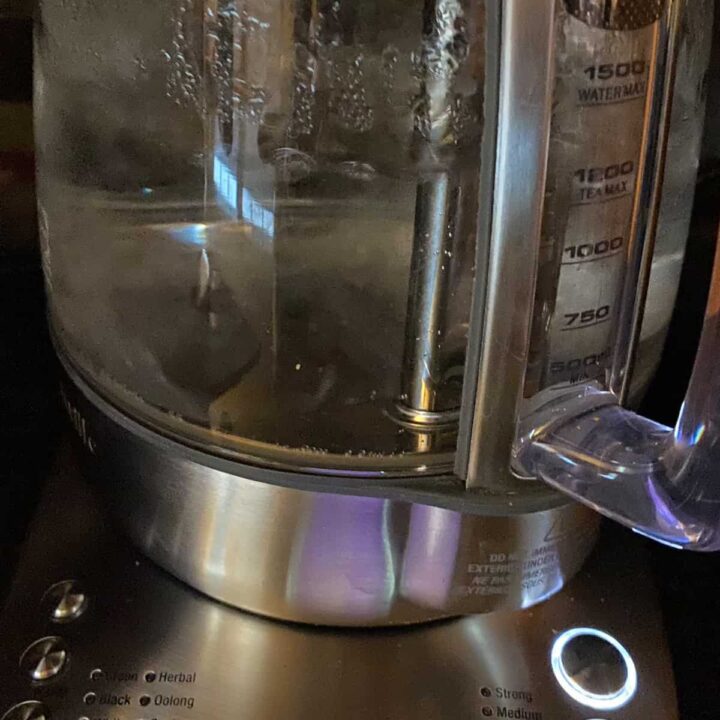
Boil water in a tea kettle.
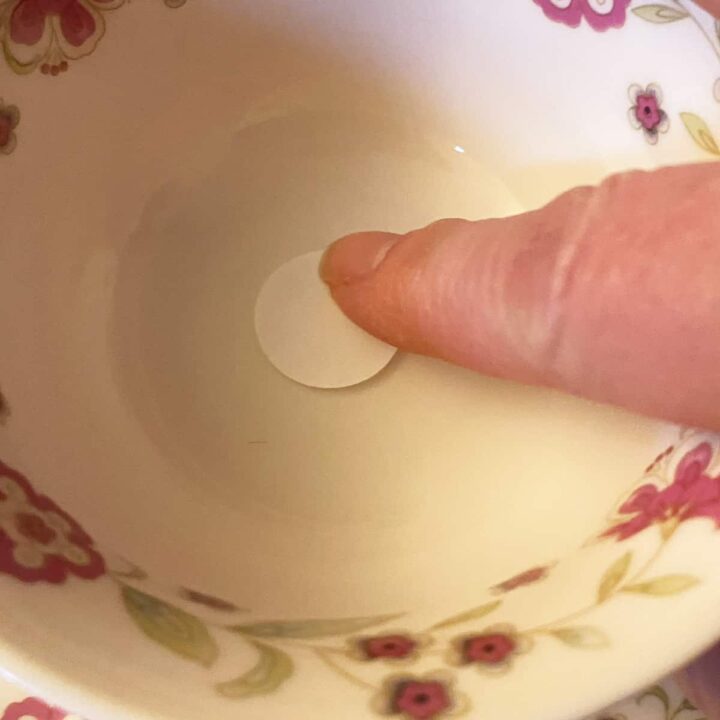
Then, boil water in a tea kettle. You will need enough hot water to cover about 2 inches of the pouring pot. While the water is boiling, add the double stick sticker to adhere the wick to the inside center bottom of the teacup.
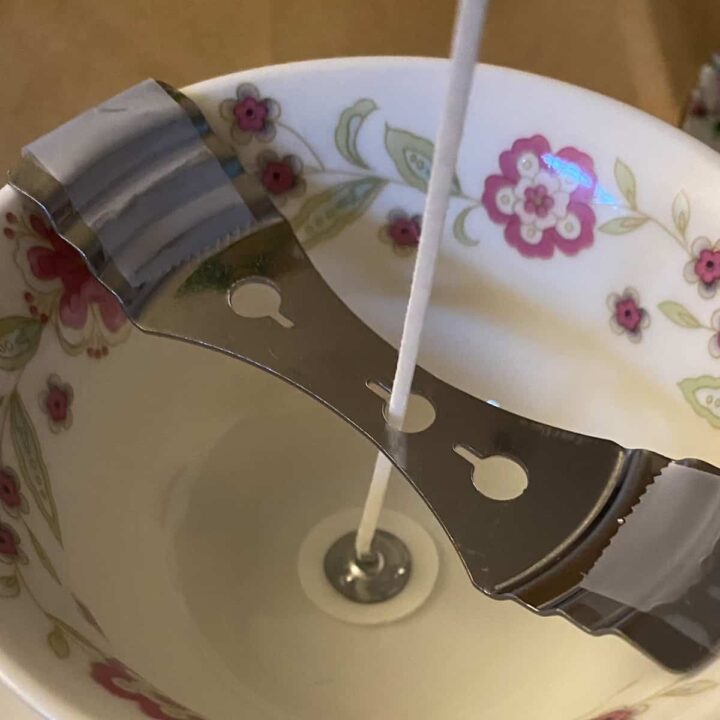
Add the wick to the center of the teacup.
Now, add the candle wick center to the end of the teacup and run the wick through the hole to ensure it doesn't bend when you add the melted wax. If the teacup is too wide, add a piece of tape to each side of the wick centering piece to keep it in place.
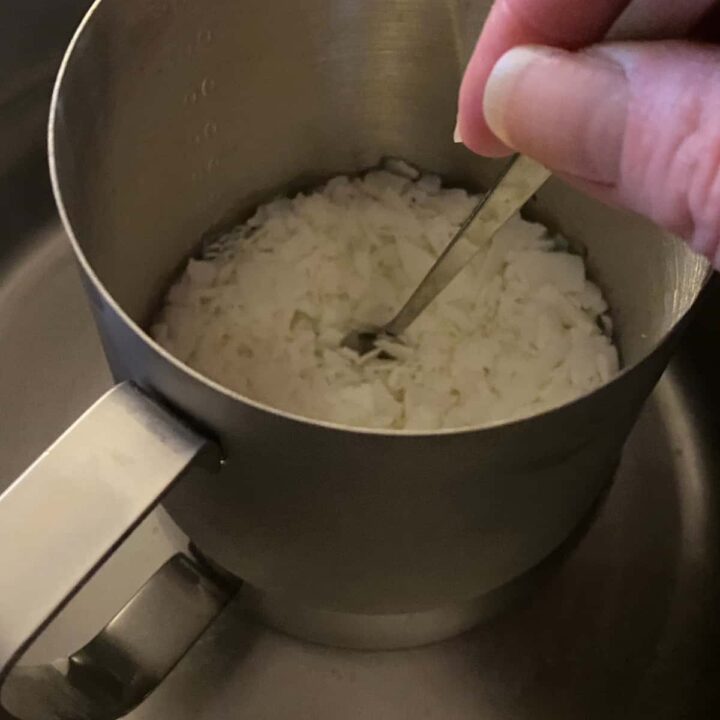
Add the soy wax to melt it.
Next, add about 300 ml of soy wax flakes to the inside of the pouring pot. Add the boiling water to the saucepan on a secure and heat-resistant surface. Place a pair of heat-resistant gloves on. Then, while holding the pouring pot with the soy flakes inside, submerge it in hot water. With your other hand, stir the soy flakes while they are submerged in the water. Keep stirring until completely melted. It usually takes about 5 minutes.
Add the essential oil if you want.
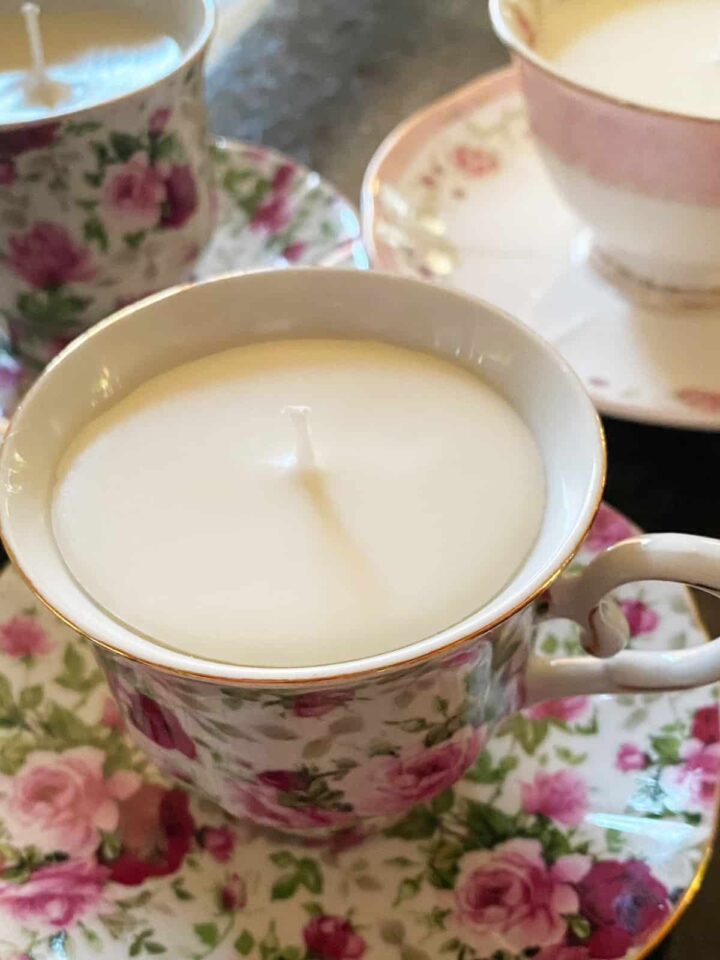
Now, add the essential oils (affiliate) if you want to the container. You may need 10-20 drops of essential oil for a small 6 oz to 8 oz teacup. You may need more if you have a larger teacup. I tried very little essential oil since I dislike scented candles (affiliate). Add the melted wax to the teacup to ensure the wick is straight. Then, remove the center wick right away. This step is crucial to ensure the solidification process proceeds correctly.
Allow solidifying.
Let solidify for 24 hours and assess. If you have any holes, you can try doing this process again and filling in the holes with a little more wax.
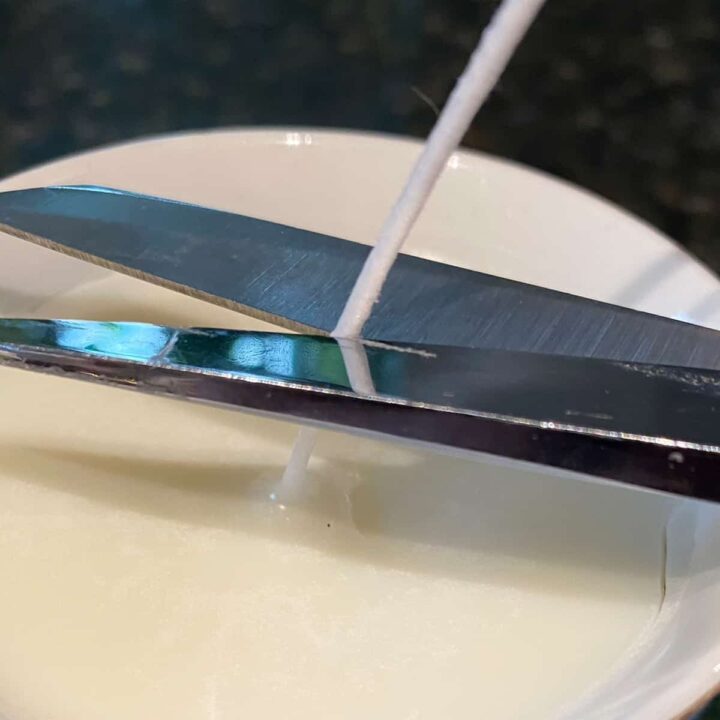
Cut the wick.
Next, trim the wick by ¼ inch. Let sit for 10-14 days before lighting to help enhance the scent if you used scent.
How much did it cost to make this DIY teacup candle?
Since I inherited this teacup and saucer from my mother's home many years ago, it didn't cost me anything. But I did buy the candle-making kit. I already had the glue, tools (affiliate), equipment, and essential oils (affiliate). The total cost for the teacup candle was $12.00.
How long did it take to make this DIY teacup candle?
It took me 48 hours to make. Much of that time was spent on drying. The adhesive took 24 hours to cure completely, and the candle wax required about the same amount of time to solidify completely.
Where to buy vintage teacups and saucers?
Teacups and saucers can be bought or acquired from a variety of places. Below are places you can find used teacups and saucers.
- Thrift store
- Yard sales
- Discount stores
- Grandparents or other family members
Why should you make these teacup candles?
Making these for different events is a unique option for any party. Below are some ideas on how you can share these cute teacup candles (affiliate).
- Give them as Easter gifts - with the spring floral on most teacups, it is a beautiful gift to anyone who enjoys candles.
- Wedding presents - it's great for giving to the happy couple or giving to the wedding guests.
- Party favor gift ideas - having a tea party or a birthday party for a child would be a cute gift option.
- To honor loved ones who passed - if your loved one always made tea and enjoyed it with them, you can quickly turn their favorite teacup into a candle. When you light it, you can think of them. It is an excellent way to honor your loved ones. Visit our other ideas to honor loved ones' memorabilia.
- Do Not Use It for tea again - I do not recommend using it for tea after making it into a candle.
The Big Reveal
This beautiful teacup candle is lovely. I am so happy with the result. What do you think? Please leave a comment below. I would love to hear from you.
Tips on making this DIY teacup candle
Below are some tips when making and using teacup candles.
If you experience sinkholes in your teacup candle, check out this post for tips on correcting them.
You can make several candles but may need more soy wax flakes. I found bags of it at Michael's.
After pouring the scented candle wax into the teacup, wait 10-14 days before lighting for the best scent.
Burn in a well-ventilated room and avoid drafts. Place the candle on a heat-resistant surface.
Always be in the eyesight of a lit candle. This will help prevent accidental burning.
Feel free to check out the video below to watch the transformation.
I hope you try making these candles for a gift or party favor. They are super cute and an easy DIY project to try today. Please let me know if you have any questions in the comment section below.
Popular DIY posts on the blog:


Leave a Reply