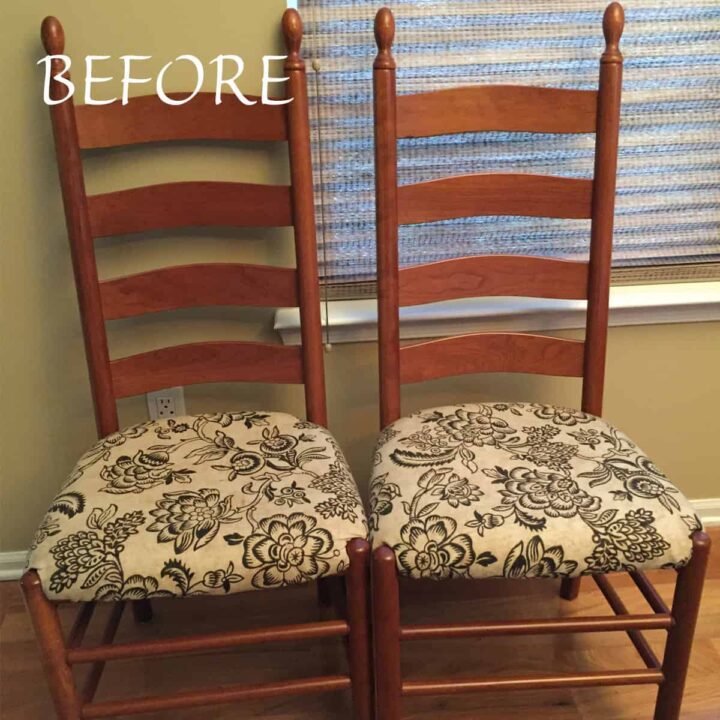
Our Shaker dining room chairs are almost 10 years old and were in rough shape. Over the years, the padding and glue that held the chair (affiliate) seat together softened and then ripped. It made you feel like you were sitting on a toilet seat while eating dinner because you sank in the middle. YUCK! It was very uncomfortable. People didn't seem to notice, but we stopped eating in the dining room because of it. So, recently, I took on the task of finding someone to repair the chairs. But, despite no success, I had to take on the challenge of fixing the seats myself.
In college, I worked for The Bombay Company (I don't think they are around any longer). The manager taught me how to upholster dining room chairs like the pros. So, over the years, I have covered several dining room chairs. But this task was going to be a little more difficult. I will need to dismantle the seats and replace them with proper support, completely, so we don't fall into the center. This post is about how I DIYed my dining room chairs. I will go through the step-by-step process of disassembling and reassembling the shaker chair (affiliate). Here we go.
Jump to:
This is what the chairs looked like before the repair.
Here are some of the tools I used to repair these shaker dining room chairs:
Drill
Staple gun and staples
Hammer
Fabric Scissors
Zig Zag Scissors
Needlenose plyers
Flat head screwdriver (affiliate)
Knife
Fabric
Batting
Mesh backing (optional)

How to repair a dining room chair?
First, I removed the padding, the torn-off mesh, the staples that were sticking out, and anything else that would not leave a clean surface. Here is what it looks like after.

This process took a lot longer than I wanted it to speed up the system, so I created quick ways to remove the fabric from the seat.
First, I removed the top layer of fabric I put on years ago to match my pillows. Then, to remove the spray glue and foam, I used a utility knife (affiliate) and scissors (affiliate) to cut a hole in it. I proceeded to see around the flat edge of the wood to make it easier to come off. The fabric and foam were spray glued onto the wood, so I needed to clean it off. Then, there was some detailed cleaning up I had to do. Here's a video showing you how to remove spray-glued fabric from wooden seats.
Add the new strips for the chair bottom.
Then, I used these upholstery strips woven together and stapled them to the sides. Staple one side, have someone pull the other side tight, and then staple.


This is the result after all the strips are stapled.

Cut the foam for the chair.
Then, I traced the foam to the shape of the seat. I added about ¾ of an inch to the foam because I wanted to press it down when I wrapped it so I didn't feel the wood near the legs.

This was the fun part. I cut the foam using an electric knife. It was quick and worked great. Be sure to stay perpendicular to the group to make sure you get a clean cut.

Cover foam with batting and staple.
Then I covered it with batting. First, I started at the center and stapled one staple on each center. Be sure to pull tightly. You can press down on the frame and then pull a little more. Be sure not to make a hole in the cotton batting. Then staple with a staple gun. Next, I moved around the entire frame pulled the fabric, and added more staples.

Then do the corners. Be sure to shape and pull the sides. The sides of these seats go inside the chair frame, so I need to make it super tight.

Add fabric to the top of the batting and staple.
The next step in the Repair Dining Room Chair was to add the fabric layer. I did the same steps as for the batting.

Then I cut the excess fabric off the batting and the fabric layer.


You can then put on a thin layer of mesh that will cover the edges if you want. I felt that it was not necessary because the material wasn't noticeable.
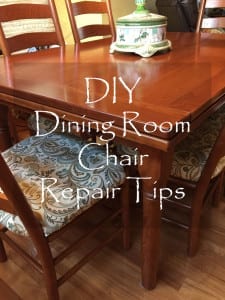
The big reveal:
And here are the final products. It took about 8 hours to do all six chairs, and I had help from my son and husband. It can be done as a weekend project.

Feel free to watch the video:
I love the pattern. Don't you? We are now ready for the company over the holidays. I can't wait.
What project do you need to complete before the company arrives? Please share your comments below.
Visit our other DIY Posts!


Please note these are affiliate links through Amazon (affiliate), and at no additional cost to you, I will earn affiliate fees if you decide to make a purchase.

Linda Bunck says
Sabina, HELP!!
Where can I buy the chair bottoms? Ours are like yours but they
cracked in half!
Sabrina Quairoli says
Sorry to hear that, Linda. I never had to replace the wood seat bottom. But there are ones that are online. I searched "upholstered dining room shaker chair seat replacement" in my search engine, and it came up with various solid wood versions; you can probably add fabric and batting to it. Check the dimensions(length, height, width) to ensure it will fit your seat. I found that using the broken seat dimensions will help determine the right fit for my chairs. I hope this helps. Good luck with your quest.
Katie says
HI! This is perfect for what I need to do to my chairs! A couple questions? What type of fabric did you to give support to the chair? And What type of foam did you use? Thank you!!
Sabrina Quairoli says
The fabric was furniture fabric, it's extra thick fabric. I used a burlap strip woven together to give extra support to the chair. I found all this material at Joann's Fabrics. I used an extra thick dense foam that way it will not get too soft quickly. I hope this helps. Good luck on your project.
Beth Niebuhr says
Like you, I have upholstered chairs before but a job like you tackled, I just wouldn't do it. I admire your beautiful work and look forward to your invitation to enjoy them. LOL
Meredith @ The Palette Muse says
What a great tutorial, and they look wonderful! I always wonder why they make chairs like that with the hole in the middle of the seat. It seems like it would be more structural if they used a solid piece of wood and then added padding on top. Great job on yours!
Sabrina says
Thanks Meredith. That means a lot from you.
Pamela Chollet says
I'm telling you Sabrina, people like you and Meredith AMAZE me. Somewhere, sometime I must have worked with my hands because I'm awed by skilled artisans. Honestly, as I read through your post I thought OMG she lost me at,the padding removal! You're chairs look beautiful, what a gift you have.
Ken Dowell says
This is a great post for me. I have a dining room set that was my mother's and probably dates back to the 1960's. I'm going to bookmark this and the first time I'm eating dinner and feel like I'm sitting on a toilet seat.....
Sabrina says
Glad I could help. Thanks for commenting.
Marquita Herald says
What a wonderful project Sabrina! It's been so long since I attempted a DIY project but you've really inspired me to take a look around and see what I can tear apart and put back together even better!
Sabrina says
Thanks Marquita. I am glad this post inspired you. =)
Phoenicia says
Your creativity never fails to amaze me!
Most people would throw the chairs away and buy a new set but you bought these to life.
The main bug bear I have with material chairs is they stain. I am constantly wiping mine. I would definitely go for leather the next time around.
Sabrina says
Thanks Phoenicia.
Maha Hudson says
I do love the pattern. I've been wanting to do this with our dining chairs. Now, I can tell my husband...I'm on a mission to make some changes. Thanks for informative steps.
Erica says
The redone chairs look really nice. I love that you made it a family affair. Thanks for breaking it down, step by step and making it look easy!
Donna Janke says
Great job on the dining chairs. I suspect if I did this, it would take me much longer than 8 hours and the end result would be less pleasing. By the company, Bombay Company still has some stores in Canada - I'm not sure about the U.S.
Rose M Griffith says
Great instructions! Our dining room chairs are easy to recover, but the small table in the kitchen? Well, I keep postponing dealing with them because it's going to be a bigger project. However, you just made it look a tad bit easier to achieve! Shared on Facebook--I know I have some friends out there who will love doing this themselves.
Patricia Weber says
Wow Sabrina. I would never tackle that - I'm the kind of person who subs out projects like this! hahaha What I appreciate is that you have such talent and a wonderful team to help you with projects like dining room chair repairs. Bravo.
Lenie says
Sabrina, that was quite a job - fantastic. they look wonderful. I really liked the idea of cutting the foam with an electric knife and the staple in the centre is something I didn't know but can certainly understand the reasoning for. Anyone interested in repairing their chairs would find those tips very helpful.