We have a small covered front porch area open to the street. People can easily see any packages left in front of my home. Years ago, my sister-in-law gave me the perfect-size front crate I used as a porch storage box. It has an open top so delivery people and clients can add things to it without being seen by anyone from the street. Today, I will show you how I updated this DIY outdoor storage box to match the new door and the painted porch we did recently. The transformation is beautiful and refreshes the porch and entryway. Follow along and see the transformation.
If you want to see the other porch bin DIY project, visit the post is HOW TO MAKE A BEAUTIFUL OUTSIDE PORCH STORAGE BIN.
Jump to:
- What did the porch box look like before this upcycling transformation?
- Supplies we used for this front porch storage box DIY project.
- How did I update this DIY Front Porch Storage Bin?
- DIY Outdoor Storage Box Reveal:
- How long did it take to do this DIY Outdoor Storage Box makeover?
- How much did this makeover cost?
- DIY Outdoor Storage Box Tips When doing this porch storage bin project
- Updated September 2022:
- Supplies to dress up the storage box for Fall:
- How much did it cost to update this storage bin for all?
- How long did it take to make this fall modification?
- Instructions to dress up the outdoor storage box:
- The DIY Outdoor Storage Box Decorated for Fall Reveal:
- Updated December 2022:
- How did I modify the DIY Outdoor Storage box for the Holidays?
- Instructions on how I updated the storage bin for the Holidays.
- Here is what this Holiday Storage box looks like now.
- Visit our other DIY Paint Projects
What did the porch box look like before this upcycling transformation?
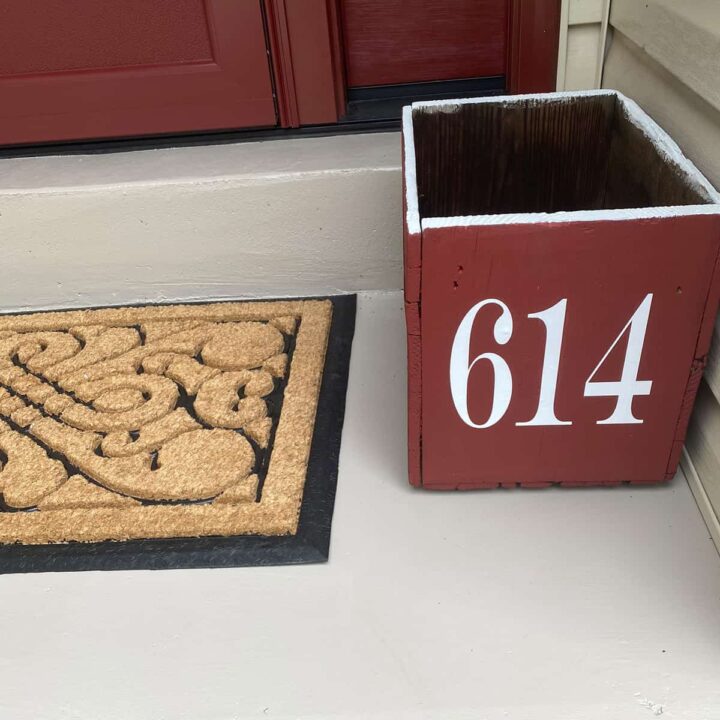
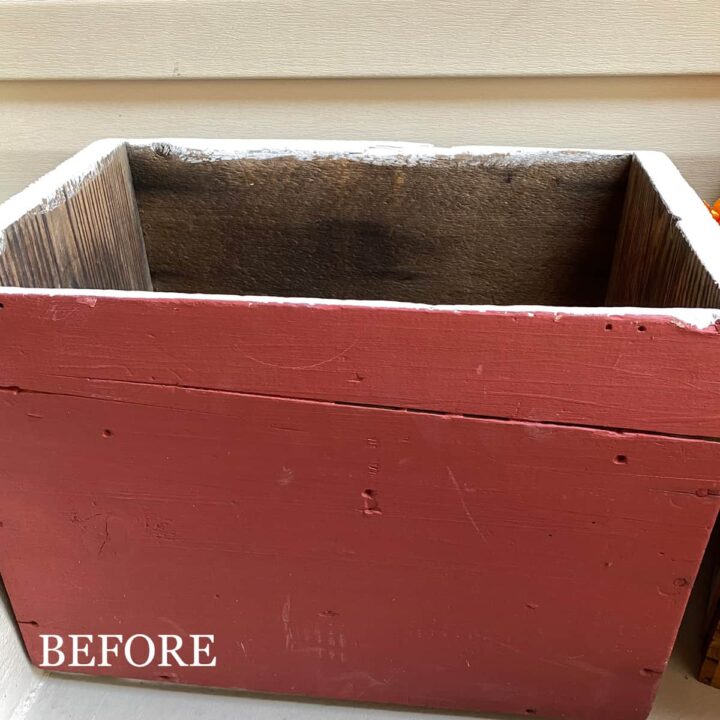
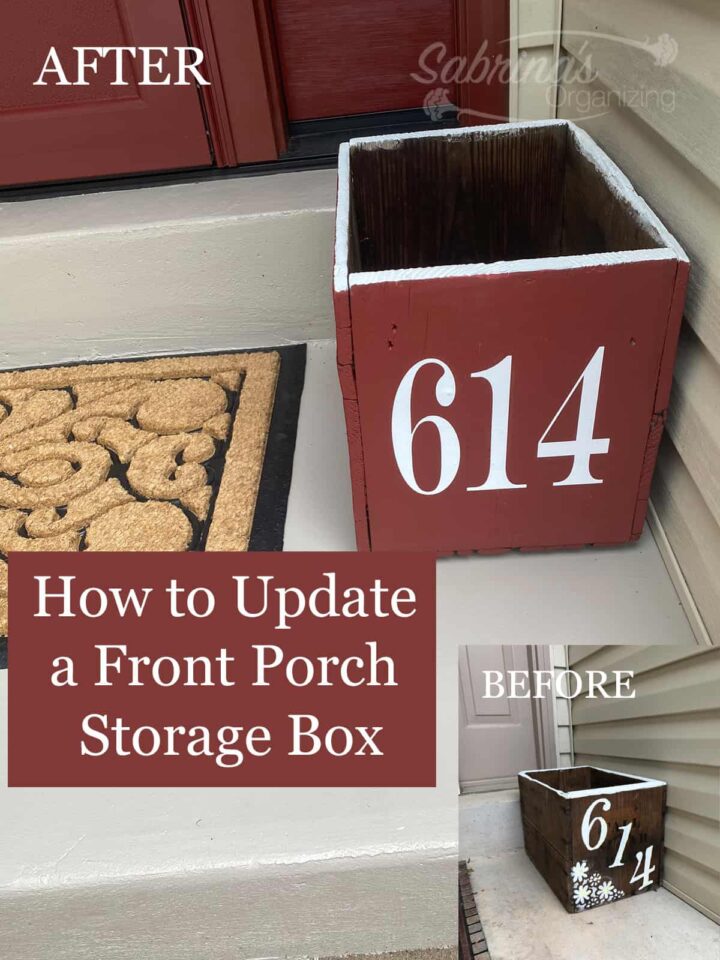
BEFORE: The front porch storage box looks cute but very rustic. I used some white paint and stencils and added our house number to it.
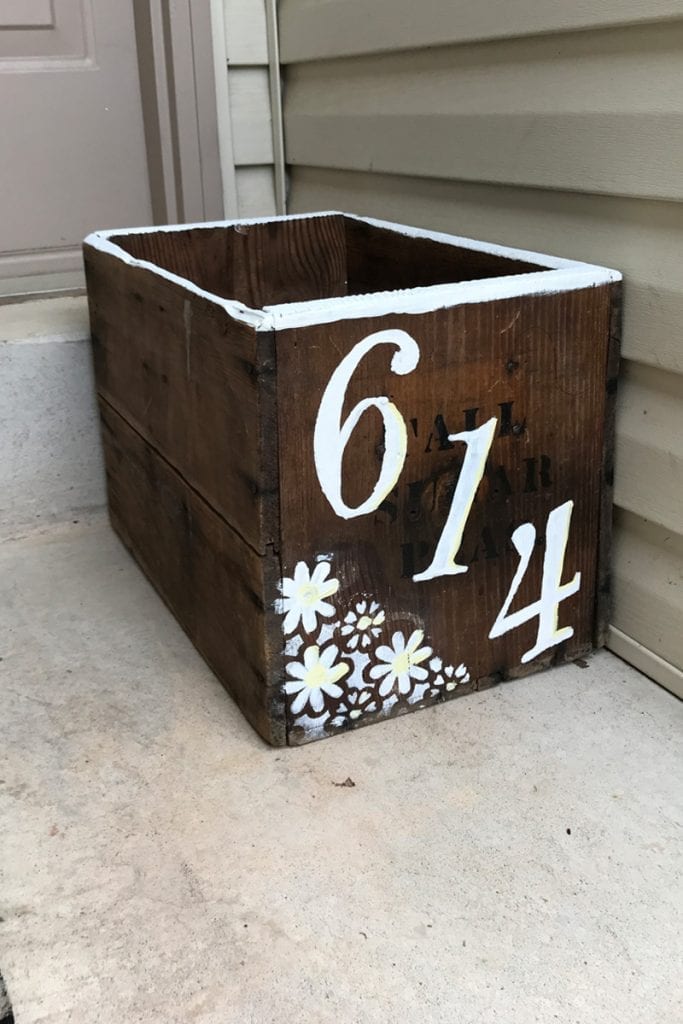
But, over the years, it has gotten weathered and pretty shabby. The bottom started separating from the sides, and the paint got very light. You can't even see the yellow any longer. It was on the ground, and I wanted more ventilation around the box.
Supplies we used for this front porch storage box DIY project.
The supplies were pretty straightforward. Below includes links from Amazon (affiliate). If you click through and make a purchase on Amazon (affiliate), I will receive a referral commission. Happy Shopping! Thank you for supporting my small business.
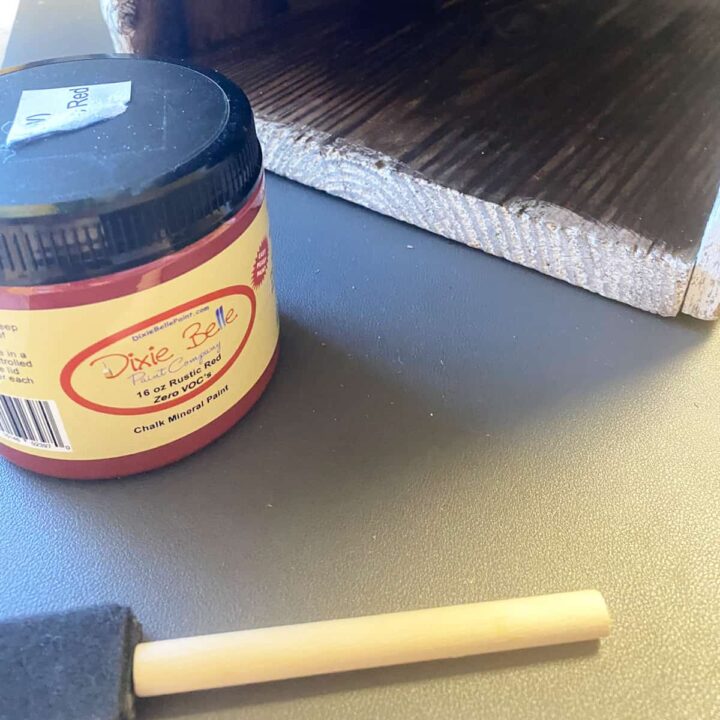
One container of Dixie Belle - Chalk Mineral Paint - Barn Red
Several 1-inch disposable sponge brushes
1-inch x 8-inch pieces of PVC molding to ensure the bottom of the box
½ inch brad nails
Nail gun (I used a cordless one.)
Four rubber feet - this link has screws included in it.
4 - ⅜ inch screws for rubber feet - I did not have this one from Amazon (affiliate) and used separate screws.
Drill
Sandpaper - I used fine sandpaper.
White removable vinyl (Cricut) - 1 sheet - I used this type of vinyl because I had a cover over my porch.
Cricut Machine (Circut Explore Air 2)
Weeding tools
Cricut Transfer Paper
We had Regular chalk paint and white paint around the house for the top.
How did I update this DIY Front Porch Storage Bin?
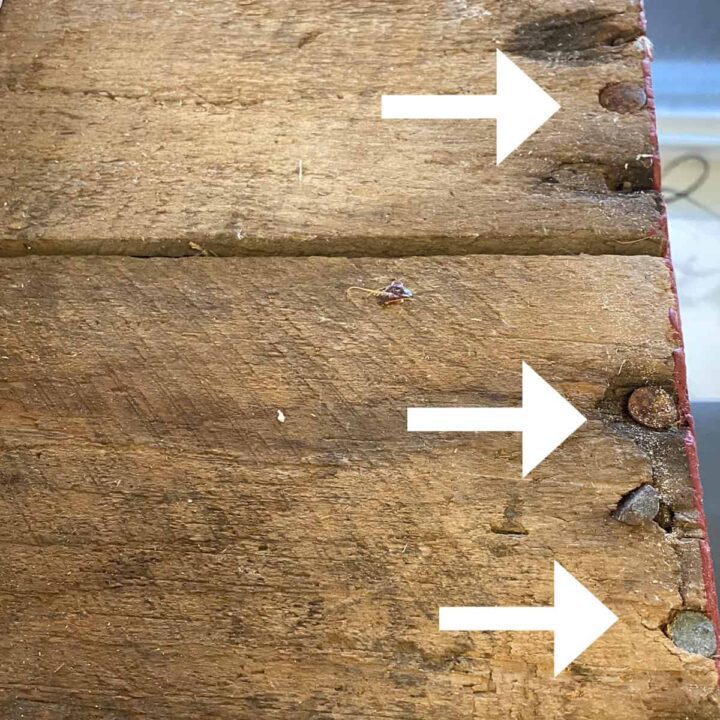
First, I inspected the box. And noticed that the box was OK, but the bottom nails were rusty. I made notes and started thinking about what I wanted to do next. I purchased a new door and got the step painted, and noticed this box needed to be updated.
Then, I cleaned the box; I started sanding the box on all sides. This took a little time because I had to bring down some of the raised wood spots. And cleaned off the dust from the sanding.
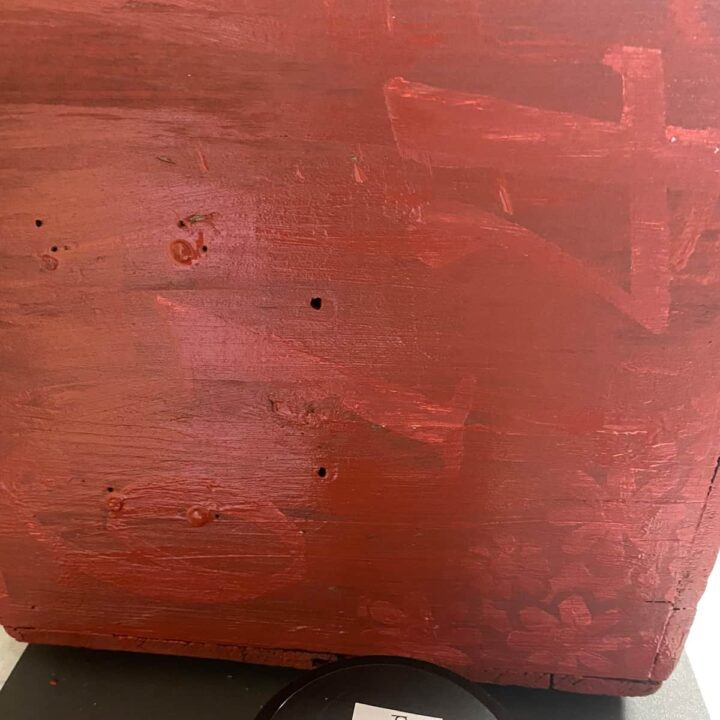
I worked my way around the box and painted each side red - allowing the sides to dry each time completely. This took about three days.

Paint two coats.
I painted at least two coats and waited about 1-2 hours between coats to ensure it was dry.
Next, I repainted and touched up the top with white paint. I used chalk paint to touch up the edges and let them dry completely.
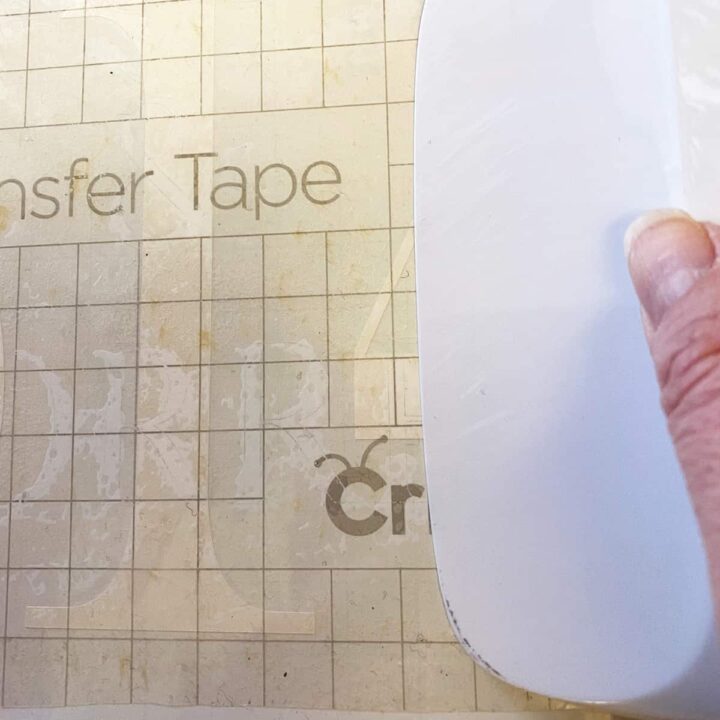
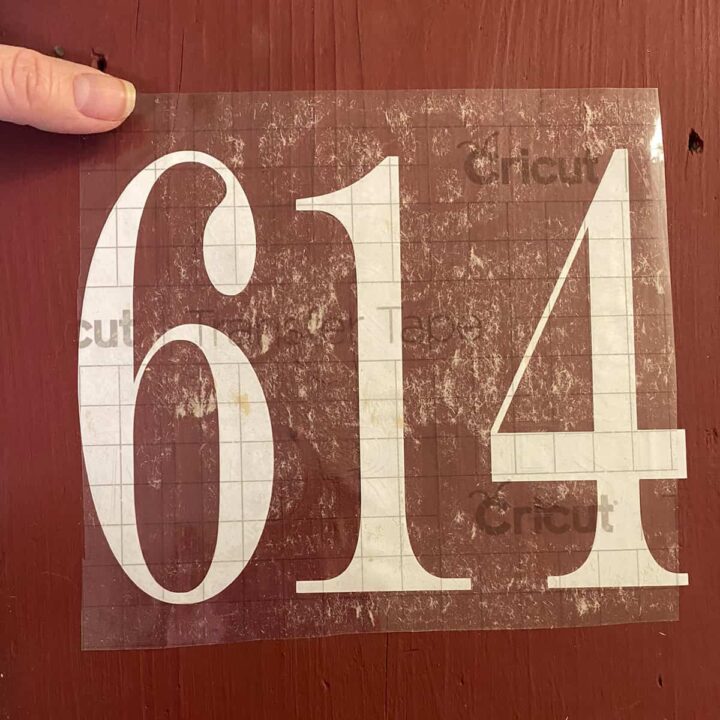
Use the Vinyl Cricut Machine to make the address numbers.
Then, I got to work on the vinyl label (affiliate) numbers. Using my Cricut Explore Air 2, I used one removable vinyl sheet. I made the numbers 5.765 inches wide and 7.675 inches high. This size was large (affiliate) enough to fit on the front of the box. I added it to the front that I wanted to use using the transfer paper after I weeded excess vinyl from the numbers.

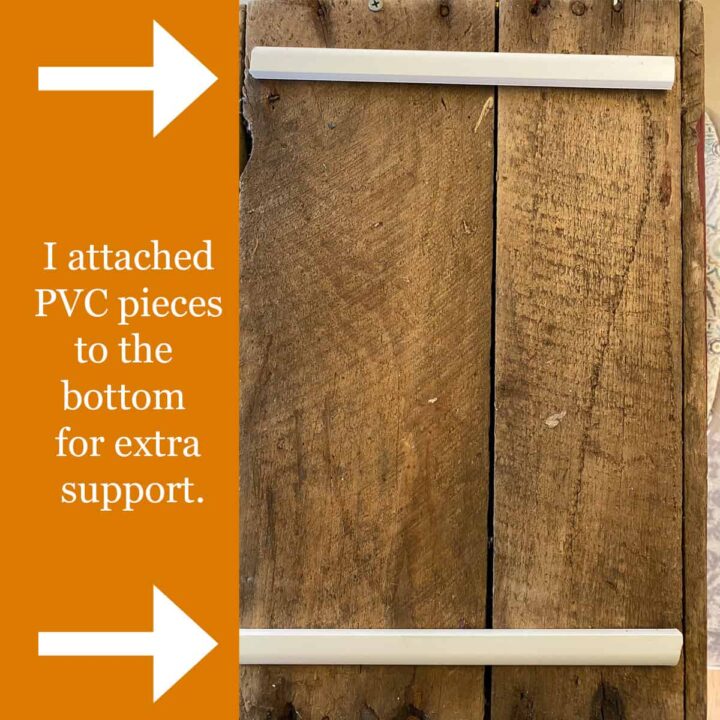
Then, I added support and feet to the bottom of the box.
Lastly, I turned the box over and added the rubber feet with screws to each corner of the box. I also added a few pieces of PVC strips across the bottom and nailed them to the side woods to support heavier packages that may be placed in the box. These were just scrap pieces of PVC-coated wood, so they would not decay if they got wet. I used a nail gun to attach it. I had to do this because the nails were rusting.
DIY Outdoor Storage Box Reveal:
And there you have it. I finished the package porch storage box for my updated porch. Here's the final picture. What do you think? I love it! And, the package bin is like new again.
How long did it take to do this DIY Outdoor Storage Box makeover?
It took about four days, with a lot of drying time in between.
How much did this makeover cost?
It cost about $20.00 and was only for the paint and vinyl sheet. I had all the other items in my tool closet.
DIY Outdoor Storage Box Tips When doing this porch storage bin project
When you examine an old box, check the sides where it was attached. This box had nails, and the wood around it was starting to decay, so I needed to find another way to secure these sides. So, I attached the cross PVC wood in the short direction since the long way had the nails and decayed wood.
Updated September 2022:
To dress up this storage box for the fall season, check out what I did below.
Supplies to dress up the storage box for Fall:
Package bin/box above.
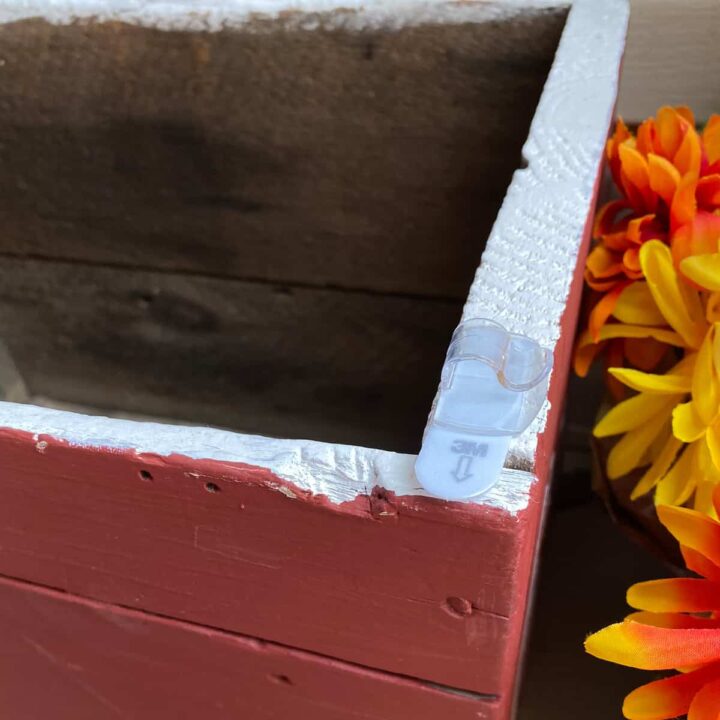
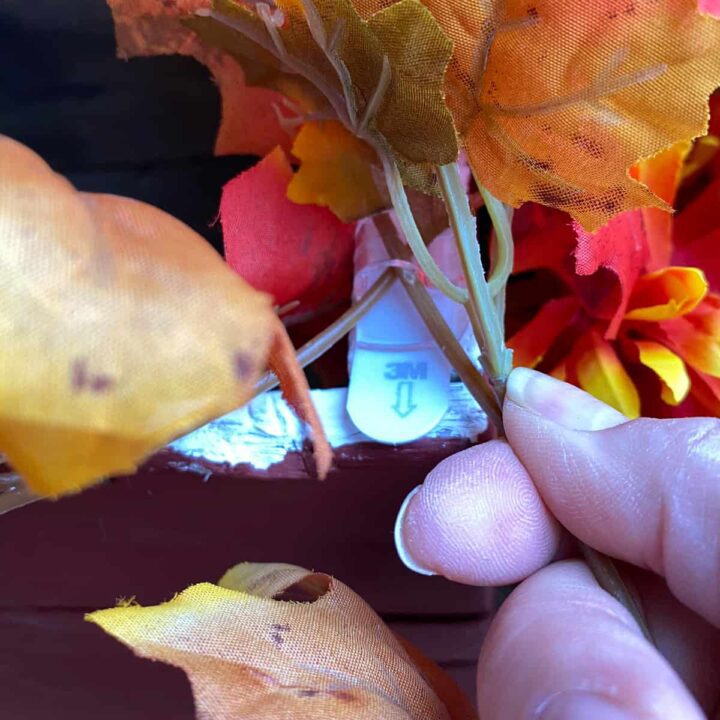
4 Command(TM) round cord clips
1 Fall Leaves garland - It should be a thin version of the fall garland, so they fit inside the round cord clips
How much did it cost to update this storage bin for all?
It only cost me $15.00 for the ivy and the clips.
How long did it take to make this fall modification?
It only took me about half an hour to do this update for the fall porch decoration.
Instructions to dress up the outdoor storage box:
Before picture: Here is the before picture. It was painted recently and didn't weather too much over the summer.
Adhere command clips to each corner at the top of the package bin.
First, I added four 3M Command Cord Clips. I placed one in each corner and secured them.
Hook the garland with each clip
Ensure the clips are secure so that when you add the ivy, it doesn't pop off.
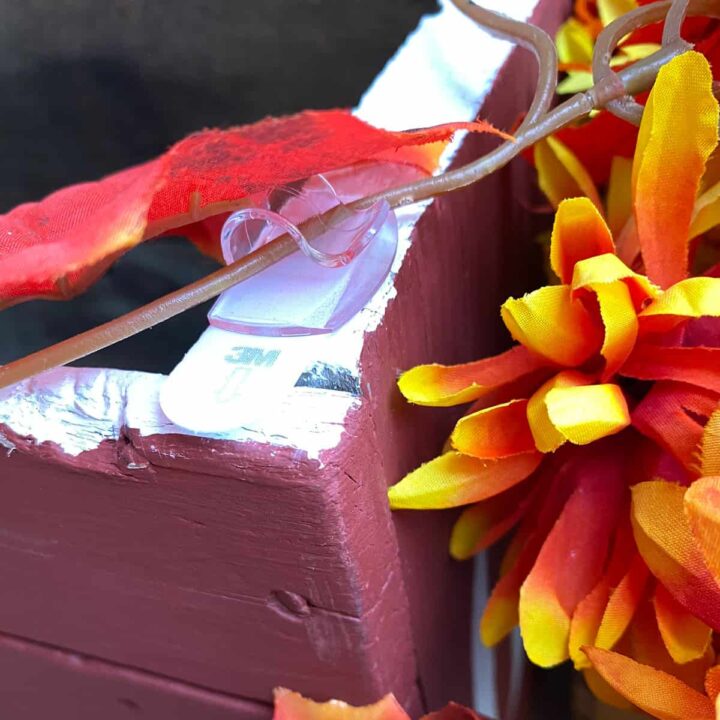
Overlap the garland and add clips around the top.
You can run the ivy around a few times, depending on the size of your storage box.
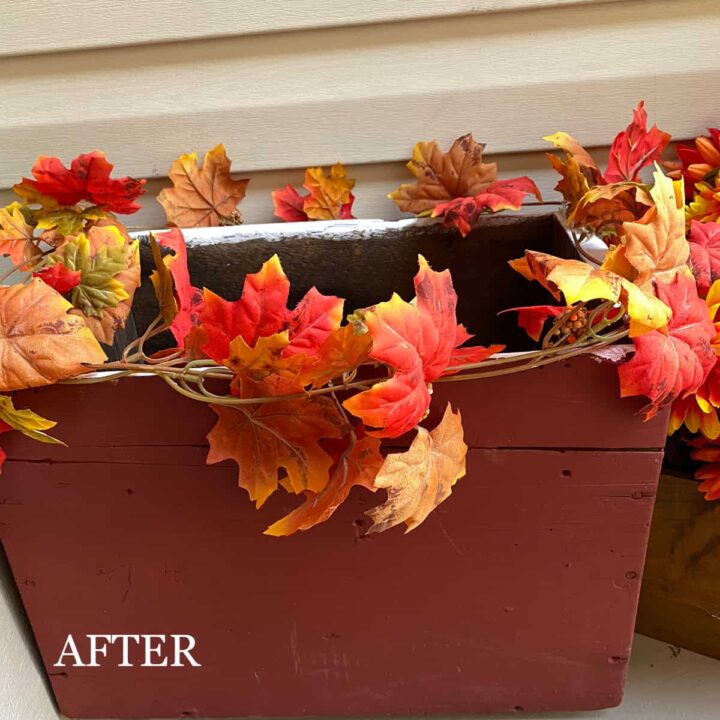
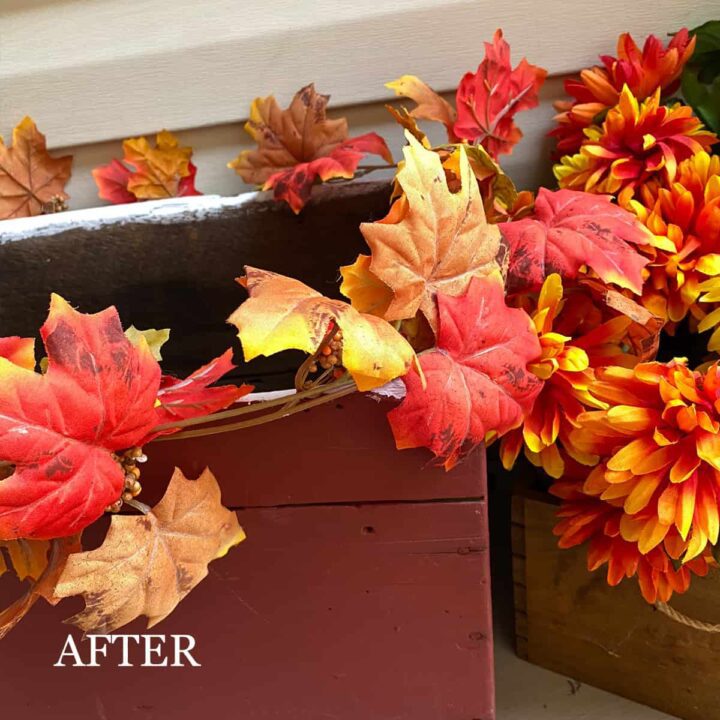
The DIY Outdoor Storage Box Decorated for Fall Reveal:
I love the way it looks! It adds a lot of color to the front porch with all our other decorations. Would you try this for your porch? Please leave a comment with questions below. I would love to hear from you.
Feel free to check out the video.
Please note these are affiliate links through Amazon (affiliate), and at no additional cost to you, I will earn an affiliate commission if you click through and decide to make a purchase.
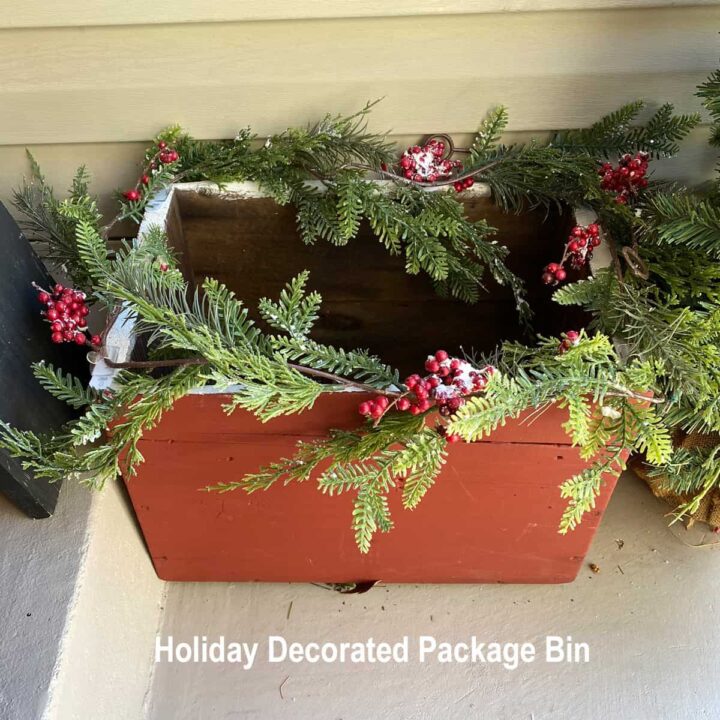
Updated December 2022:
As the holiday season started, I decided to modify the outdoor storage box.
How did I modify the DIY Outdoor Storage box for the Holidays?
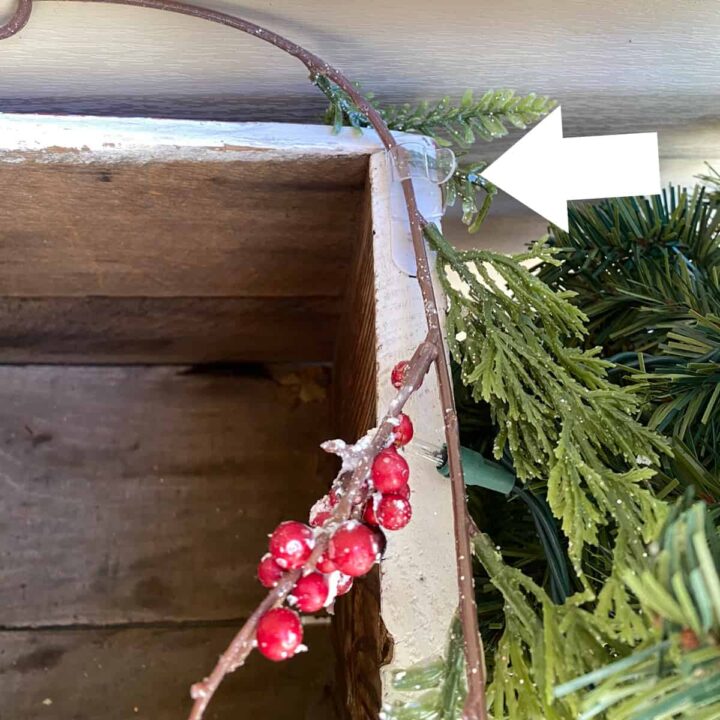
This storage box still had the clips on it, so I decided to remove the fall garland and replace it with the Holiday garland with berries. I picked it up at Michaels for about $11.00.
4 Command(TM) round cord clips
1 Berry and leaves garland - It should be a thin version of the garland so they fit inside the round cord clips
Instructions on how I updated the storage bin for the Holidays.
As I went around the bin, I added the garland to the Command Hook slowly to secure it and not break the round cord clips. I overlapped to fill it out a bit.
Here is what this Holiday Storage box looks like now.
And here is what the bin looks like for the holiday season! I love it. The berries stand out, and the leaves are nice and long, allowing for a beautiful texture around the side of the box. It's an excellent fit. What do you think?
Popular Posts
- Yummy Curry Chicken Salad Recipe
- Places To Donate Jewelry You Do Not Want
- The Ultimate Cruise Packing List Everyone Needs
- 43 Positive Mantra Sayings to Keep You on the…
- This Year's Recycling and Shredder Events
- 13 Ways to Make Your Bedroom An Oasis
- Welcome to Sabrina's Organizing
- Incredibly Easy Tips for Organizing An Older Adult's Home
- 7 Book Storage Solutions For Small Spaces
- Powerful Professional Organizer Advise For New Organizers