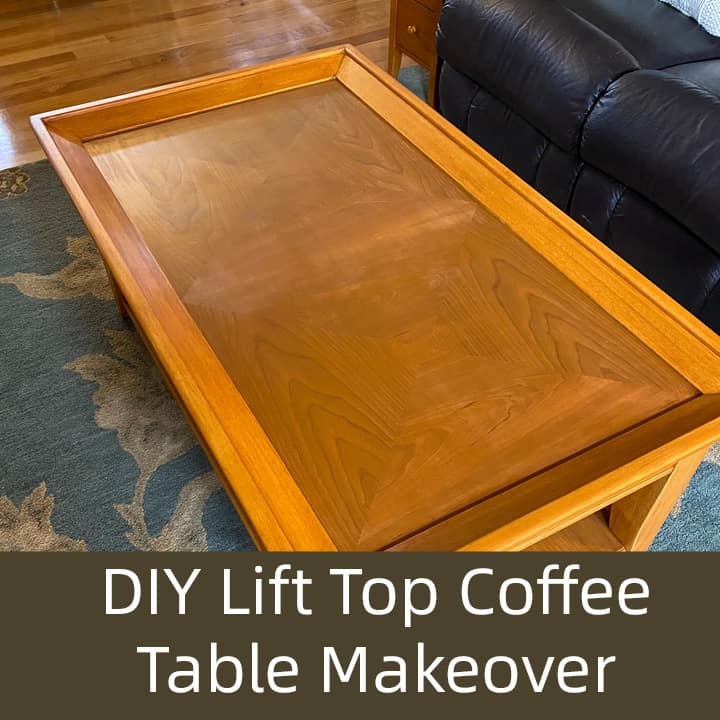
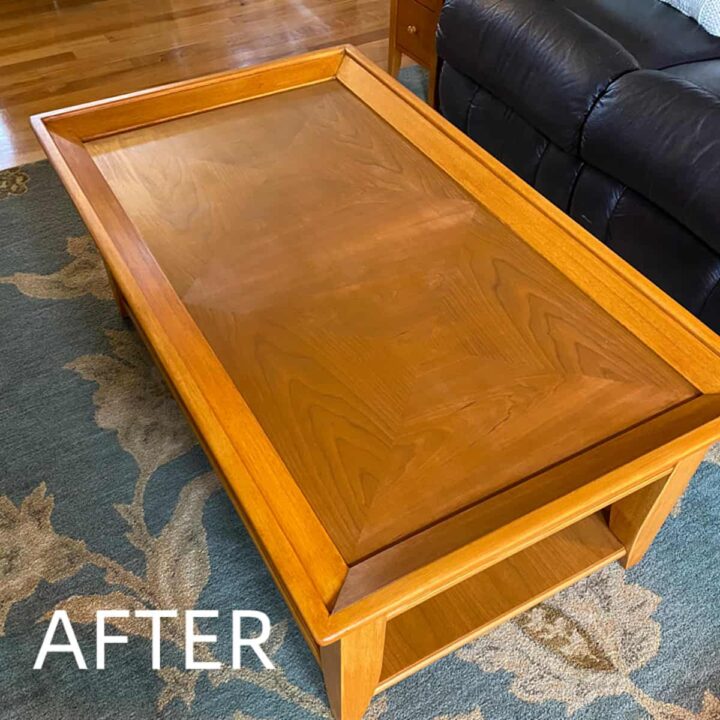
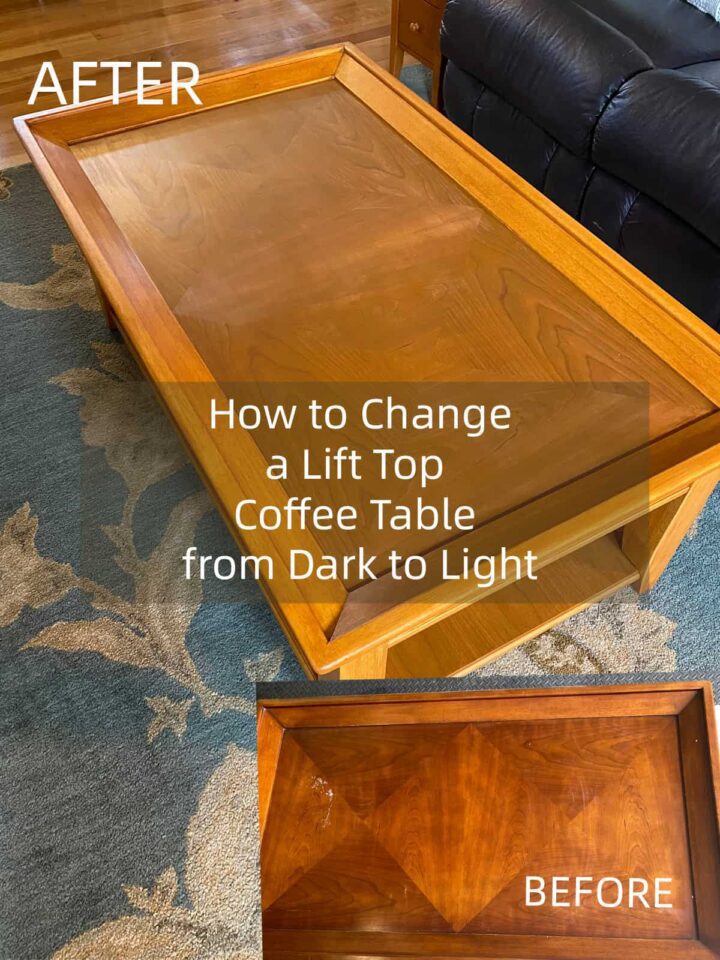
The trend in furniture (affiliate) is lighter-toned wood. In my house, my furniture (affiliate) was always dark cherry. Instead of replacing my coffee table, we decided to go a different route and update our coffee table (affiliate). This post will show you how I updated my furniture (affiliate) color to match the end tables and the entertainment center. Follow along and check out the coffee table (affiliate) makeover details and the big reveal below.
Jump to:
- How much did this DIY lift-top coffee table makeover cost?
- What supplies were used to do this DIY lift-top coffee table makeover?
- How to do this DIY lift-top coffee table makeover?
- How long does this DIY project take to do?
- Tips when doing this DIY Table Makeover project:
- Reveal Coffee Table Makeover:
- Feel free to visit our other DIY projects for furniture makeover below.
How much did this DIY lift-top coffee table makeover cost?
I found that getting all the stripper bottles and other things was the main expense for this project. It cost me about $100 to update this DIY lift-top coffee table. And I am super happy with the result. Note: While the polyurethane process is still being perfected, I am happy with the color of the stain and that it matches the new end tables we purchased.
What supplies were used to do this DIY lift-top coffee table makeover?
Note: Some of these links are from Amazon (affiliate) (affiliate). If you click through and buy something on Amazon (affiliate), I will receive a small referral commission.
CitriStrip 64 fl oz Regular Stripper Paste - no harsh fumes, removes dried latex and oil-based paint
2 bottles of Klean-Strip 32 oz. Paint Stripper After Wash from Home Depot
2 - drop cloths paper and poly backing 9 ft x 12 ft
3 - 3M refinishing pads - ultra fine
2.5-quart Metal Paint bucket from Home Depot
4 - 3M refinishing pads - very fine from Lowes
2 - Kobalt 43 inch width by 30-inch high steel sawhorses (affiliate)
1 sheet of plywood for on top of the sawhorses
Craftsman Ceramic Mouse refill 120 Grit 5 piece sandpaper from Lowes
Craftsman Ceramic Mouse refill 220 Grit 5 piece sandpaper
3M Sandblaster Pro 120 Grit 2.5 in x 4.5 in brick
3M SandBlaster Pro 220 Grit 2.5 in x 4.5 in brick from Lowes
2 Pack (affiliate) 6 inc Plastic Putty Knives
Screwdriver (affiliate)
Minwax Stain Color - Golden Orange from Lowes - we got it mixed by the friendly people at Lowe's - 1 quart
Satin Minwax One Coat Minwax Polyurethane 1 quart
Minwax Wood Conditioner - 1 quart
4 Tack cloths
Cheap staining brushes for the stripper
Stain sponges
Rags - cotton and paper
Now that we had all the needed supplies, we started doing the makeover.
How to do this DIY lift-top coffee table makeover?
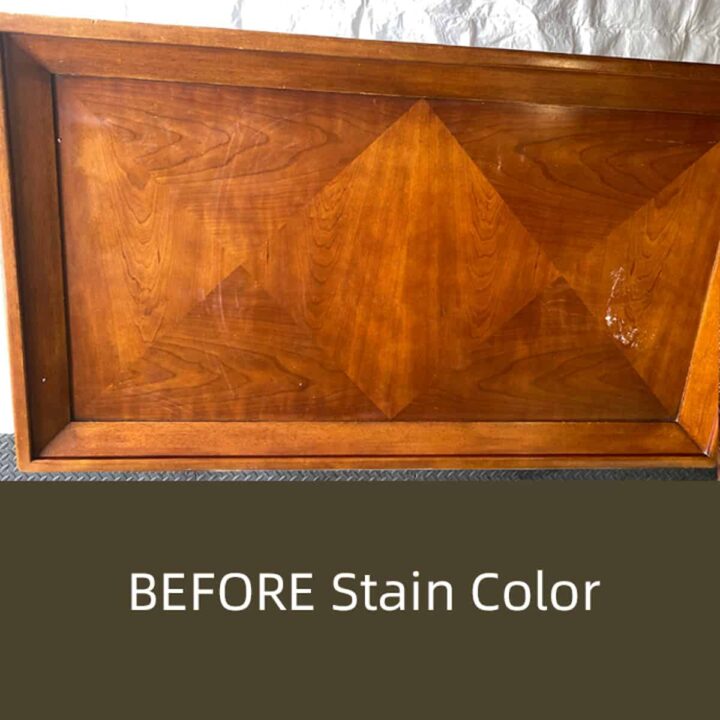
BEFORE PHOTO:
The table was purchased in 2006 and has been very loved. It has several dings and marks, but it has held up pretty well.
First, I took apart the table.
It was pretty easy since each section, legs, top and base, and bottom all have screws. Taking the table apart helps with staining and makes it easier to maneuver in our garage (affiliate).
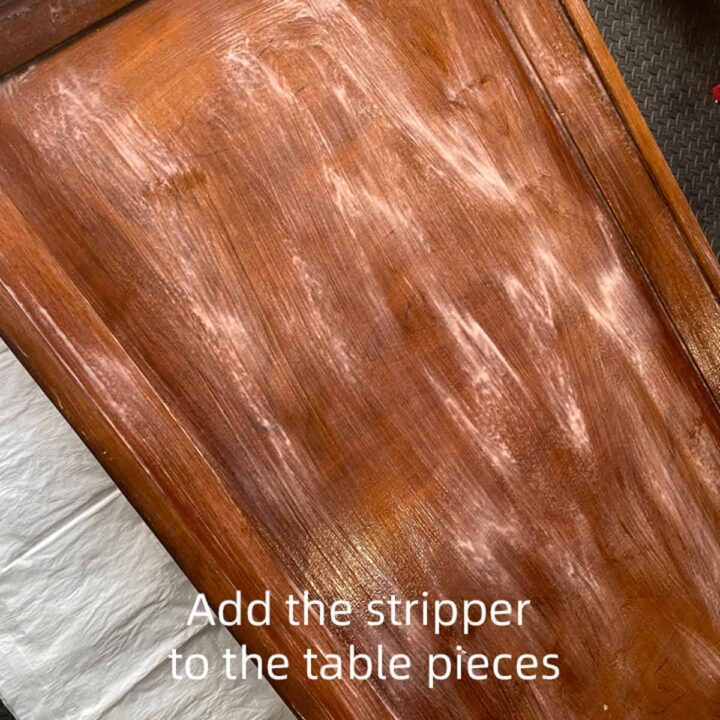
Remove the stain.
Next, I started removing the stain and poly using the CitriStrip 64 fl oz Regular Stripper Paste, brush, and a plastic scraper. This process took a while since it needed to sit for a bit and then be scraped into a trash can (affiliate) to get rid of it properly. It smelled like orange (affiliate) and scraped up pretty well.
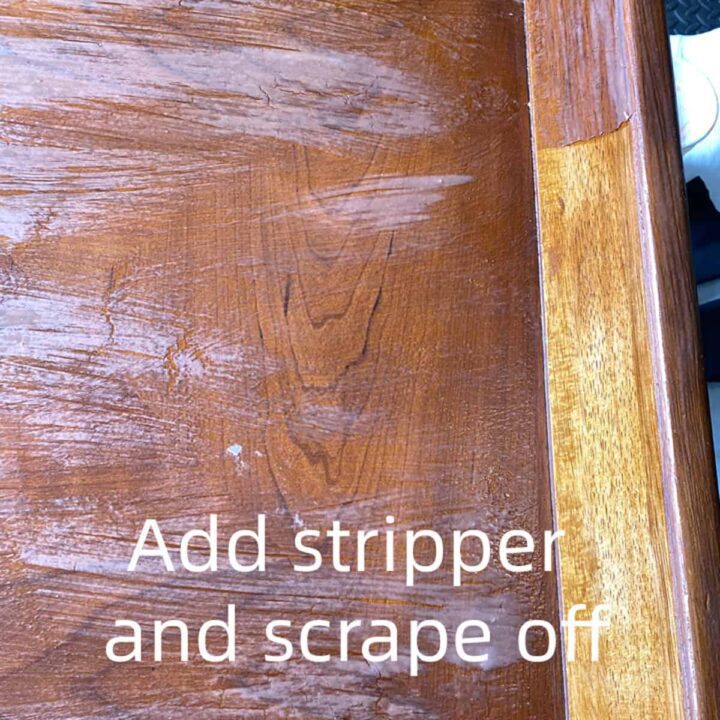
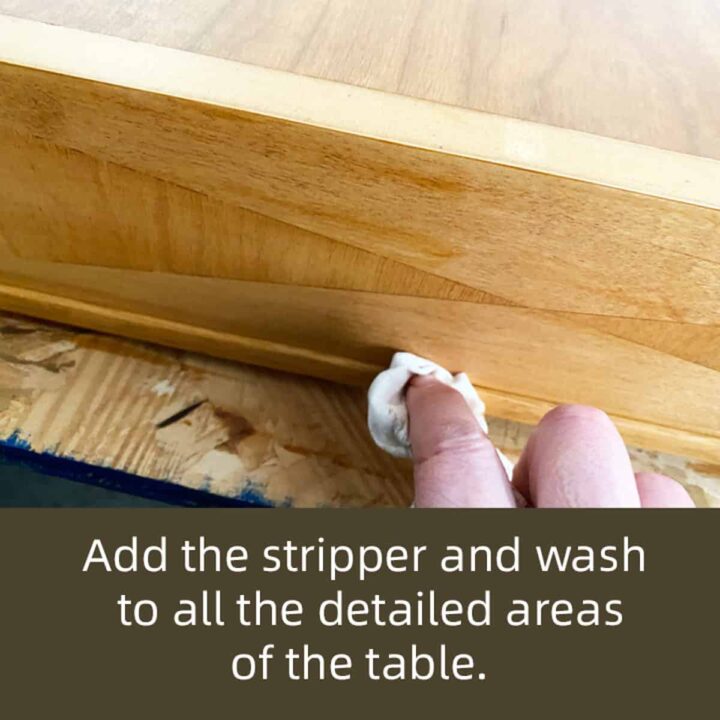
Remove excess stripper and original stain by adding a wash.
Then, I needed to remove the excess stripper and stain using Klean-Strip 32 oz. Paint Stripper After Wash. We added a small amount at a time to a metal bucket and dipped the stripping pad in it. Then, we applied the stripping pat to the wood and wiped it off with a clean rag as it pulled the remaining stain and stripper off the wood. This process took some time, but you will see a huge difference in the color of the wood.
Examined the wood after the stain was removed.
After the wood dried completely, we determined what the wood looked like with the other table pieces. Some pieces were softer wood, and other pieces were harder wood. Reviewing the imperfections and deciding if we needed to repair anything.
Find the right stain color.
We determined the stain color we wanted to use to match the end tables. Before going to the store, we took a knob off the end tables and matched it to the Minwax options for stain. Purchasing a lighter color so we can add layers if needed helped a lot.
Add pre-stain conditioner.
Then, we sanded the table pieces with fine sandpaper, cleaned the sand off with a tack cloth (affiliate), and added the pre-stain.

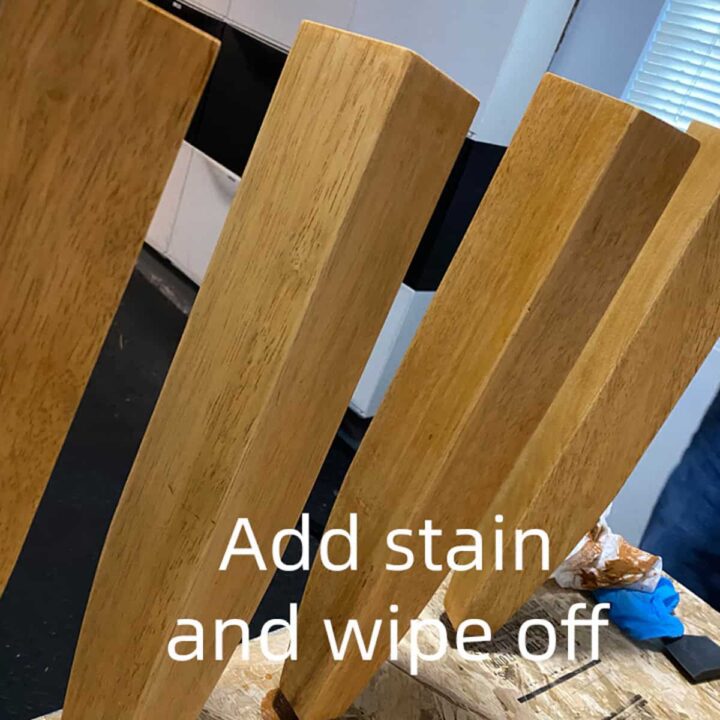
Add Stain to the wood pieces.
Now, we applied the stain with a rag to the wood and wiped it off completely. We applied one layer at a time to see what the color looked like, then added another layer if needed. The legs took three coats of stain, and the veneer took two coats. This process took some time because we had to wait until it dried completely.
Add Polyurethane to the wood pieces.
Then, we added the polyurethane. It was okay to be generous with the poly. If you didn't, it would streak. Let each piece dry completely. It didn't take long, but we allowed at least a day before assembling the table again.
Assemble the Table.
Place the table back together again using the screws we placed in a baggie earlier. And place it in your room.
How long does this DIY project take to do?
It took about 3-4 days, including the drying process.
Tips when doing this DIY Table Makeover project:
My husband and I learned a lot from this refinishing project. Below are just some of the tips we thought were helpful. We hope they help you too.
- After seeing how the water-based stains work with veneers, we found out that it was better to use an oil-based stain for the veneer. It did not absorb the stain very much.
- Do not do the staining process in a cooler space. Bring it to an area that is regulated at least 65 degrees. The stain and poly dry up really fast when it gets cold.
- Use screws to hold the legs in place while you stain and remove the stain. This works wonders for not having finger marks on the stain/wood.
- Use heavy-duty reusable nitrile gloves when using the stripper and cleaner to protect your skin.
- Read the instructions on the back of ALL these bottles, especially the chemical ones.
- We added the screws and bolts to a quart-size baggie to protect them from getting lost.
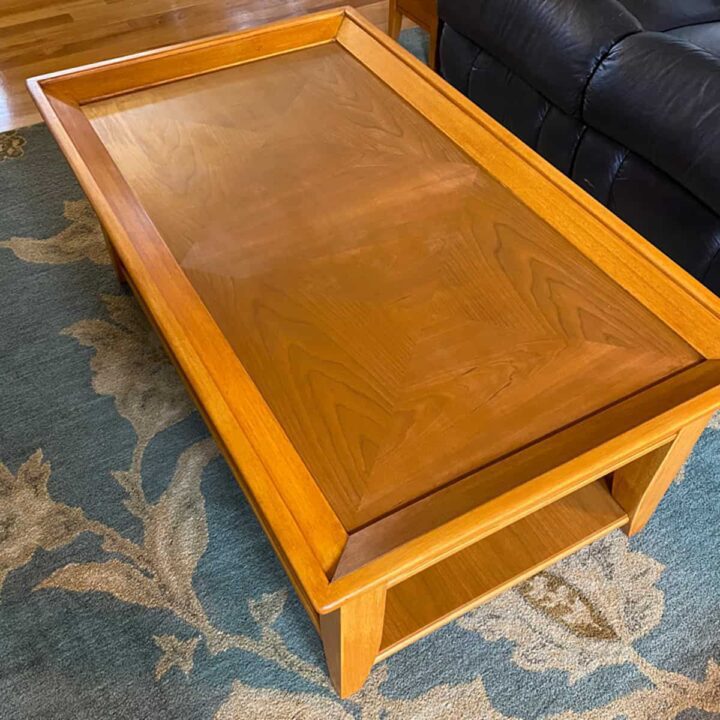
Reveal Coffee Table Makeover:
Here is the big reveal! What do you think? I think it looks wonderful. I love that it looked more like our wood floors and end tables now than the dark cherry finish that was on it before.
Please leave a comment with any questions below. I would love to hear from you.
- How to Create an Attractive Armoire Room Divider
- How to Transform a Wooden Folding Card Table from Blah to Fabulous
- Chalk Paint Armoire DIY Project Tutorial
- How to Upcycle an Old Bench into an Adorable Accent Table
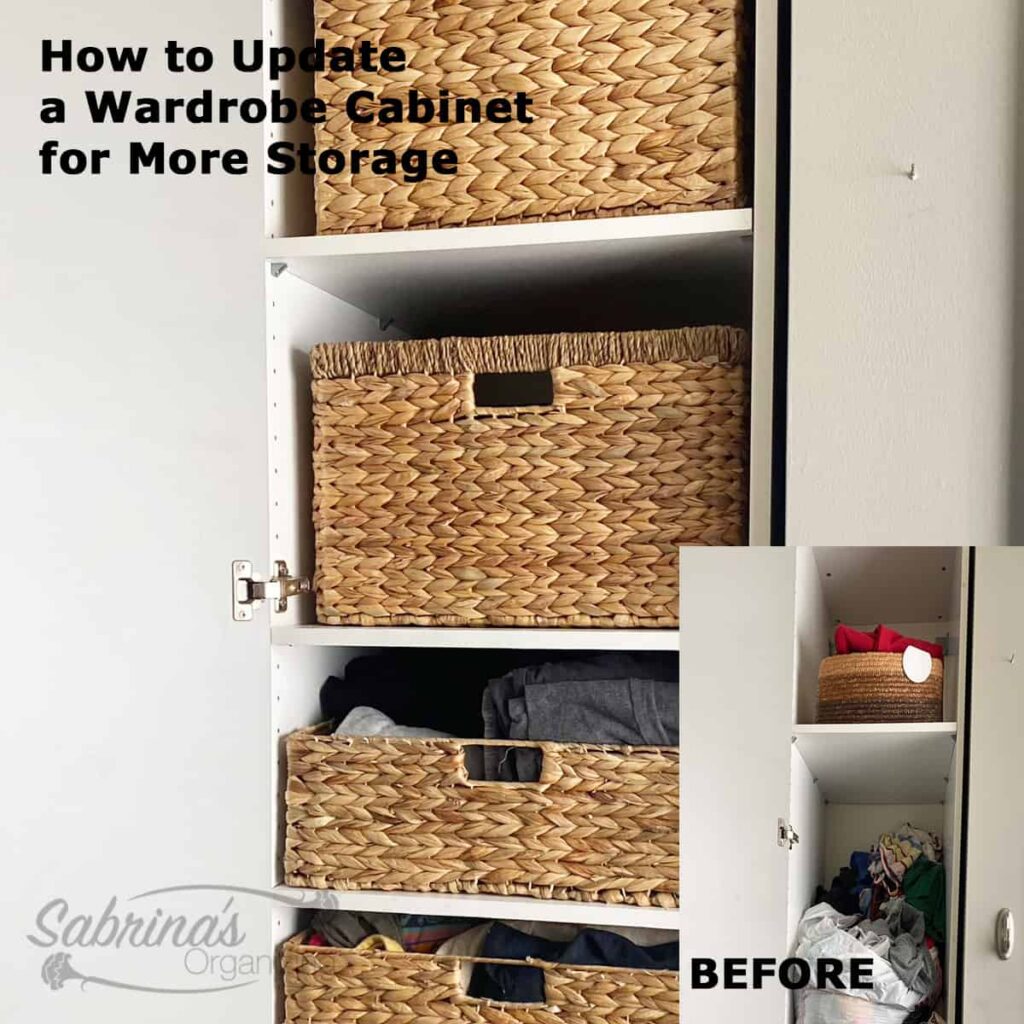
- How to Update a Wardrobe Cabinet for More Storage
- How to Make This DIY Armoire Furniture Makeover Idea
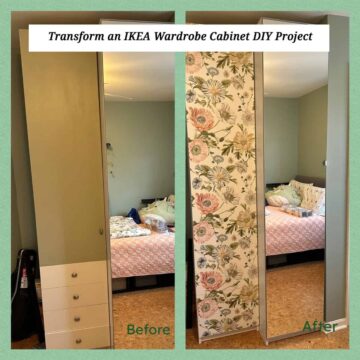
- Transform an IKEA Wardrobe Cabinet DIY Project
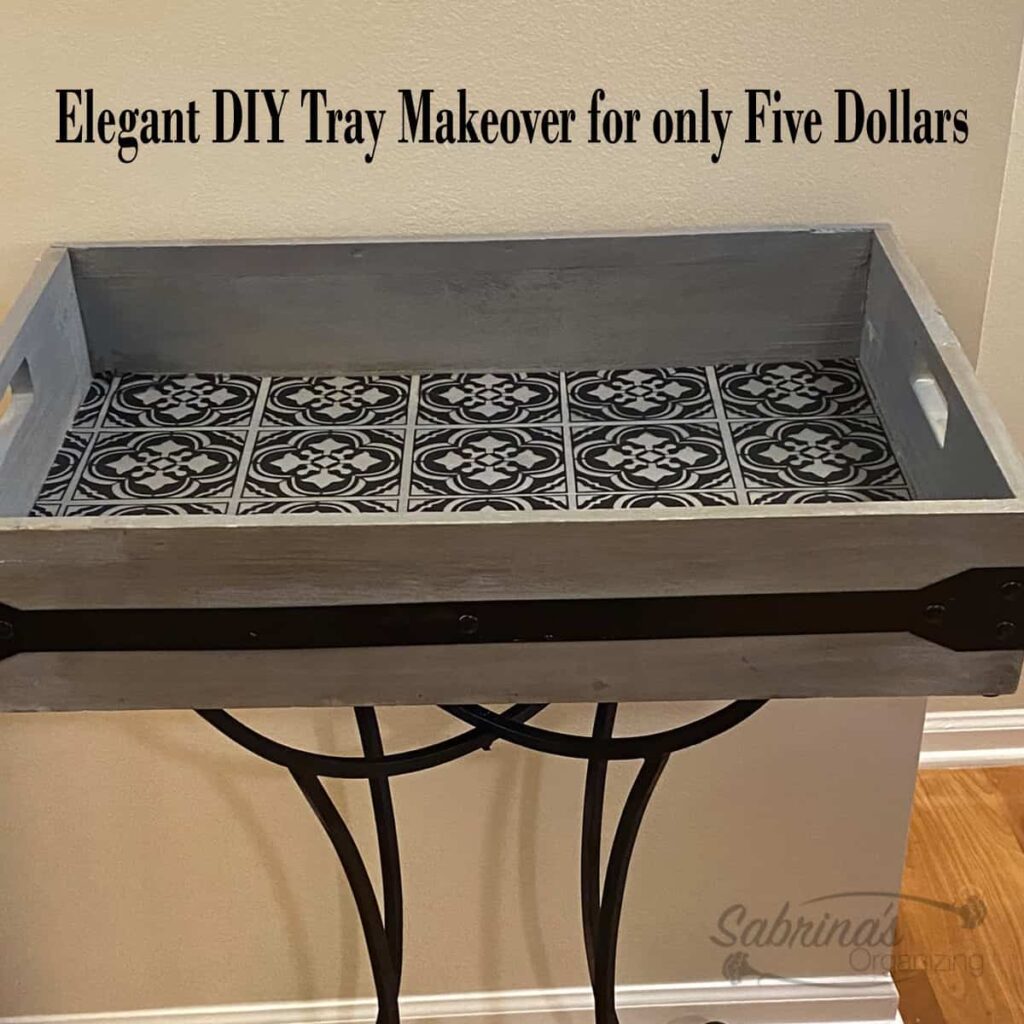
- Elegant DIY Tray Makeover for only Five Dollars


Lisa says
i would have liked to have seen a 2 tone colorblock in a mahogany & oak ( or whatever dark & light stain contrast) alternating , but in most cases it's better to keep it simple. cute table & nice job