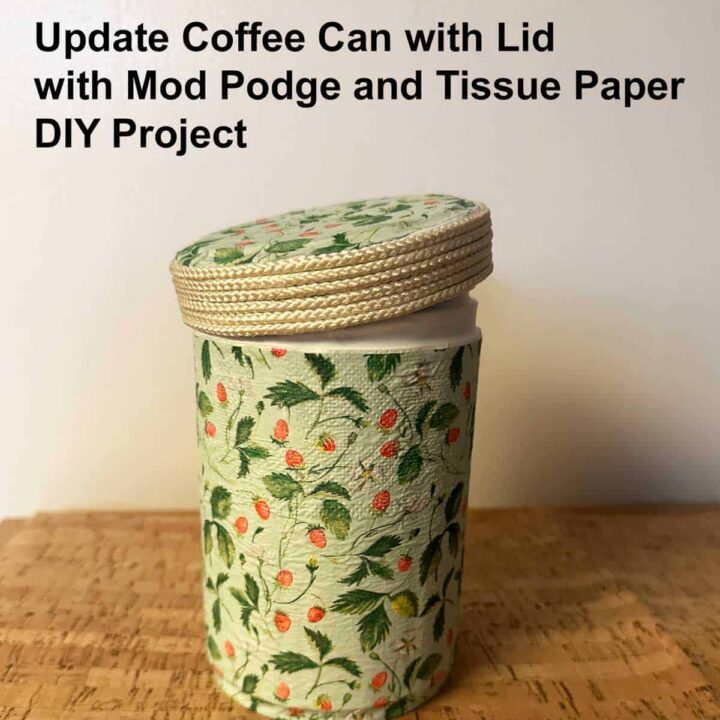
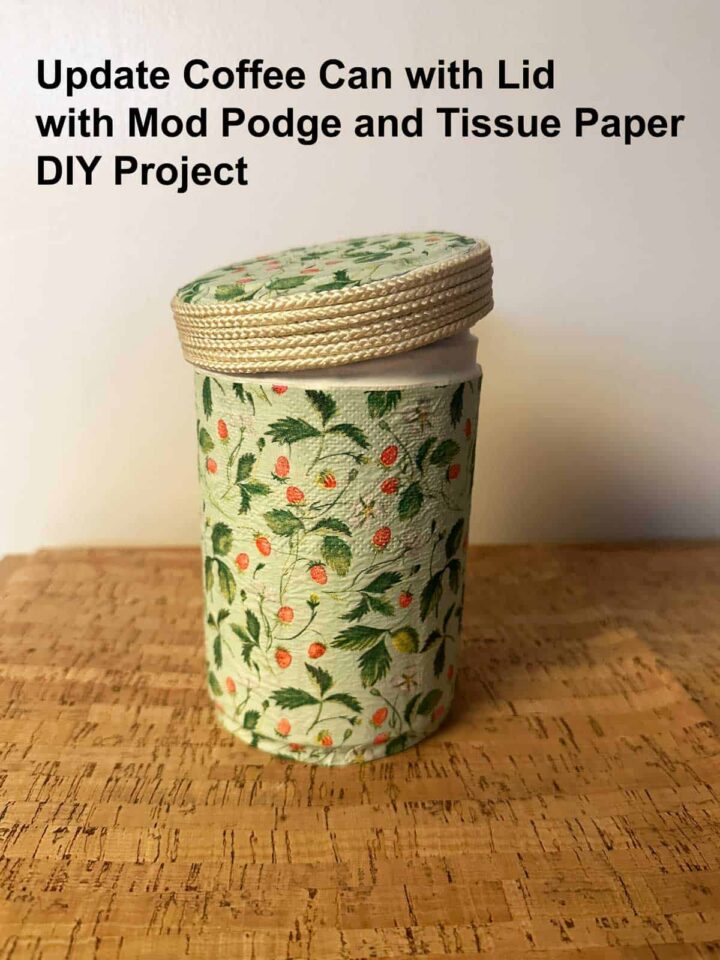
Artisan coffee cans usually have a unique style, and when we use up the contents, I want to reuse the lids for another organizing purpose. Follow along and check out how I transform this coffee can with a lid with Mod Podge (affiliate) and a decorative Napkin (affiliate) or tissue paper (affiliate). NOTE: I used a one-layer decorative napkin (affiliate) sheet for this project.
Jump to:
Key Takeaways
- You can update a coffee can with a lid using Mod Podge (affiliate) and tissue paper (affiliate) for an organizing project.
- The supplies needed include a small coffee can, acrylic paint, a paintbrush (affiliate), Mod Podge (affiliate), and decorative napkins (affiliate) or tissue paper (affiliate).
- This DIY project costs about 5 dollars and takes around 2 hours to complete.
- Start by cleaning the can, painting it white, and adhering the napkin or tissue paper (affiliate) with Mod Podge (affiliate).
- The finished product serves as a stylish organizer for various small items.
What inspired me to do this craft project?
We went to a new store in the area called Eataly, which carries all kinds of Italian food from different regions of Italy, my ancestors' home country. Well, we found the espresso that my husband wanted to try, and after he finished with the coffee can, we didn't know what to do with it. So, this DIY project came about because we didn't throw it away, and I wanted to try tissue paper (affiliate)/decorative napkin (affiliate) art.
What supplies did I use to make this upcycling project?
The supply list is pretty easy. You can use any coffee can you like to make this project.
- Small Coffee Can - any brand, as long as the can is smooth on the sides and lid.
- paintbrush (affiliate) for acrylic paint
- white acrylic paint - FolkArt Wicker White
- disposable bowl and sponge brush (affiliate) for paint
- Mod Podge (affiliate) matte finish
- floral tissue paper (affiliate)
- cream rope
- Gorilla Glue (affiliate)
Please note these are affiliate links through Amazon (affiliate), and at no additional cost to you, I will earn an affiliate commission if you decide to make a purchase.

How much did it cost to make this project?
This project cost only 5 dollars to make.
How long did it take to make this craft project?
It took me about 2 hours to make this cute project.
How did I make this coffee can with a lid project?
Time needed: 2 hours
The steps are pretty easy but need time so be patient.
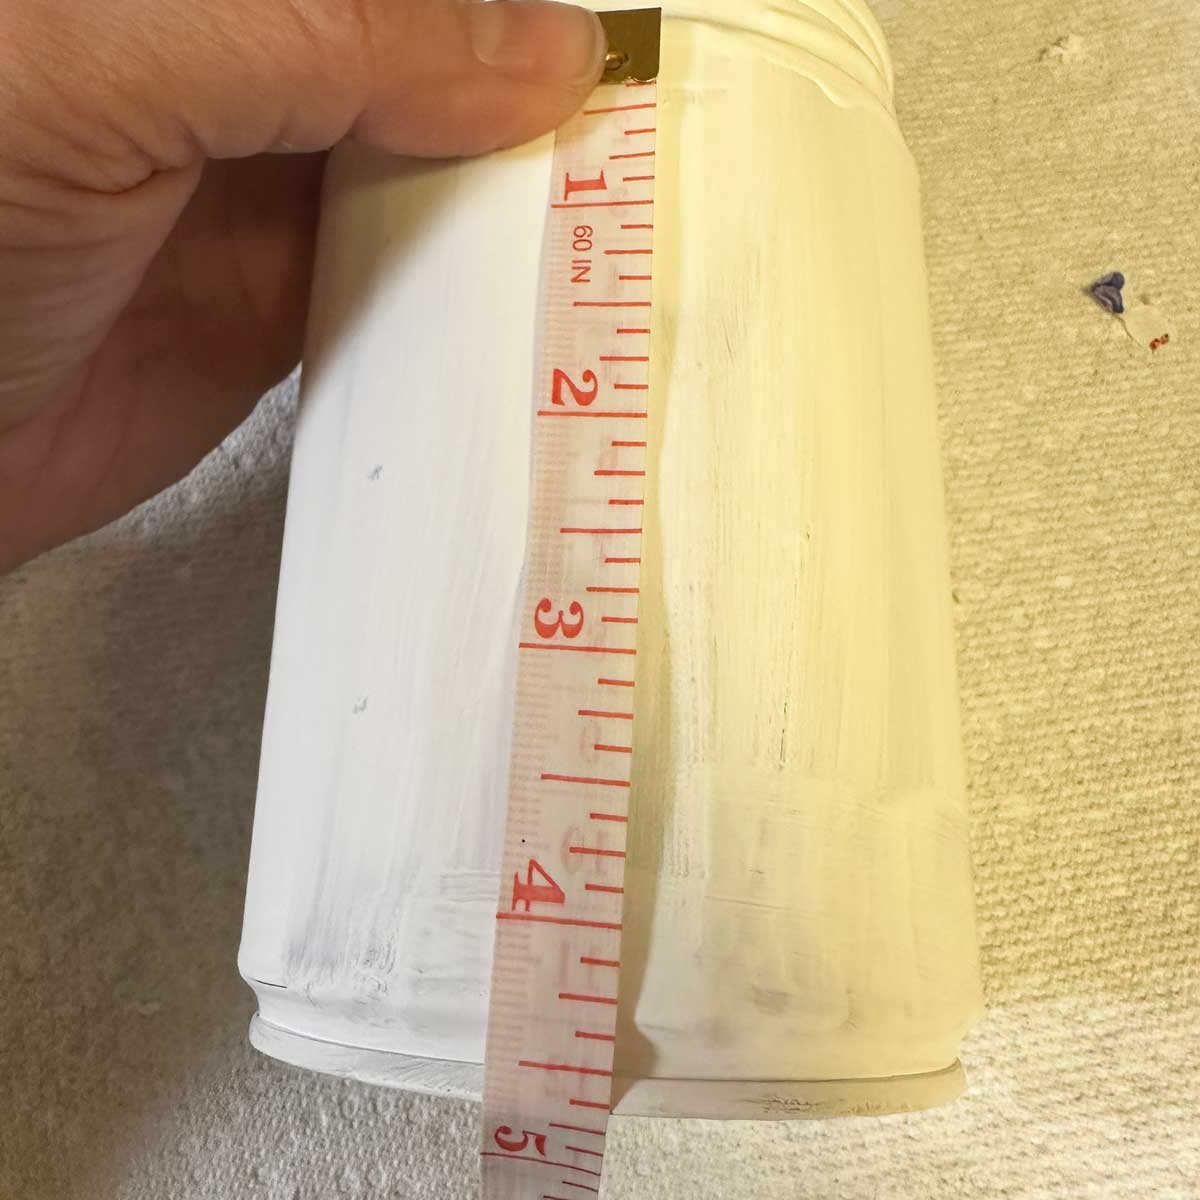
- First, clean and measure the coffee, and then measure the sides.
Before you begin, make sure the coffee can and lid don't have any paper or stickers on them. Clean it inside and out. Use soap and water, and clean it thoroughly.
Then, measure the coffee can. This coffee can is 4.5 + inches long. Add half an inch to the bottom so it lies flat past the edge. The napkin will measure 5 inches long.
- It's time to cut the decorative napkin (affiliate) or tissue paper
Then, I cut the decorative napkin (affiliate) paper to 5 inches long and to the diameter of the can.
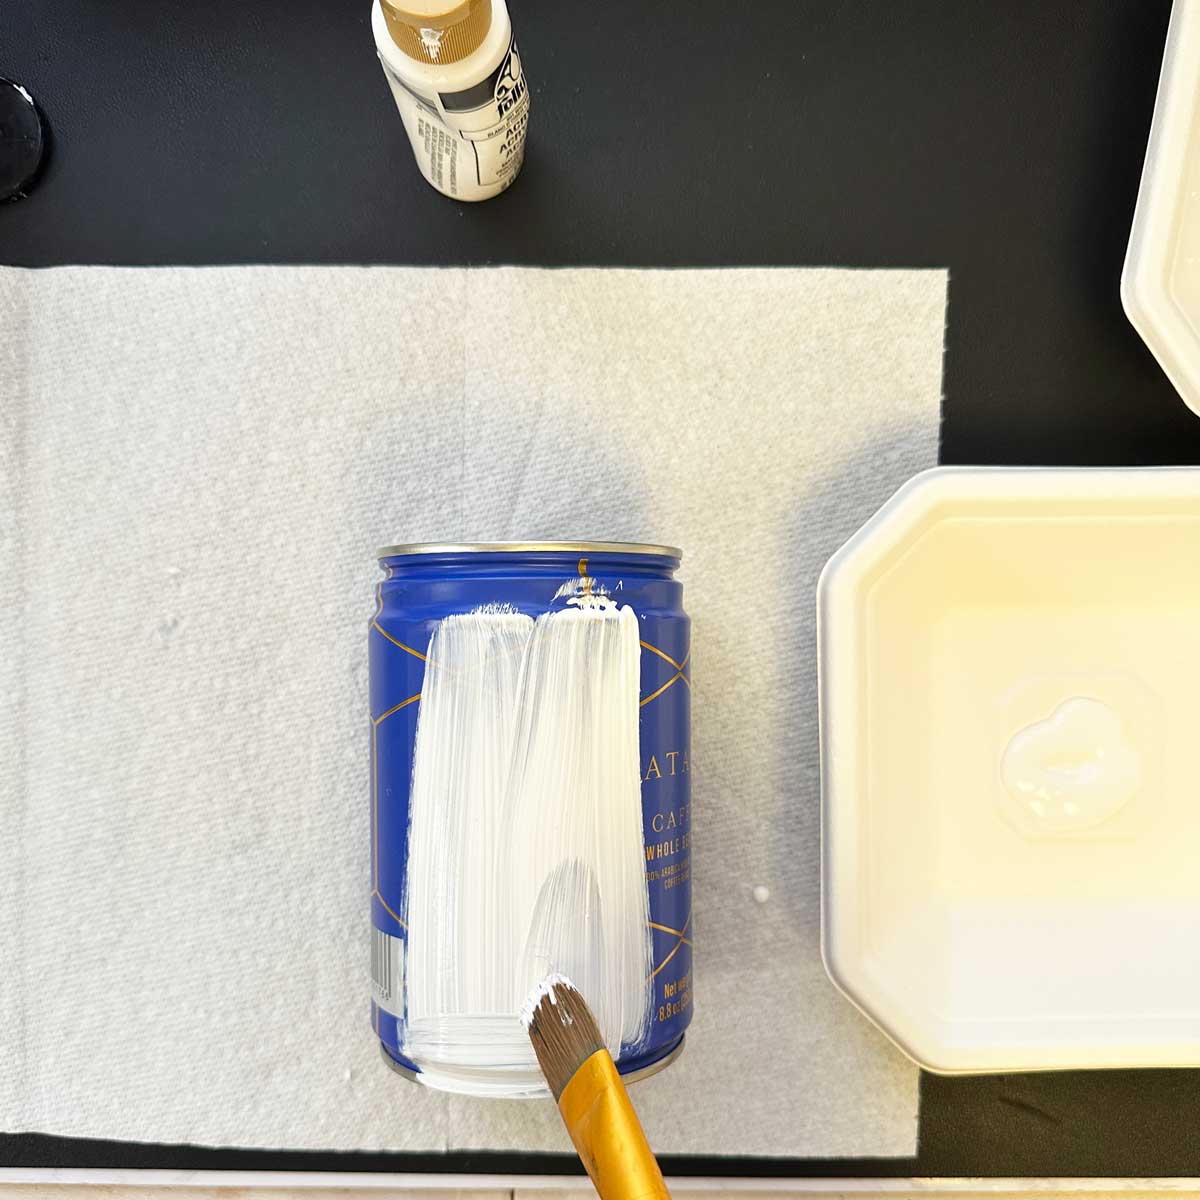
Be sure to make the design set in the right direction. Flowers should face up. - Paint the can with a white coat to cover its color.
Now, I painted the can white using a sponge brush (affiliate) to cover the coffee can color. Then, I painted the lid white as well. Add two layers of white paint then let dry completely.
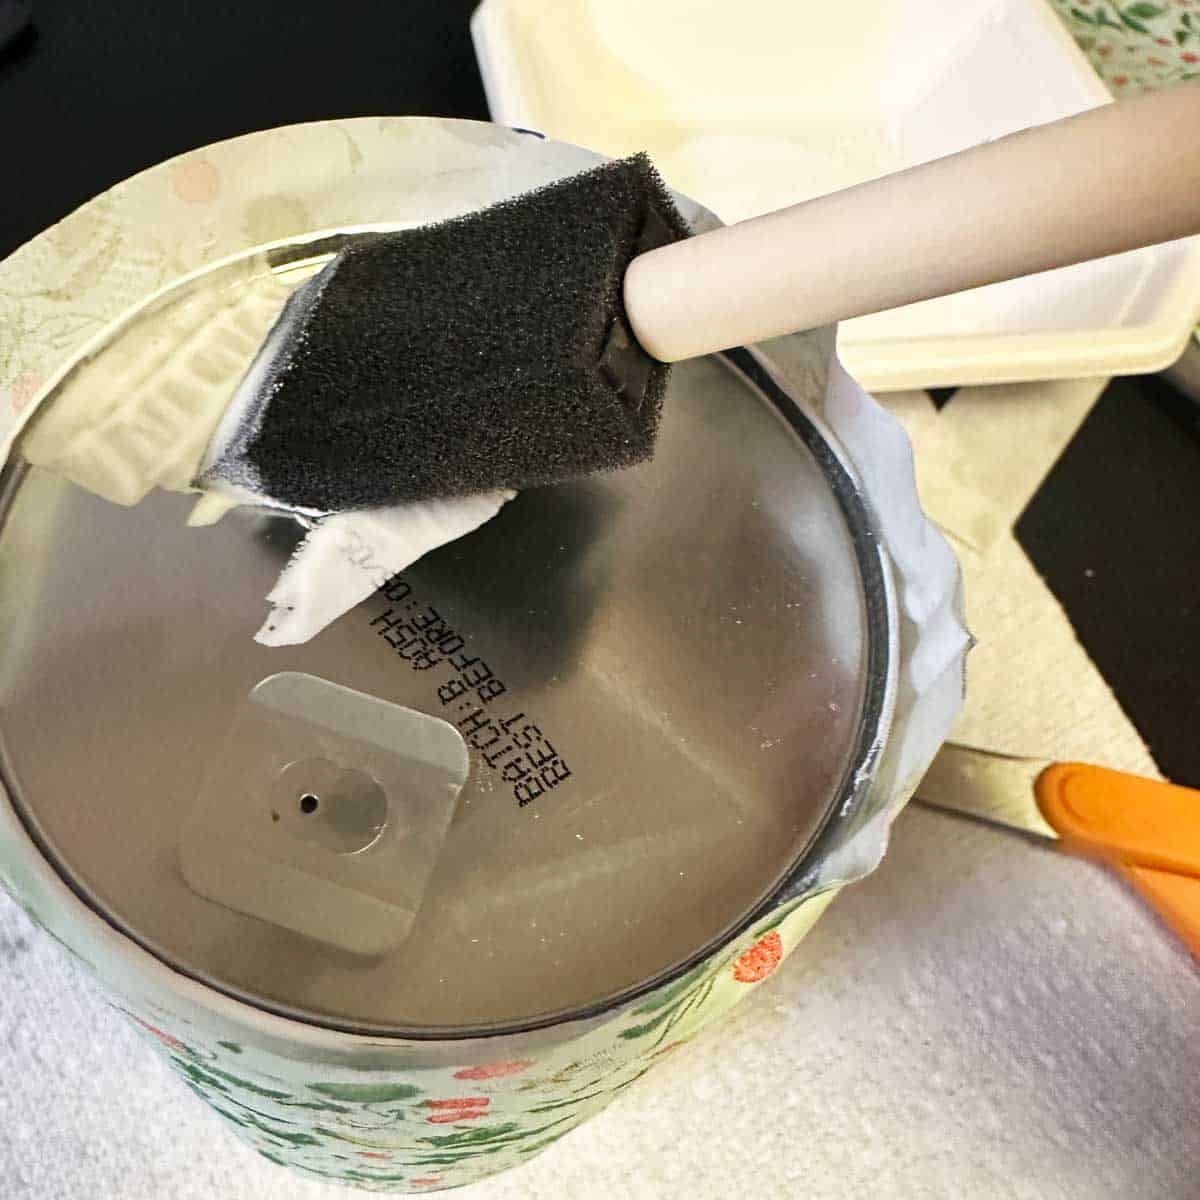
- Add Mod Podge (affiliate) with a sponge brush (affiliate), then adhere the cut decorative napkin (affiliate).
Next, using Mod Podge, I brushed on the glue and gently added it to the sides, having the excess lay over the bottom of the can.
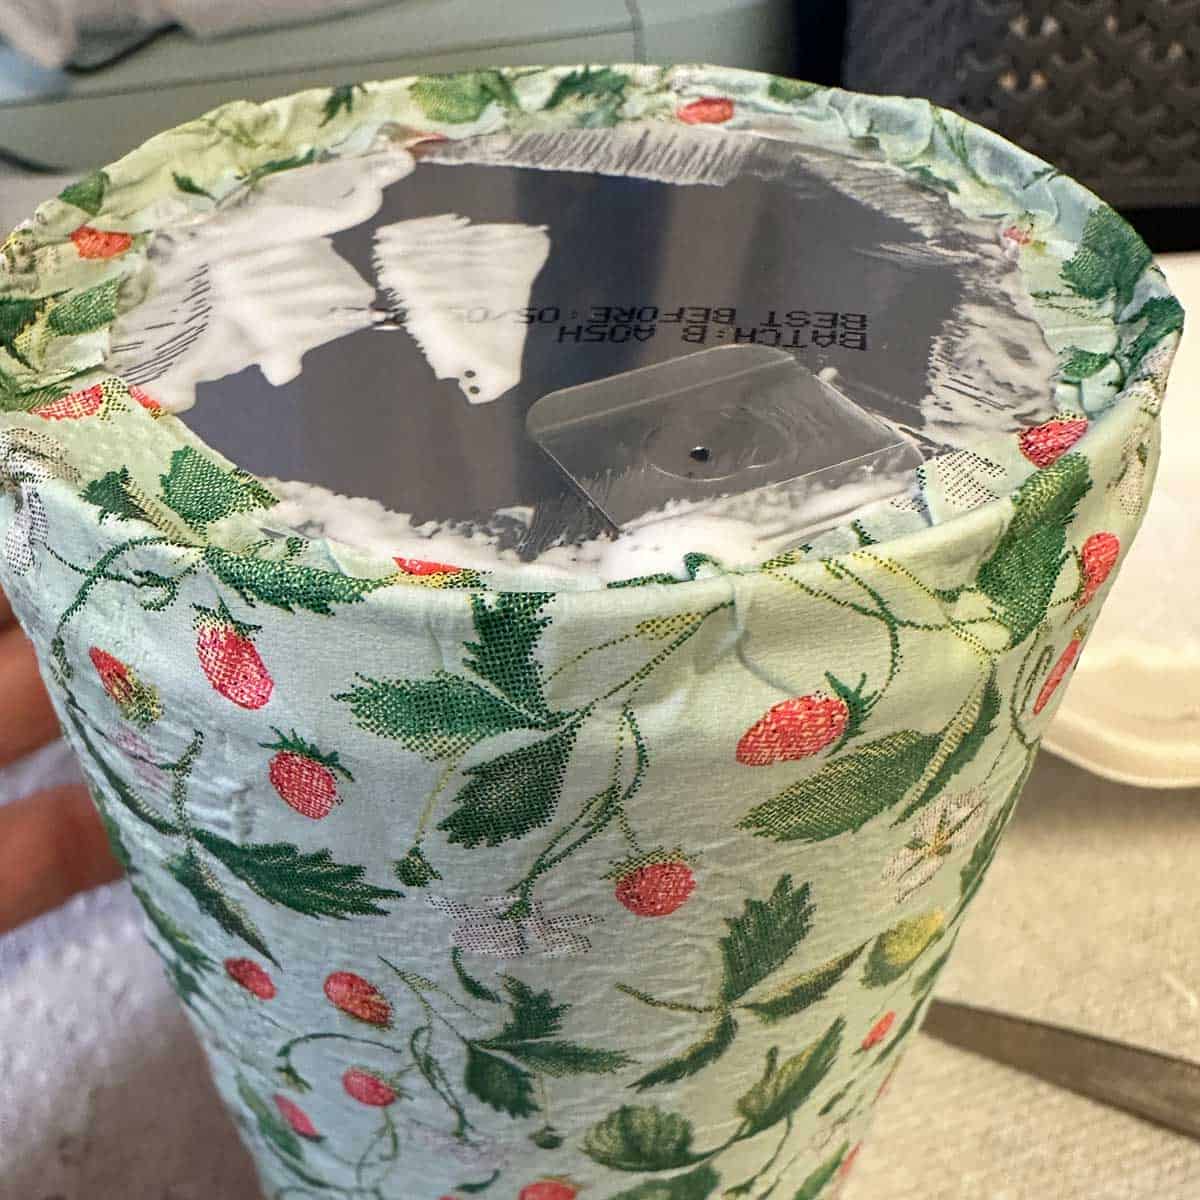
- Important tip for the bottom of the coffee can when adding the decorative napkin.
Then I added Mod Podge to the bottom and pressed the edges of the napkin onto it. Be sure to press it evenly so it makes a level surface so the can doesn't angle when it dries.
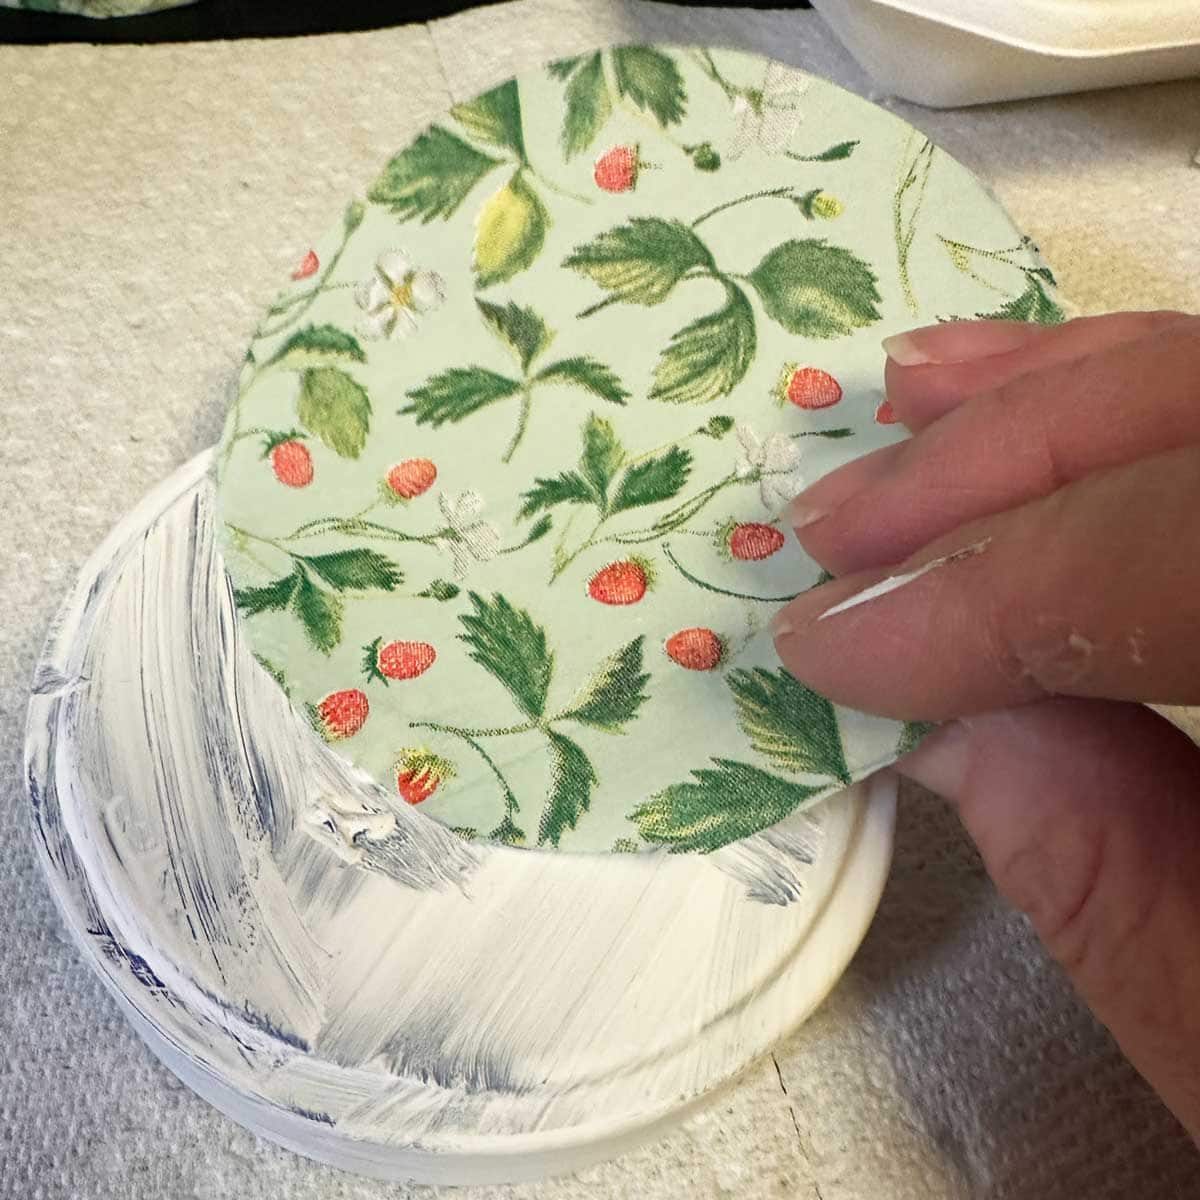
Optional: after the coffee can is dry, you can add another very thin layer to the top to seal the napkin. I did not do this since it will not be in a wet area. - Decorate the lid
To make the lid, I cut a circle for the top of the coffee can and Mod Podge-glued the tissue circle to it.
- Add the rope
Then I applied Gorilla Glue (affiliate) to the sides of the lid and wrapped a cream rope around them to finish. This finished off the side edges of the lid.

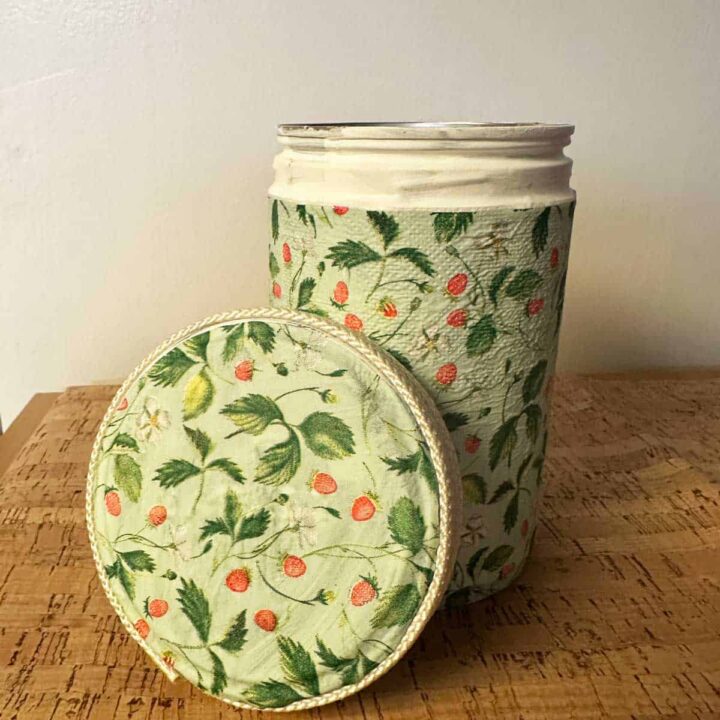
The Big Reveal
This updated coffee can with a lid, with Mod Podge and Tissue Paper/decorative napkin, looks amazing. Keep in mind that the decorative napkin has texture, so it may show through when it dries. I like the texture, though.
Feel free to visit my other tin can DIY Projects!

Frequently Asked Questions
Yes! You can use any coffee can you like, but the key is making sure the sides and lid are smooth. A smooth surface allows the decorative napkin or tissue paper to adhere evenly without bumps or wrinkles.
Both work well for this project, but a one-layer decorative napkin sheet is ideal because it's thin enough to adhere smoothly with Mod Podge while still being sturdy. Tissue paper can work too, just handle it gently since it tears easily when wet with glue.
Painting the can white first covers any existing printing, logos, or color on the can. Without this step, the original colors could show through the thin napkin or tissue paper and dull or distort your design.
Mod Podge is highly recommended for this project because it acts as both a glue and a sealant. It dries clear with a matte finish and helps protect the delicate tissue paper. Craft glues without a sealing property may not give you the same clean, finished result.
Making sure the edges lay flat and even on the bottom is essential so the can sits level. If the edges bunch up unevenly, the can will tilt or wobble, which affects both the look and the functionality of your finished organizer.
This is the fun part! Because the can comes with a lid, it's perfect for storing small items you want to keep dust-free, like cotton balls, craft supplies, rubber bands, paper clips, or even tea bags. The decorative finish makes it pretty enough to display on a countertop or desk. Visit my organizing small things post for ideas.
Absolutely. Just adjust your napkin or tissue paper measurements accordingly. Keep the same half-inch overlap at the bottom to ensure the paper lays flat and the can sits level.
Additional Q and A for this DIY project
With adult supervision, older kids can absolutely participate! Painting the can and pressing the napkin into place are great tasks for kids. Just make sure an adult handles the Gorilla Glue portion, as it bonds quickly and can be tricky to work with.
Yes! The steps are straightforward and the supplies are affordable and easy to find. The most important thing is patience - giving each coat of paint and Mod Podge enough time to dry will make a big difference in your final result.
Decorative napkins with floral or artistic designs can be found at craft stores like Michaels or Hobby Lobby, Marshalls, HomeGoods, TJMaxx, and other home goods stores, as well as specialty shops like Eataly, and online through Amazon (affiliate) or Etsy. Look for napkins with a single decorative layer for the best results.
I hope this diy project inspires you to take those artisan coffee cans and make them usable again for your next organizing project.
Check out our other DIY craft projects